Making a 130 Year Old Instant Camera

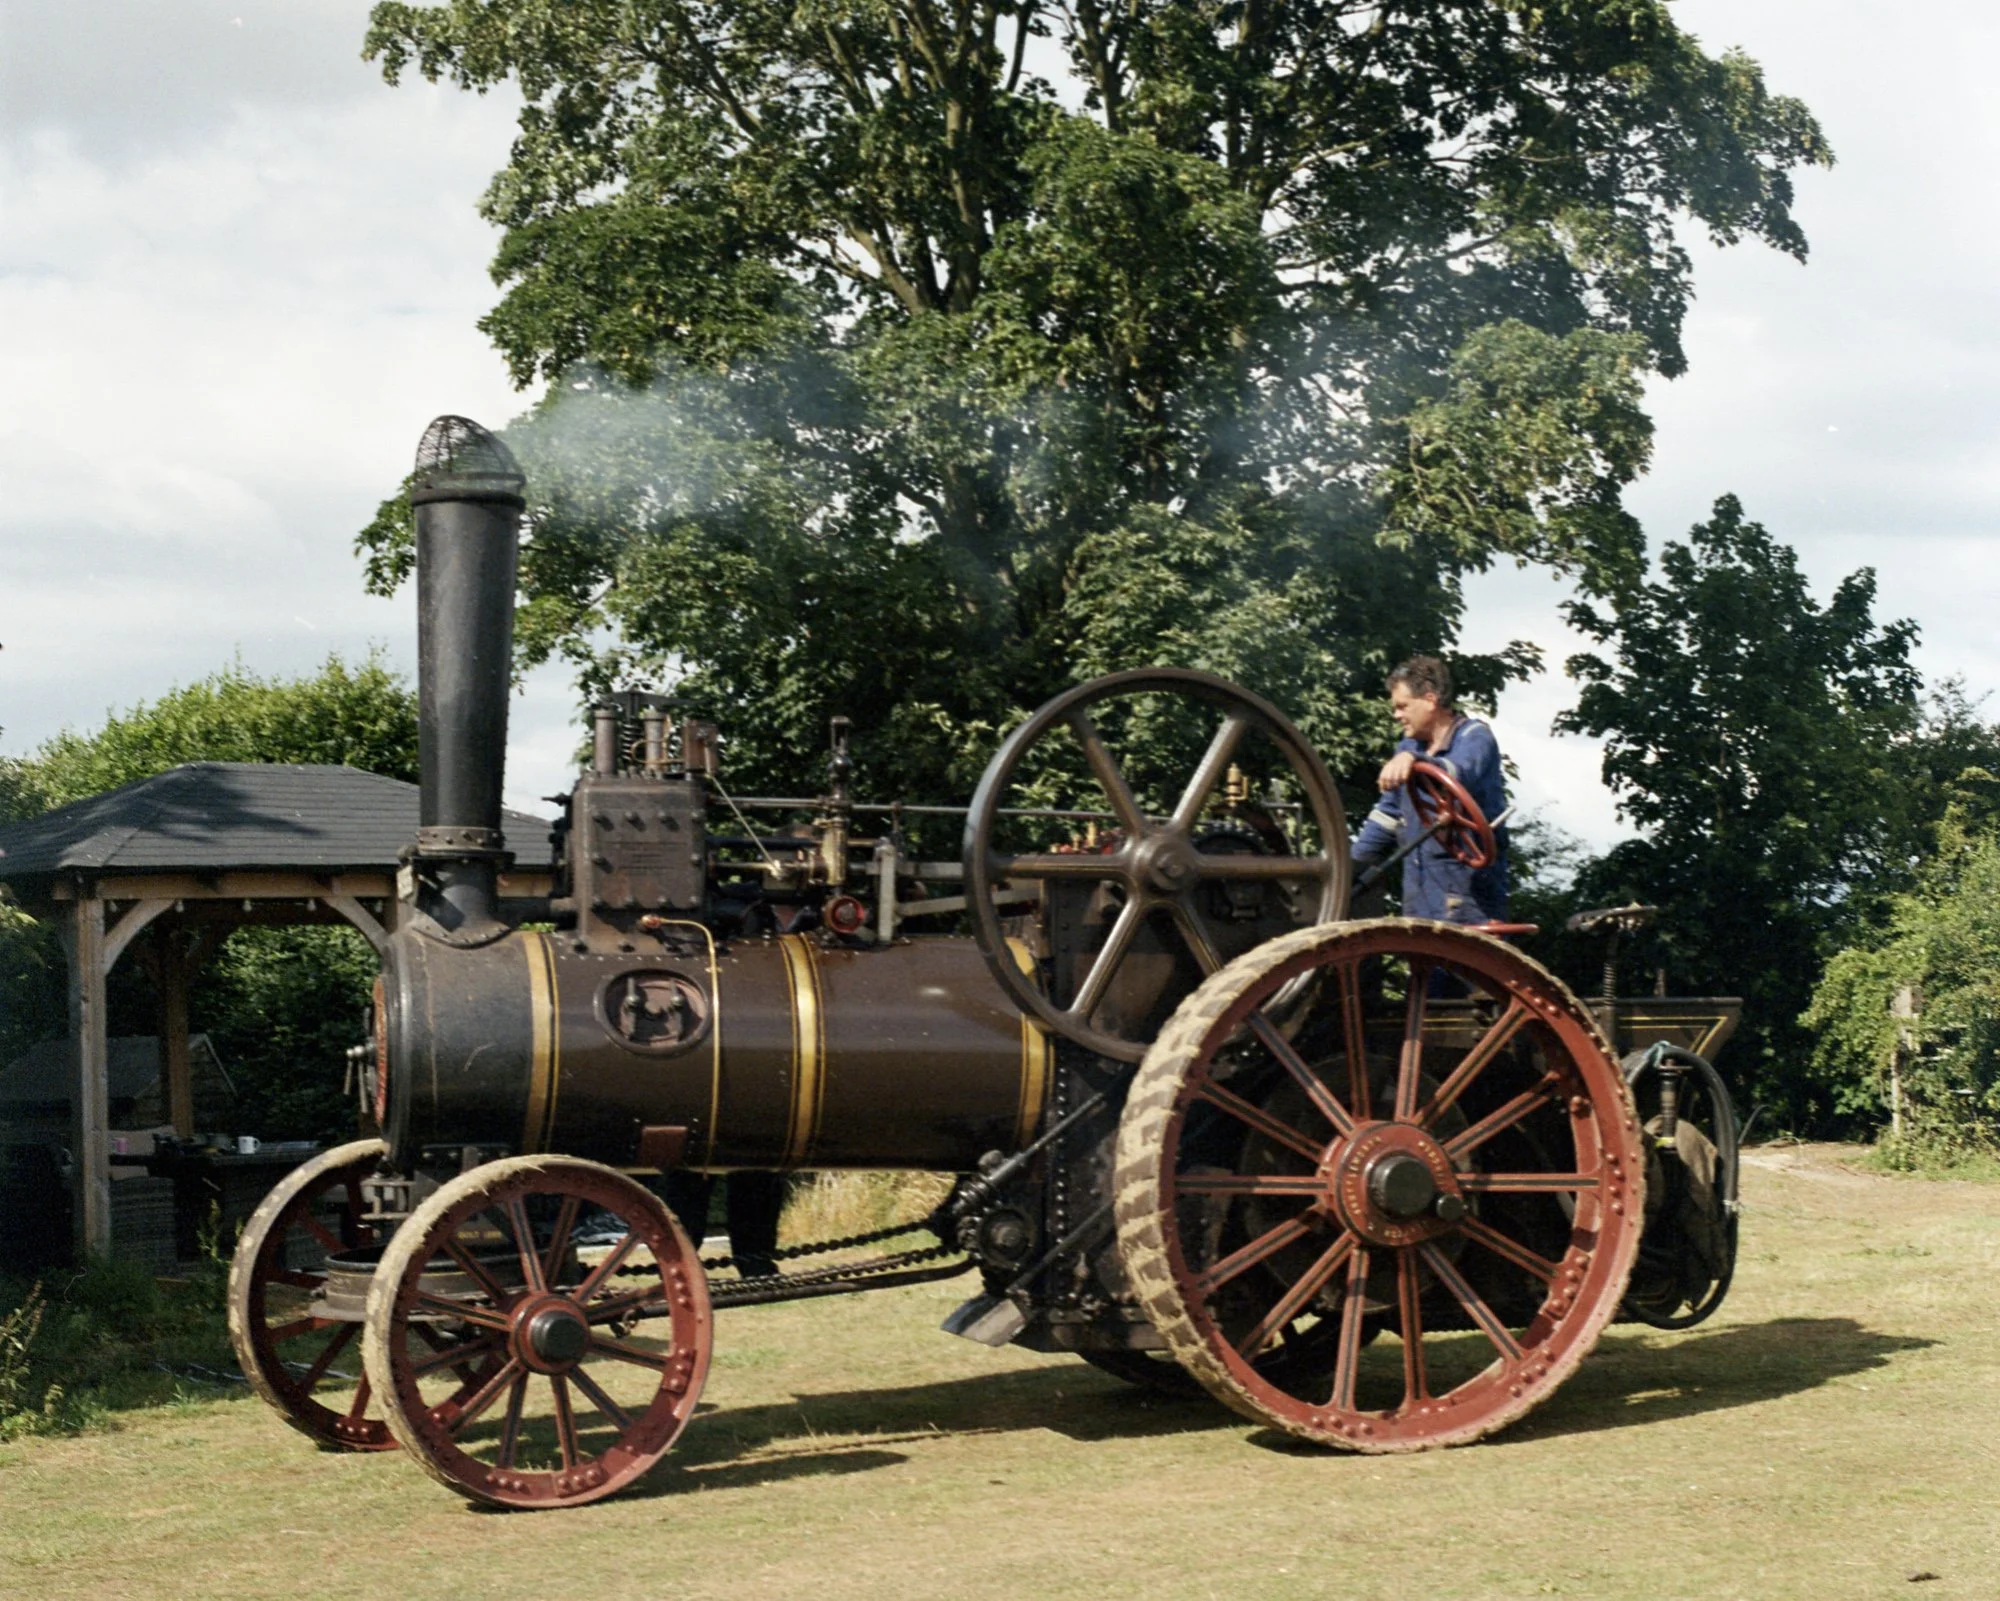
The Camera itself is a work of art

The camera above was a very impressive gadget back in the 1890s. I got it at a camera fair in Boston Spa. It’s a quarter plate camera which takes pictures on glass slides. These are mounted inside a film holder which clips onto the back of the camera. When it was time to take a picture you’d slide back a “dark slide” on the film holder which covers the film surface and fire the shutter. Then you’d slide the dark slide back over the film and try to remember not to expose it again. The film holder has a dark slide on each side, so each holder is good for two shots.

Back home in the dark you’d take the glass slide out of the camera, develop it to make a negative and then create contact prints by exposing photographic paper through the negative. Then you’d post the prints to your friends and head off the chemists to buy some more glass slides, chemicals and paper to repeat the process. Instagram in the time of Queen Victoria.

You can’t get the glass slides any more. But you can get Instax Wide instant film. It turns out that the instant film is around 2 mm deeper than the glass plates and won’t fit in the holders I got with the camera, which is rather annoying. So I thought I’d make my own film holders which are large enough to allow me to use instant film with the camera.

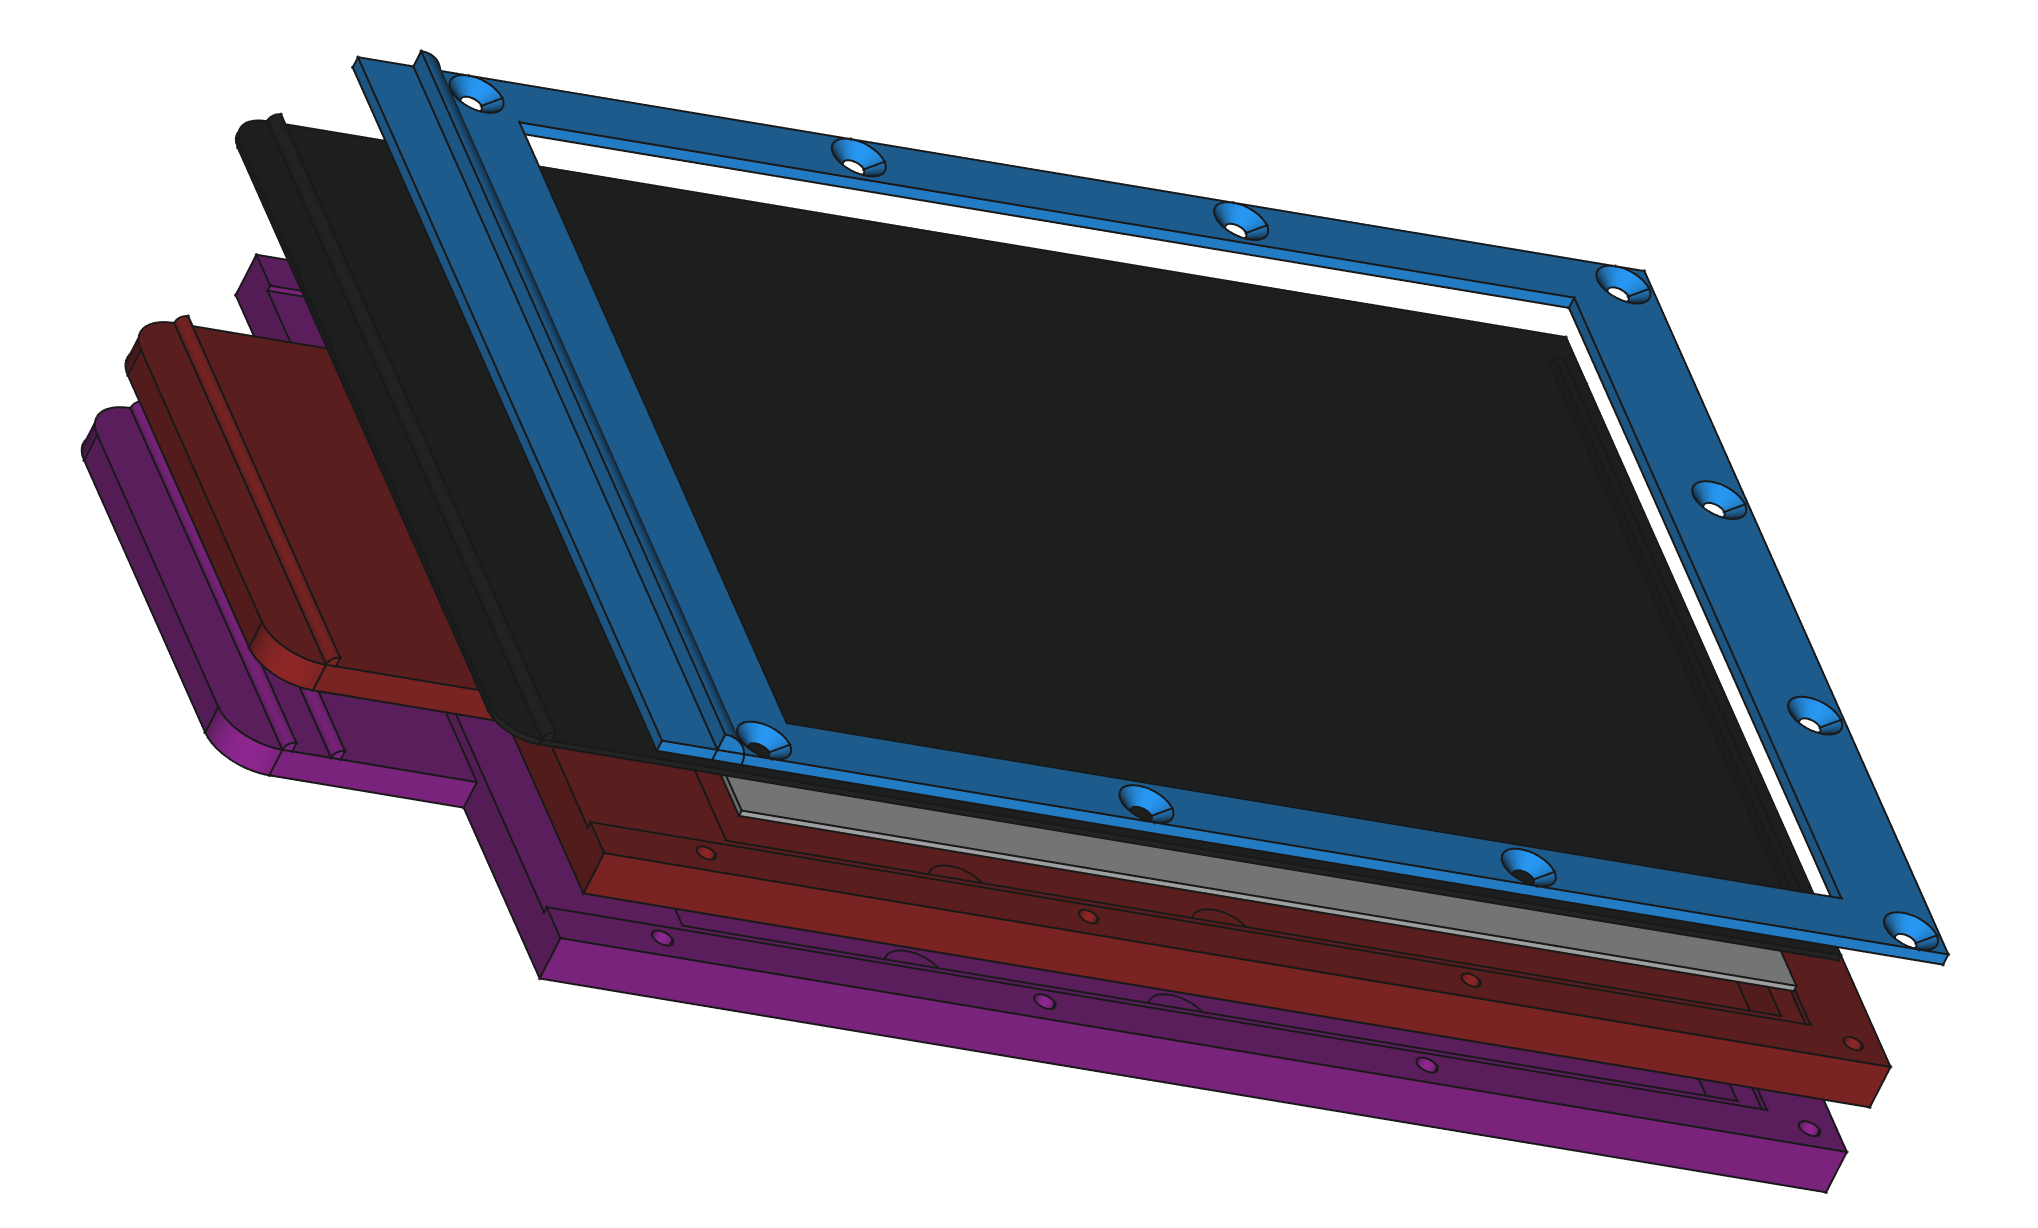
This was the design I came up with. The dark slide (the black thing in the picture above) fits behind the blue outer frame. Then we have the Instax film (you can just see the grey edge of the film sheet) which fits inside top of half of the frame (the red bit). The purple bit at the bottom is the other half of the frame. That will have another outer frame bolted to it and hold a second dark slide. All the parts are bolted together. I have to use this rather complex design because 3D printers can’t really print the kind of overhangs that you’d need to print both sides at the same time.

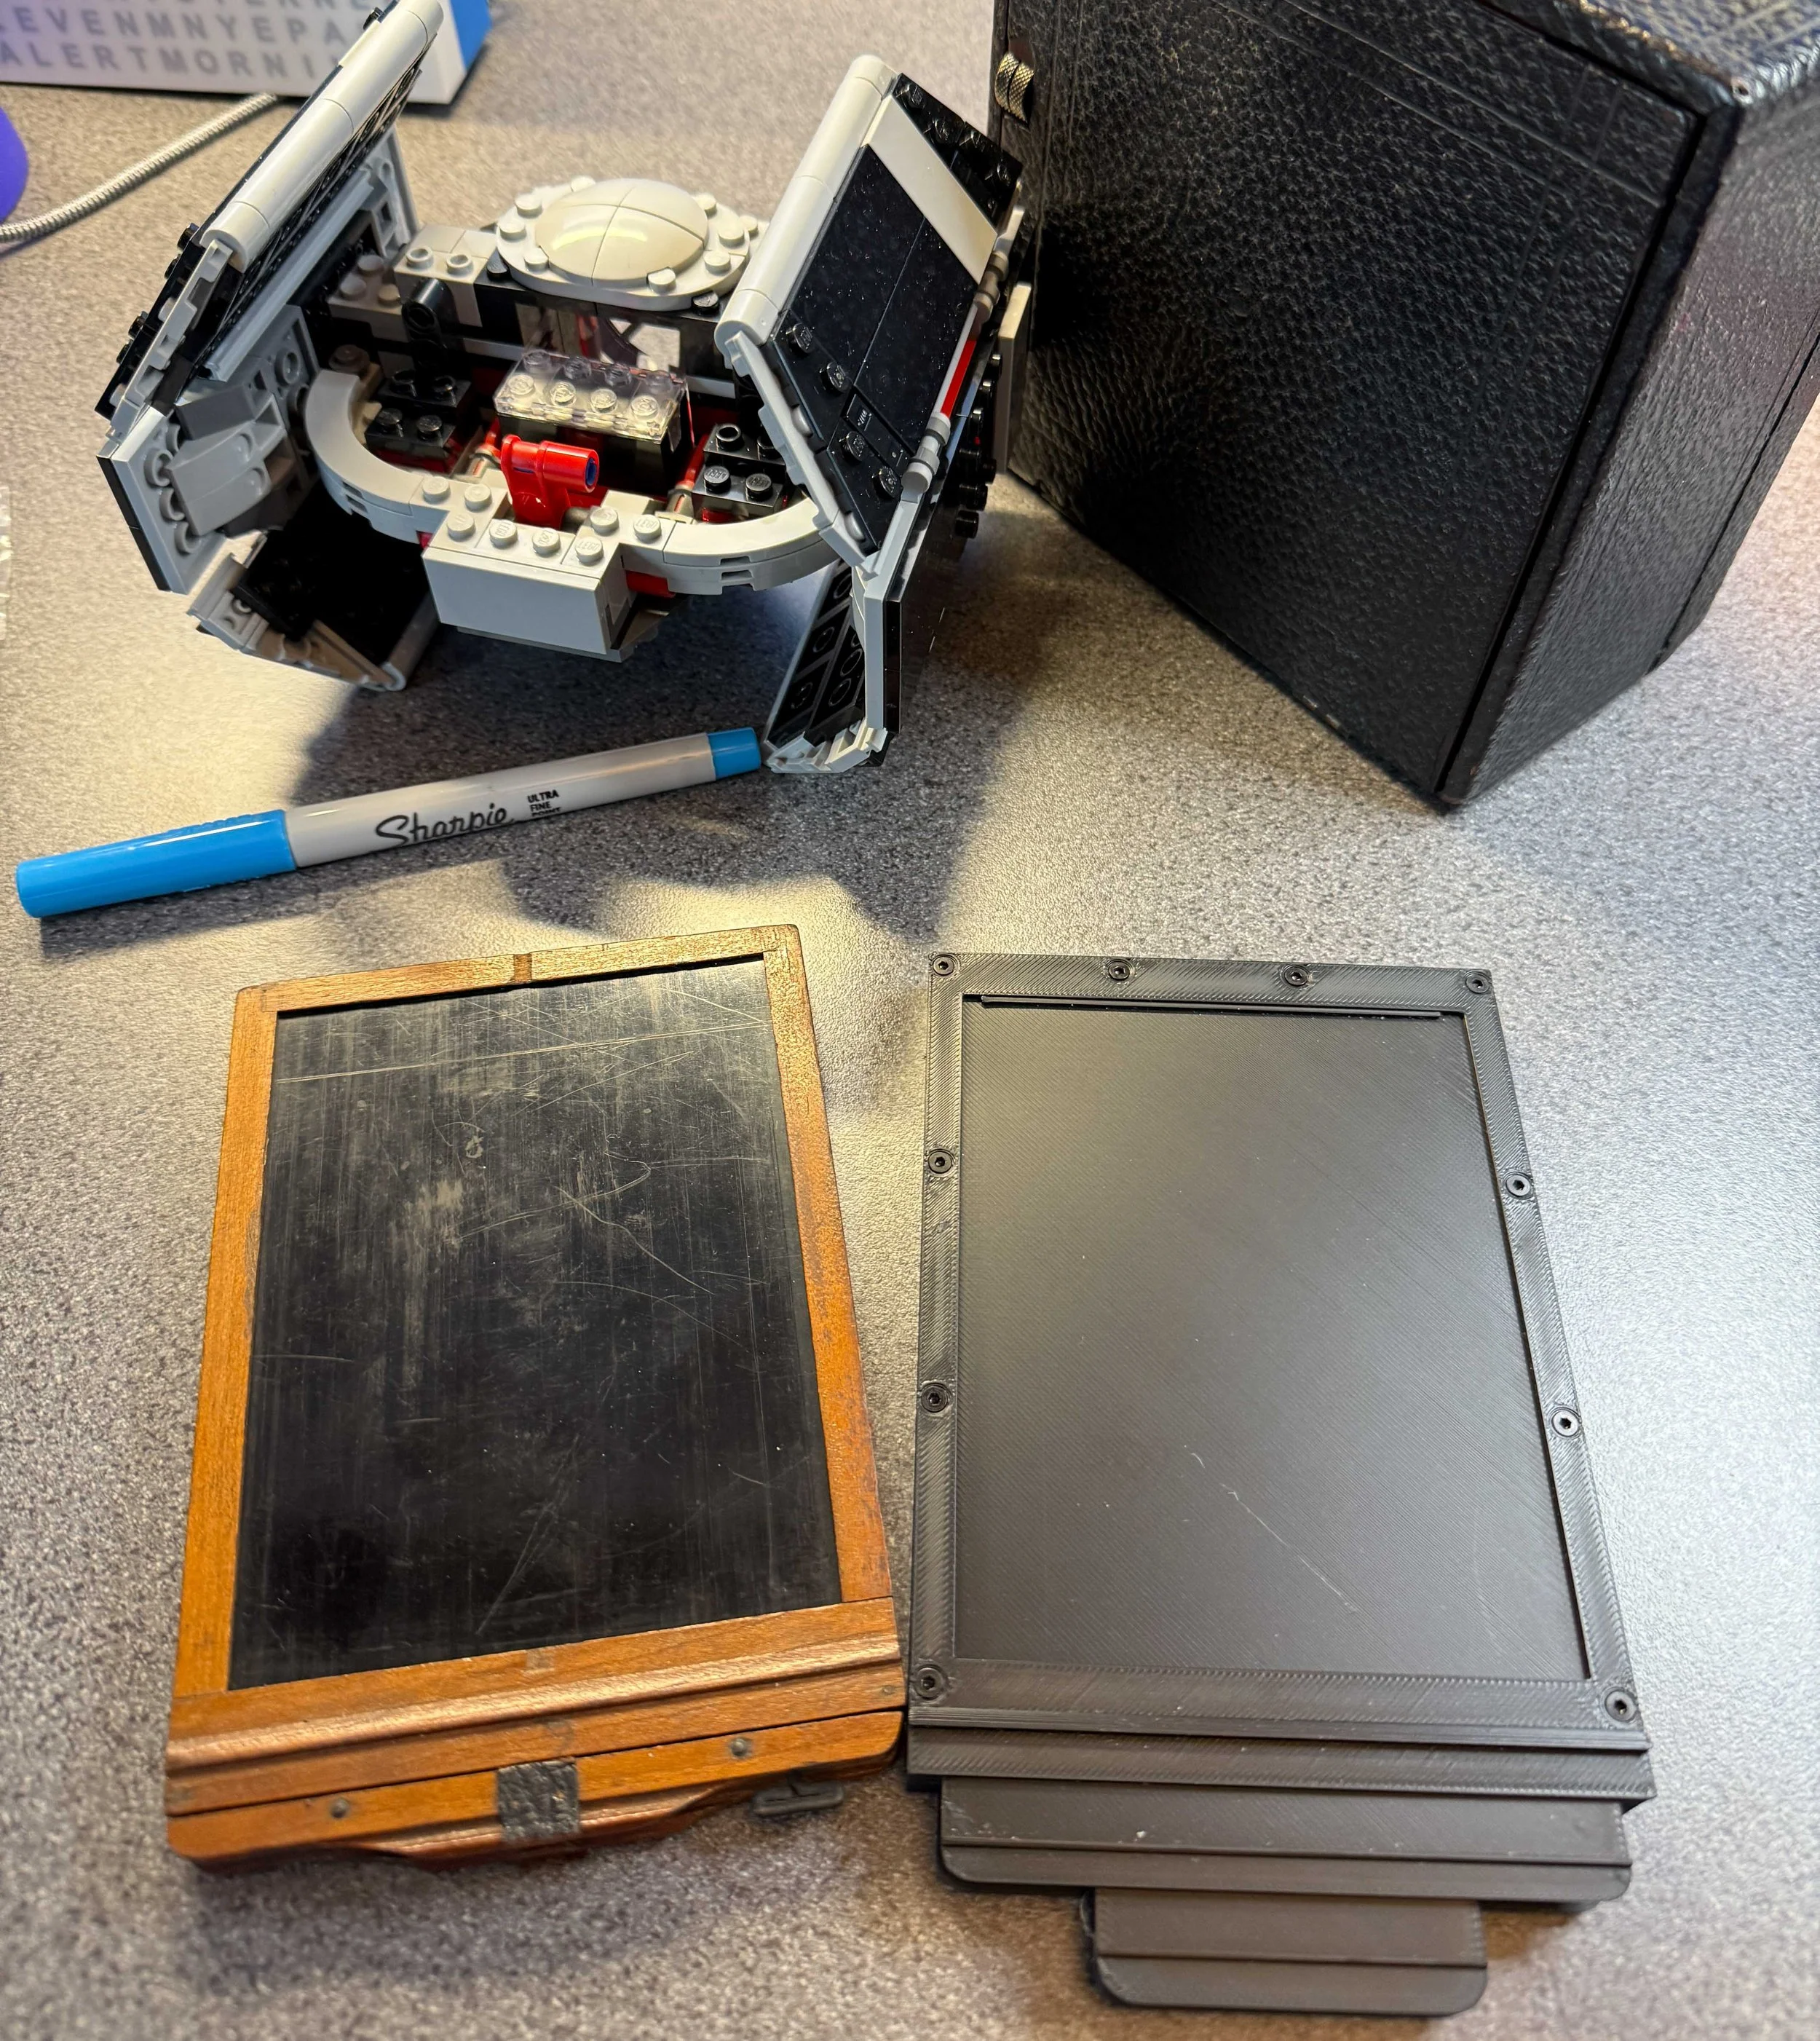
Pen and Tie Fighter for scale

At the back right is the camera folded up in its little box. On the left at the front is an original wooden film holder. On the right is my 3D printed version. It turns out to be light tight enough to be used successfully. I wouldn’t leave it out in the sun, but as long as you keep it in the shade it works fine. I load it up with Instax film, pop it in the camera, slide open the dark slide, take the the picture, put the film back into an Instax film holder and then run it through an instant camera to process it. It sounds a bit complicated, but it is easy enough. If I make a few more of the holders I can load them all up and then go out and take a bunch of pictures.

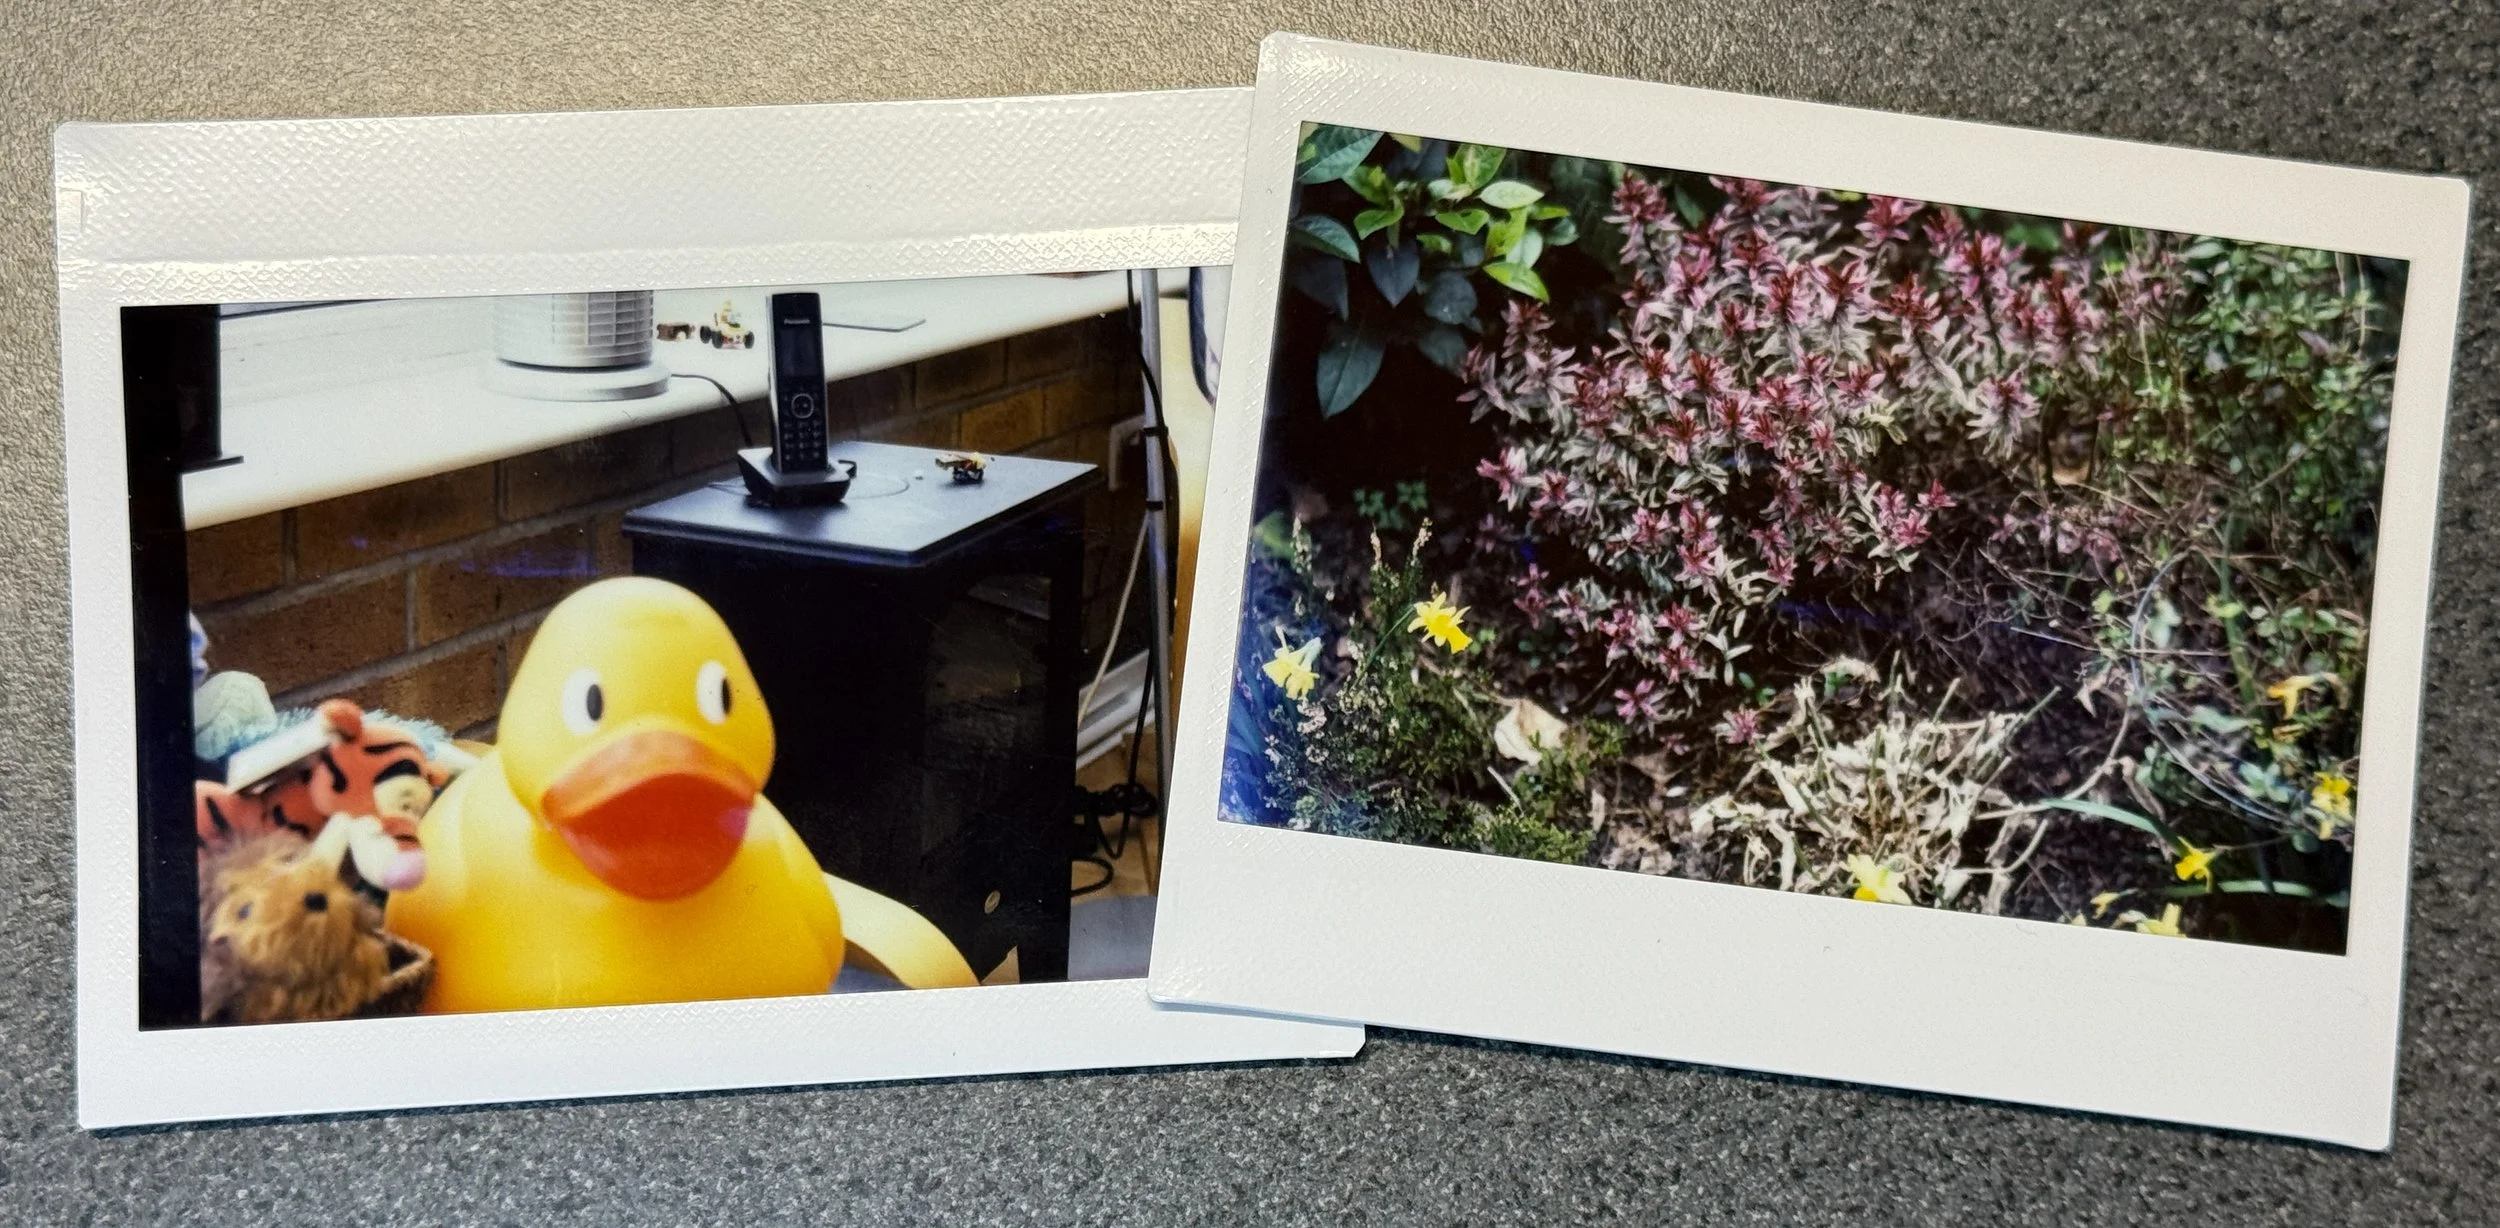
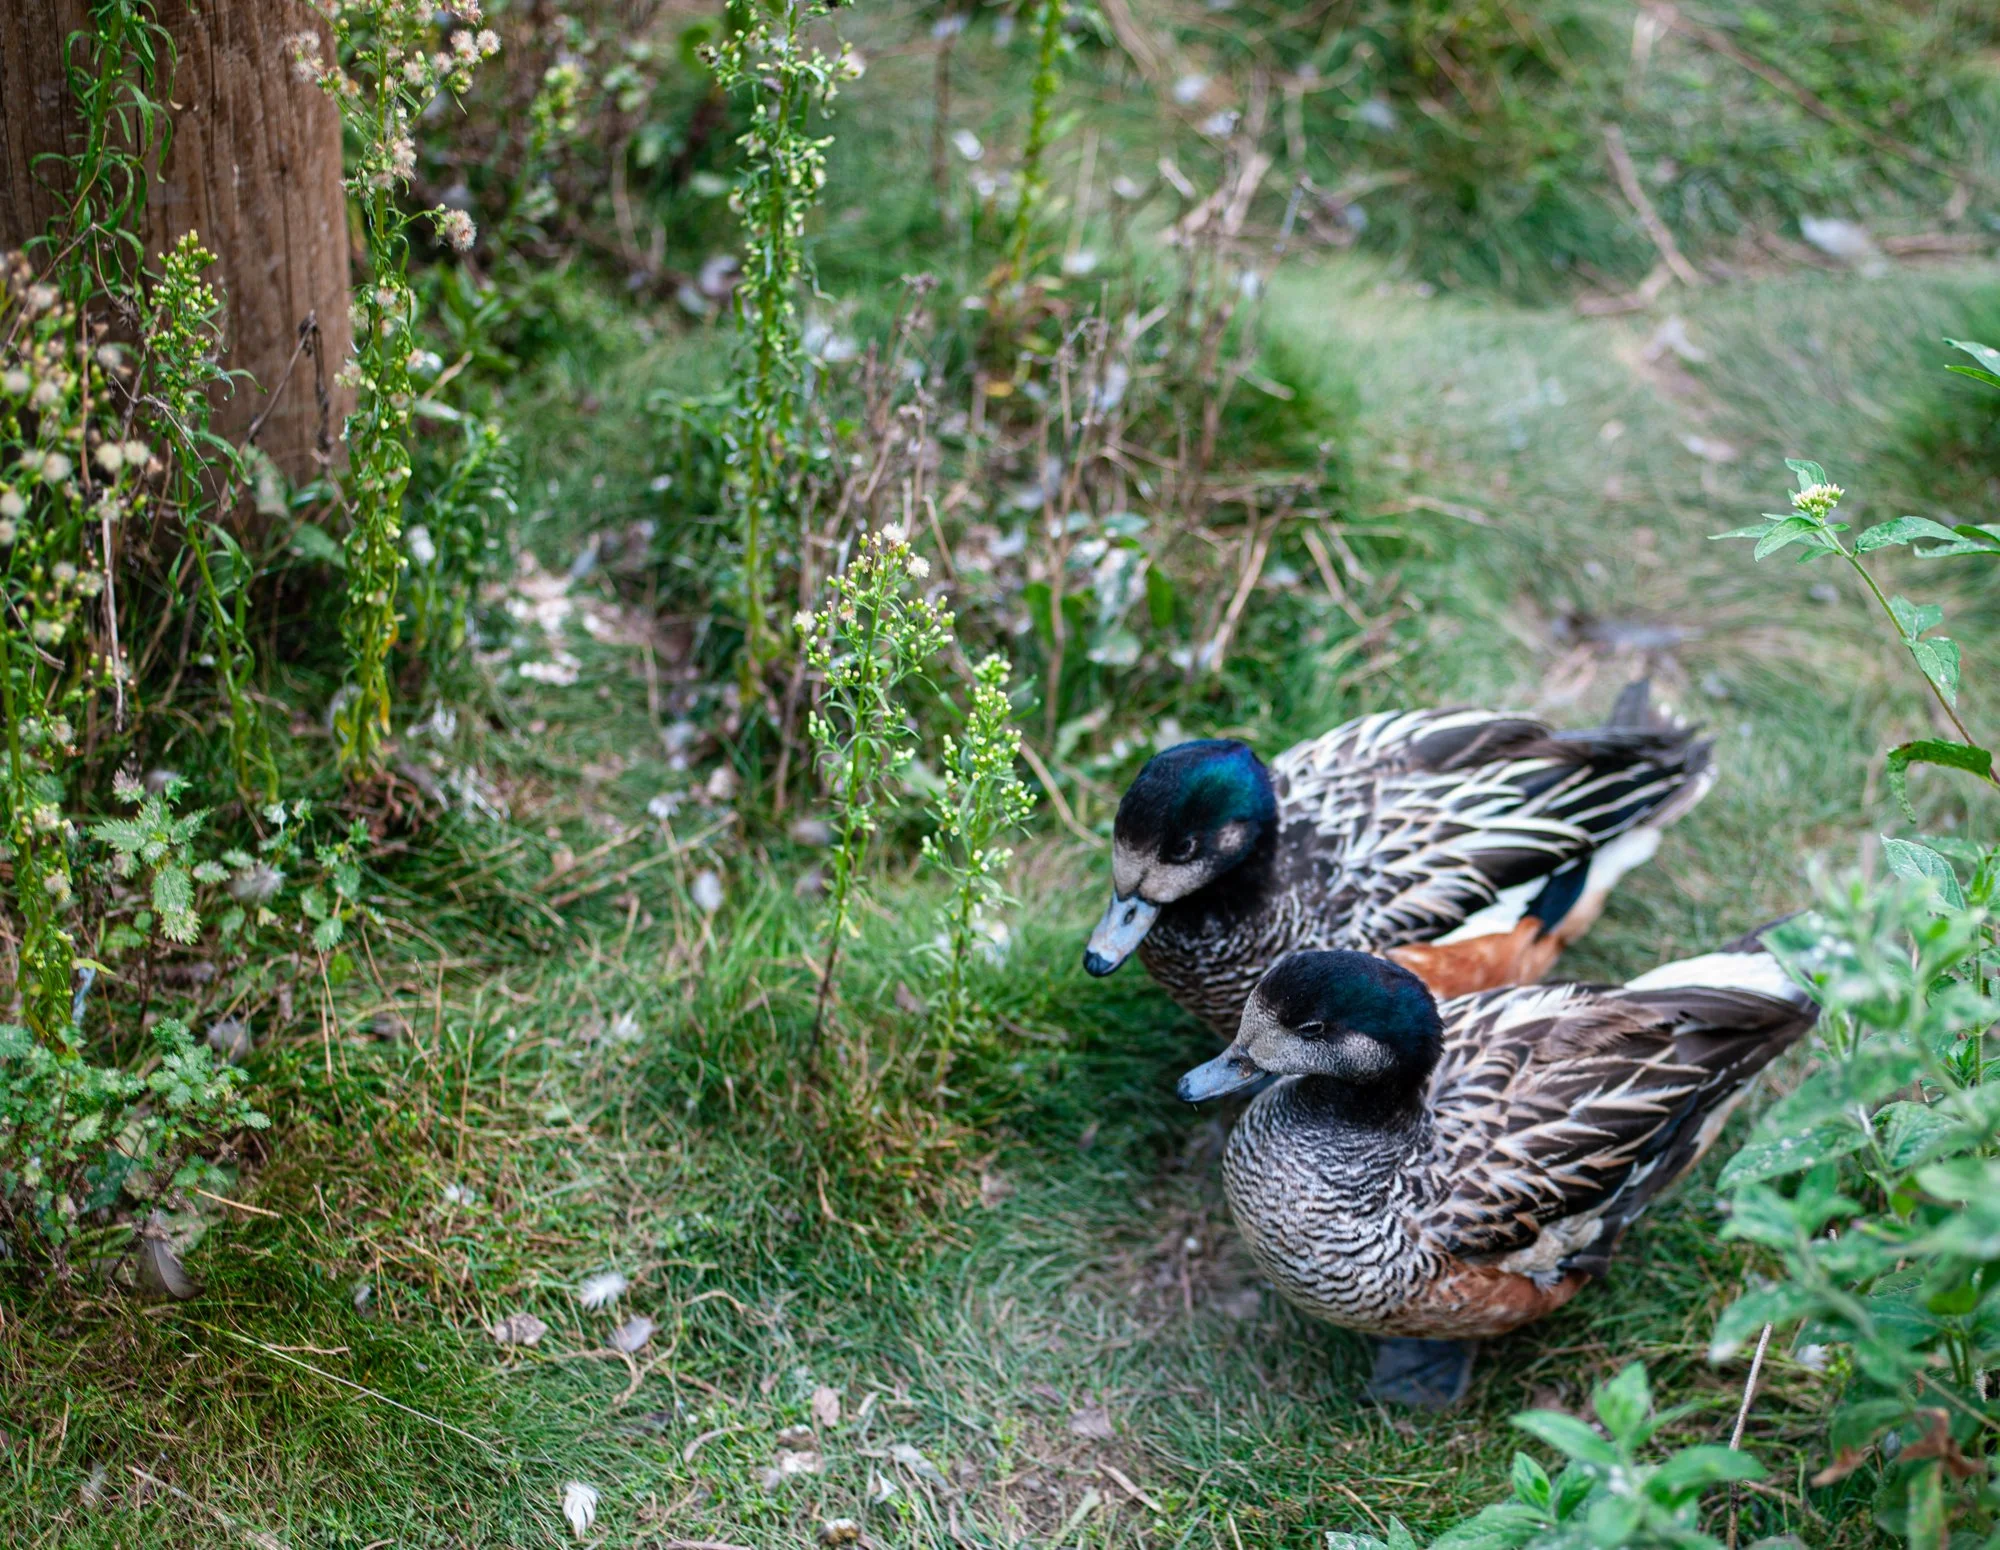
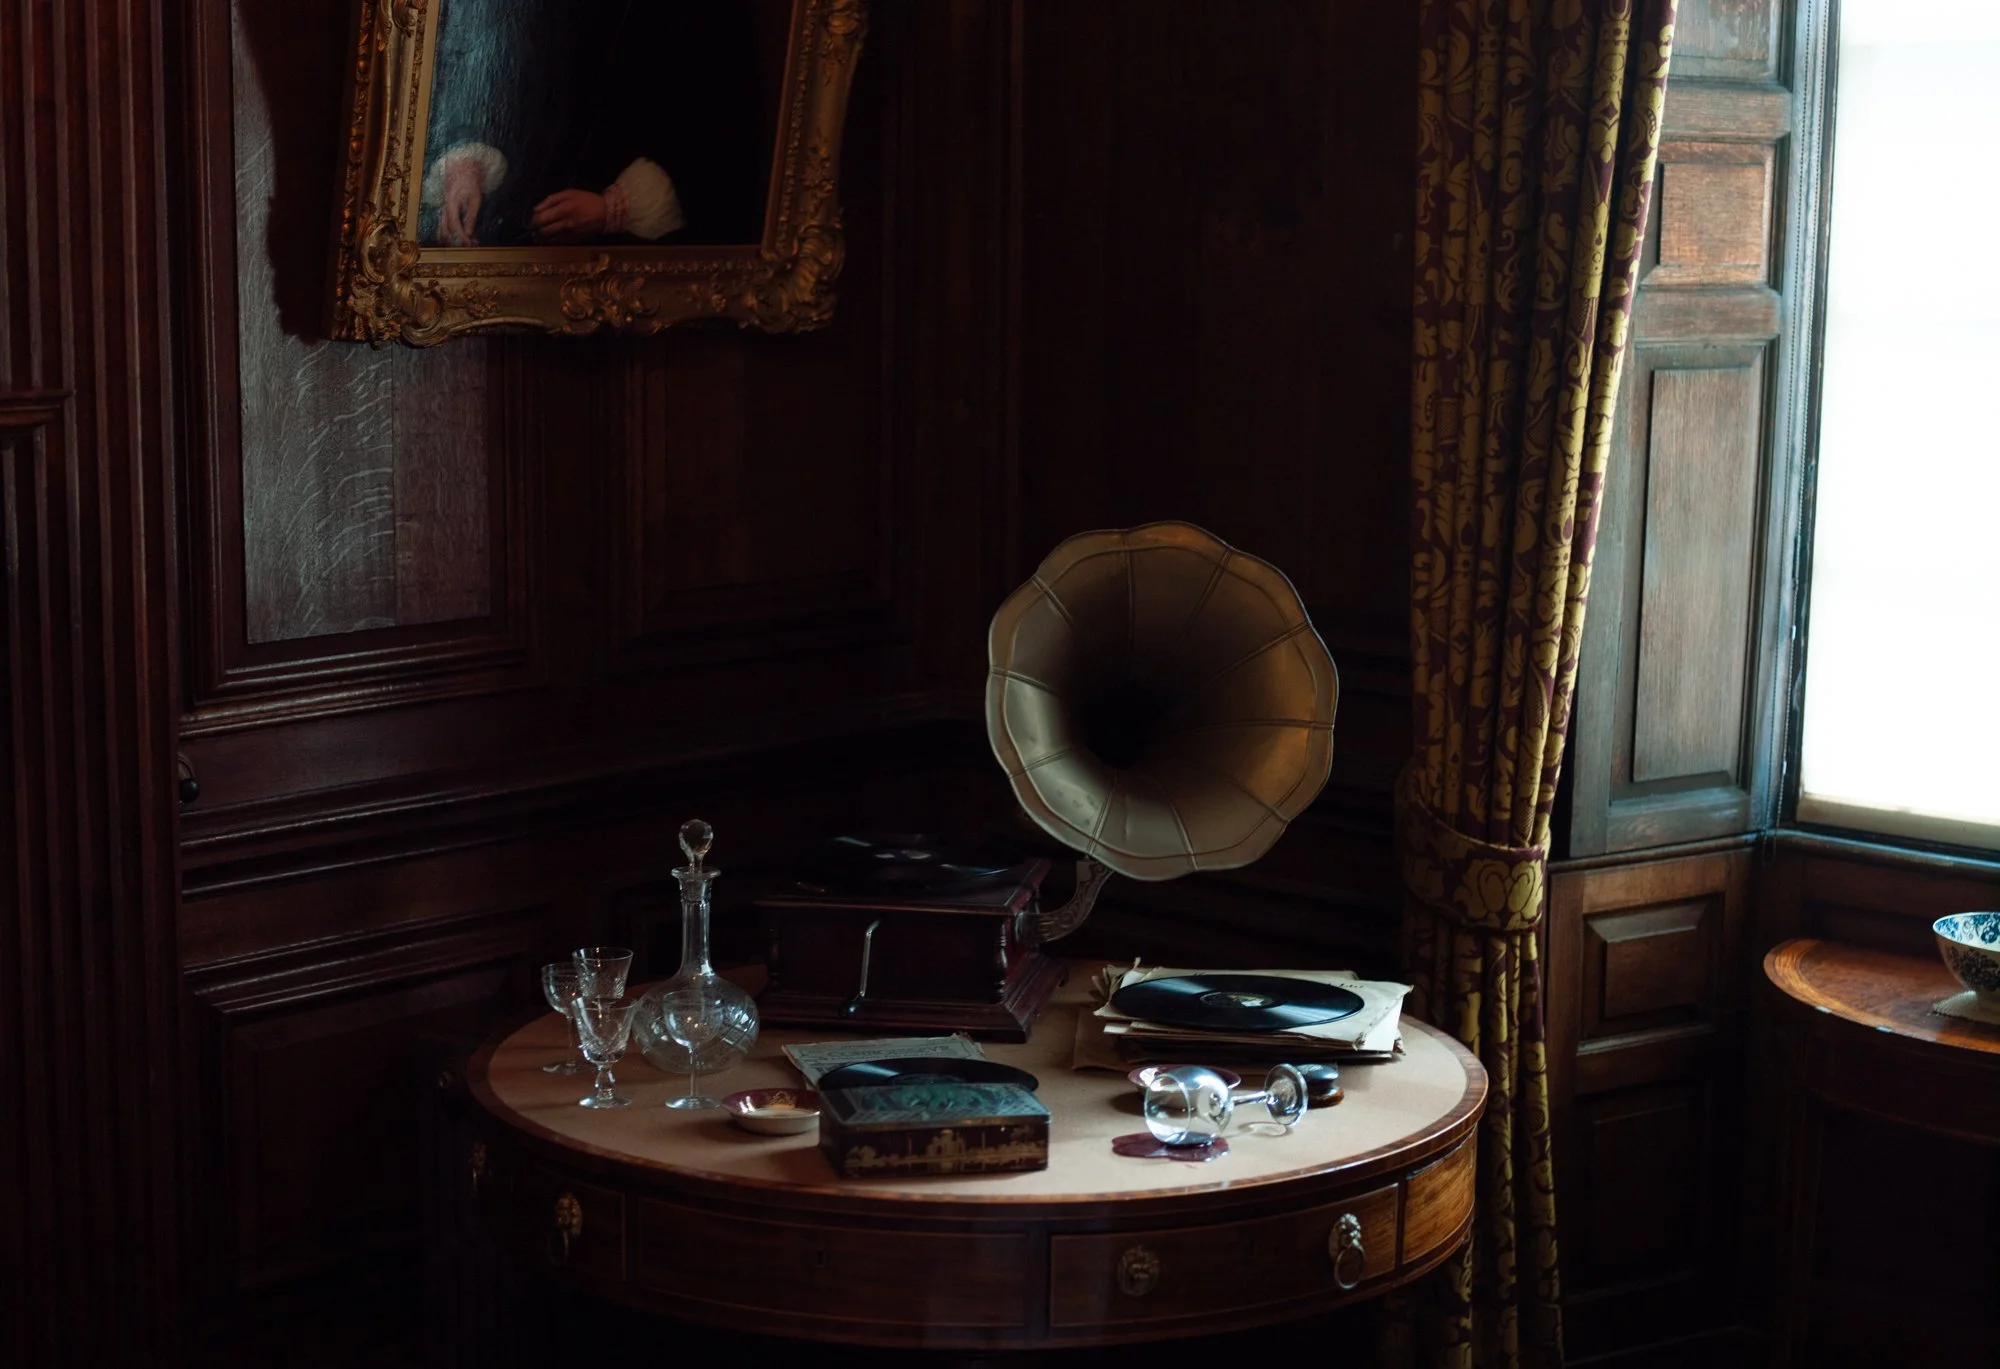
On the left is the first ever picture I took with the camera and my film holder. The duck is a bit blurred, but the stuff further back is tack sharp. The picture on the right is not particularly interesting, but it is lovely and sharp with plenty of detail. There’s a light leak down the left because I pulled the dark slide all the way out and a bit of light got in. The finished version has a stop which prevents the dark slide from being pulled all the way out, so that shouldn’t happen again.

I’m going to take the camera to the next hardware meetup and try and take some portraits with it. The film holder designs will be available on GitHub for anyone who has a camera like this and fancies using it as an instant camera.

Pro Camera Tip

Here’s a Pro Camera tip which makes you look a bit less like an amateur. At least, I hope it works for me. When you’ve finished taking some pictures, put all the settings on your camera back to “normal” values. This means that next time you use the camera you won’t end up taking a whole bunch of pictures that are massively underexposed because last time you used the camera you turned down exposure compensation down a bunch. Don’t ask me how I know this..

Film Camera Zen

I bought a few books at the Photography Show yesterday. Well, they were 20% off. Mathematically that’s like getting the fifth one free.

Anyhoo, one of the books was Film Camera Zen. It’s a bunch of pictures of really nice cameras along with nice descriptions of why the cameras are so nice. It’s giving me lots of ideas for new things to take a look at - as if I need help.

Miniportrait pictures

The picture above was taken with the new (to me) Polaroid Microportrait camera that I got yesterday. I had to put the camera and my Lomo Graflok Instax film back in a dark bag, extract a sheet of film from the film back and load it into the camera, take the camera out of the bag, take the shot, put the camera back in the dark bag, take the sheet of film out of the camera, put it back in the film back, take the film back out of the dark bag and eject the film to process it. Not something I’ll be doing again in a hurry.

Instax film is smaller than the original pack film so the images don’t fill the frame properly. I had to guess the exposure a bit because I wasn’t sure how powerful the flash was and I’m not convinced I set the focus properly. The results show potential though. I’ll try a few more later.

The camera is extremely restricted in terms of what you can do with it. The lens is fixed focus, for portraits of people. You can adjust the aperture, but there are only two shutter speeds available. Having said that, it does take the pictures very well and is super fun to use.

I’ve discovered that you can still get packs of film for it, but they stopped making new film over twenty years ago and what is left (which might not work) is selling for at least ten pounds a shot. You do get four pictures per shot though. Perhaps when I’m rich…

What I plan to do next is make a back that will let me use sheet film with camera. A sheet of 4x5 film will cover the entire image with room to spare. Then I will be able to take super high quality portraits.

Polaroid Miniportrait - four pictures in one

Got given this today. Well, it was free with another camera I bought. But what a beauty! It’s a Polaroid MinPortrait which was made for taking passport pictures and the like. You can set it to take four shots at the same time, giving four identical pictures, or you can take individual or dual images. It has ultrasonic focusing, a beefy flash (that works) and it is all round awesome. Only snag is that you can’t get the film for it anymore. But I’ve got plans involving Instax Wide instant film. Great fun.

Developing Nicely

Always fancied one of these cars, but I don’t think I’d fit into it

We spent some time yesterday developing colour film. This went surprisingly well and I really like the results. We used these chemicals which make colour development as easy as black and white. We did the first batch of prints at the end of November. It’s nice to know that the chemicals keep for a reasonable time.

Slow Flash Sync on Christmas Eve

I’ve spotted at least two chocolate decorations..

Apparently “slow flash sync” is all the rage this year. You take a long exposure giving time for the lights in your picture to show up in the image and maybe wave the camera around a bit. Then, at the end of that you take a flash photograph, which lights up everything else in the picture and freezes it. Qute fun.

Schrodinger's Revenge

Yesterday I was waiting for a battery to arrive so that I could discover whether I had a working camera (yay!) or a broken one (boo!). Of course, just because there are two outcomes doesn’t make them both equally likely, so I should have been prepared for brokenness. Which is what I got. Wah. So it was off with the top and…

It’s probably one of these wires…

A bit of experimentation with a multi-meter left me thinking that no power was getting to the system.

…or more likely this one.

One problem with old cameras is that chemicals leak out of the battery and corrode connections, which is what has happened here. So all I have to do is find the battery terminal and solder this wire back on. Or, replace the wire completely - which is what I ended up doing. So now, with the battery check light showing a happy green, I’d fixed the camera, right?

Wrong. The metering was all broken and the shutter didn’t open and close how it should. Turns out that my camera has succumbed to “The Pad of Death”. This is a thing with Yashica Electro 35 cameras. The shutter mechanism uses a tiny foam pad to transfer movement from one lever to another. But, plastic foam being what it is, after a while it turns to dust. No pad, no movement, broken camera.

There should be a foam pad where that pink yuccky stuff is

I had great fun fixing this. If by “great fun” you mean “nearly went insane rolling up small pads of tape and then trying to fit them into the slot between the two parts”. If it breaks again the camera will end up being a “display piece”. Or going on eBay as “sold for parts”.

Newly fitted pad. I hope the glue holds…

Anyhoo, I prevailed and now the meter is doing an impression of something that might be working. I’ll to some proper testing tomorrow, for now I’m happy that I get longer clicks with darker subjects. To be honest (why on earth to people say that - it’s like saying “I was thinking of telling you a lie, but I’ve changed my mind”) I don’t mind if the camera is not quite right yet. I’ve quite enjoyed fiddling with it - pad of death not withstanding - and I’ve gained a lot of respect for the people who designed and made this marvel of mechanics and early solid state electronics. I’m sure they didn’t expect folks to still be trying to use them 50 years after manufacture. It’s a tribute to them that they still mostly work.

Colour Film Processing Fun

If you are wondering what is special about the picture above, its that I actually developed it myself. I’ve done a lot of black and white processing but I’ve always avoided colour because it just sounds too scary. But now you can get chemicals which only need two baths. This makes working with colour very like working with black and white, where you usually need dip the film in developer and fixer.

The only other problem with colour processing is that you need to keep the chemicals at a specific temperature; in our case 35 degrees centigrade. We did this by using a new fangled cooking tool called a “sous vide” which heats and circulates water around a bath we made from a plastic box. All we had to do was drop the bottles of developer and “blix” (bleach and fixer) into the bath and leave them there for a while, and then keep the developing tank in the bath while the film was being processed.

The whole thing went very well; once we’d mixed up the chemicals which took a little while. In all we developed four films. The chemicals should be good for another 8, and we might be able to develop even more if we increase the development time still further. I can’t really tell the difference between our negatives and ones from “proper” film processing places. By doing four films we’ve kind of broken even on the cost of the chemicals against sending the fillm away, the next few should see us moving into proper savings. Great fun. Just remember to wear gloves and work in a well-ventilated area.

Light Leaks?

This one looks OK

I think I have a light leak. Either that, or something weird is happening with the film developing process.

At first I thought this was cloud, but it isn’t

This one has weirdness down the right hand side.

It’s here too

I don’t think it is problems developing because that would lead to dark marks, and these are light. I think some light is sneaking down the side of the dark slide and getting onto the film. It might be time to invest in some new felt here and there…

Exposure Testing..

Instant photos are great fun. But not if they are completely white or completely black. In that case they don’t even make very good drinks mats. With this in mind I spent the afternoon measuring light levels and taking pictures using different lenses. It’s my idea of fun. OK?

Anyhoo, I got the results on the left. The top shot was taken with the wide angle lens, and it looks fine. Then we switch to the normal lens and things still look good. And then…..

My telephoto lens has a shutter in it which could be described as “a bit on the slow side”. This lets lots more light in with the hilarious white result you can see in the bottom picture. So, I’m going to have to make some adjustments when I use this lens.

This is something worth keeping in mind when using camera bits which are around 60 years old. Just because the mechanism goes “whirr-click” doesn’t mean that it is going at the right speed. Instant film is extremely picky about the amount of light it needs so a problem that might not show up on more tolerant film stocks becomes horribly obvious when you load up with instant film..

More Naval Battles at Scarborough

Coming under heavy bombardment..

A while back I wrote about the Naval Battles that they stage at Peasholm Park in Scarborough. We went back there today and I took some more pictures. Fun fact, the camera I used this time was actually older than the one I used in 2009…

The bad guys get their cumuppance

Aircraft carrier

Sending in air support

The boats have people in them steering.

If you get the chance you should go along. The battles take place every Monday, Thursday and Saturday at 3:00pm and are preceded by a musical performance. It’s great fun and you can buy ice creams. And wine. Find out more here.

More Photowalk pictures

Analogue Wonderland must have been very busy over the last few days, processing the films from the 40 photowalks that took place last Saturday. We got the rest of our pictures back today, which is much more quickly than I expected. Pretty much all of them have come out, which is very pleasing

I’d not used Kodak Pro Image 100 before, but I’m a convert now. Very nice grain and lovely colours. And on offer at the moment..

Loading film with my eyes shut

I spent a chunk of today loading film into holders, ready for some photographic fun tomorrow. This involves putting all the elements into a bag and then shoving my hands through a pair of elasticated cuffs to keep the light out. Then, with my hands in the dark, I open a box of film, take out a sheet, put it into the holder and then close the dark slide. Then I take my hand out of the bag and let light in. Which is stupid. Fortunately I noticed in time and, since the film stays in a light tight bag most of the time, I think/hope I got away with it.

One of the problems that you have when doing all this is that you are working by touch. What you are looking at is irrelevant. I end up staring stupidly into space. Something which I’ve been told I do a lot of without my hands in a bag.

Anyhoo, today I tried something I should have tried a long time back. I closed my eyes. Suddenly everything made a lot more sense, and it was actually easier to load the sheets. I’m going to do this more in the future. There is no picture of of me doing any of this because it would, of course, turn out to be black.