Adventures in 3D Printing #1: Tape Dispenser

I don't know what you think Christmas is the season for, but I reckon it is 3D printing. Plenty of time at home to keep an eye on the printer, and maybe even useful things to print. This is a tape dispenser that I thought might be useful for wrapping presents.

It works quite well, as long as you remember that the nut that holds on the roll of tape is screwed on with a left hand thread. If you forget this, as I did, you'll actually destroy your first print by trying really, really hard to "loosen" the nut. I got it to work but then I discovered this little gadget from Sellotape. 

You attach it to the knuckles of your left hand and you can just get tape as you wrap. It worked really well for me (I have slender and artistic hands - of course) although some of the reviews are less complimentary. Worth a look though I reckon.  

Printing in the Air

I've been doing a bit of 3D printing recently and I've had a need for some lens caps for, er, lenses that I seem to have bought recently. I found a design on Thingiverse that looked promising, downloaded it, sliced it and Una, my lovely if rather tempestuous 3D printer, refused to print it properly. 

To be honest, I've been expecting problems. I made the mistake of saying to Peter last week that I've reached the point where the printer "just prints" these days. At the time I said this I worried that I may have spoken too soon. And it looked like I was right. 

The print just refused to stick to the printing bed. The filament just went out into the air and all over the place. This is usually a symptom of poor alignment of the print head and so I spent a non-happy half an hour today getting the bed height precisely positioned. And it still didn't work. Very annoying. 

And then I noticed something odd about the print design. It seemed to be hovering in the air a millimetre or so above where it should be. Turns out that the printer was set up perfectly all along and the fault was with the design itself. I've found a different, less levitated, one and it prints out pretty much perfectly. Oh well, another good lesson hard learned....

Printing Tiny Robots

I've not done any 3D printing for a while. Then, earlier this week Peter showed me some things he'd been printing and they looked rather nice. And today on Twitter I saw a link to a tiny articulated bot that looked interesting. I like designs which print all as one. The legs, arms and head are intended to be separate items which stay fitted together because they are made that way. The original model had a print time of four hours, so I scaled it right down to speed things up and get a print time of an hour or so.

I was a bit worried that this would mean that the different pieces would fuse together into a single block but with a bit of careful twisting I managed to free of all the elements and I now have a tiny figure to help me with my breakfast cuppa. 

Robot Recovery

Last Wednesday my balancing robot kind of overbalanced, leapt off the desk and shattered on the floor. You can see the awful damage here. At the time I said that all I'd have to do is design some replacement parts, print them out,  and I'd have him back on his wheels again.

So I have.

Robot Plates.PNG

These are the FreeCad designs for the two plates that were broken. I did some careful measurement, wrote some Python to do the designs (it's a strange way to work, but I like it) and then printed them out and put everything back together. And it all works, which is nice. I think the new pieces are quite a bit stronger than the old ones. And if they break, I can just change one value in the program, run it again and print out some thicker ones..

3D Printing with iBox Nano

Update: Please read the comments section of this post for the latest on this device. 

Thanks to a combination of poor time management on my part and digging up an absolutely crucial road at rush our on the part of Hull Council I wasn't able to get to the MeetUp at C4DI tonight. But when I did get home I thought I'd fire up the iBox nano printer that arrived last week. 

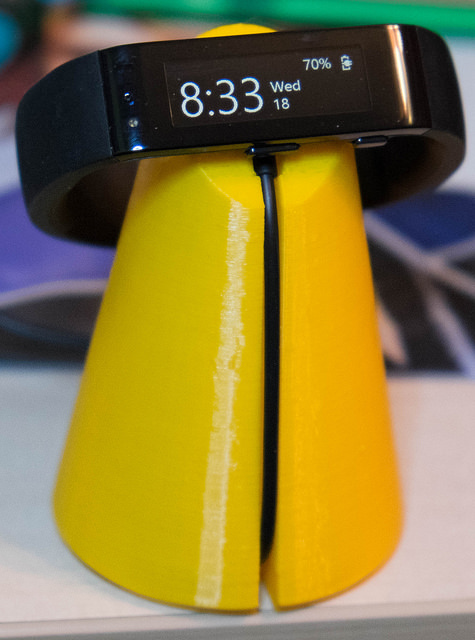
The printer was a Kickstarter project. I've had pretty good success with Kickstarter. I've only had one Kickstarter project come seriously unstuck - I'm looking at you Agent watch. The iBox project promised a light powered high resolution printer for less than 300 dollars and was too tempting to pass up. So I backed it a while ago (I think it was November) and then waited.

The device was a bit late arriving, but I don't mind too much about that. Lots of people get very upset when these projects have delays, but I'm happy to give them time to get it right. As long as something turns up at the end. I'm still looking at you Agent watch....

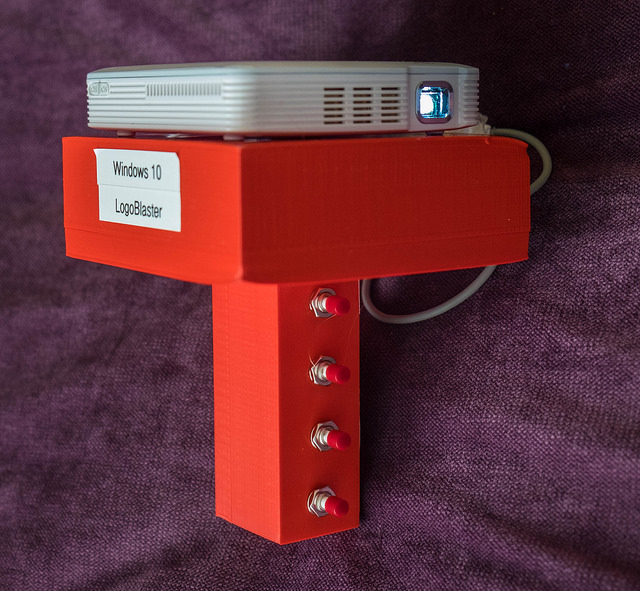
The iBox is powered by a Raspberry Pi and uses a WiFi adapter to connect to your network. You set up prints on your PC via a web interface that works really well. There are a few buttons on the machine and some lights to tell you what it is doing. 

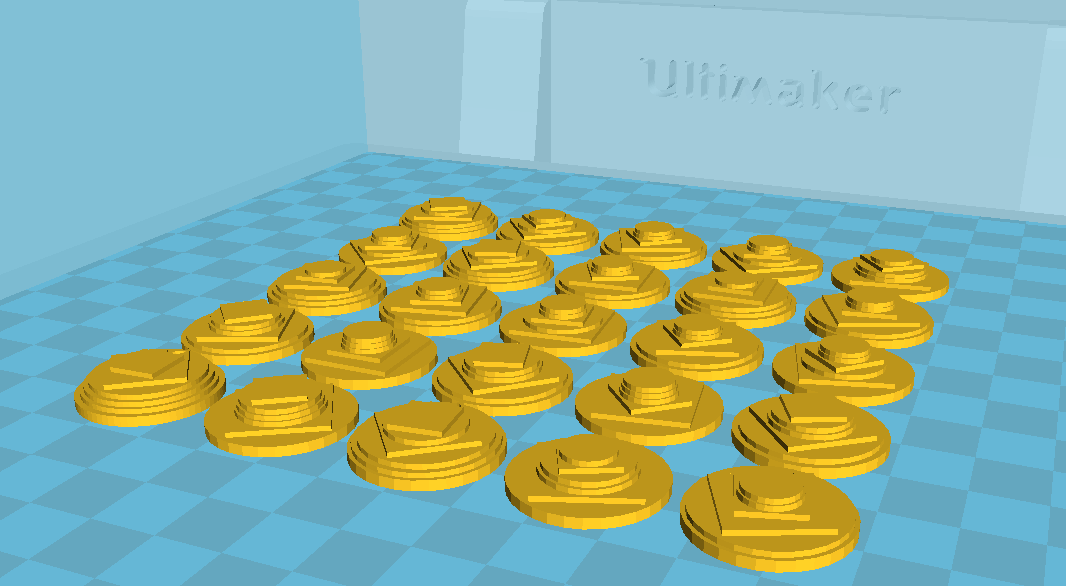
So I carefully filled the vat with resin, rubbed the build plate with some sandpaper to make it nice and rough so that the print would adhere to it, lowered the plate into the resin and set it off. 

My first print failed. All I got was a little lump of goo on the bottom of the vat. Oh well. I've got quite good at consistent printing with Una my Ultimaker, but I remember how much fiddling it took to get to where I am now. 

It turns out that, just as with Una, the key to successful printing is the print height. When Una squirts molten filament at the build plate it is crucial that the very first layer is just the right height for the filament to stick to the plate and provide the starting point for the print. With my iBox printer, which doesn't have a name yet by the way, the crucial thing is the distance of the build plate from the bottom of the glass dish, or vat, which holds the liquid resin.

The idea is that the build plate is a tiny distance from a sheet of teflon tape stuck on the bottom of the vat. The UV light makes some of the liquid resin in this gap turn solid. Then the printer pulls the build plate upwards, taking this layer of solid resin with it. Only on my first print the solid bit stuck to the bottom of the vat instead, hence the mis-shapen lump that was produced. So I re-adjusted the build plate and tried again. 

The printer does look great while it prints, like some kind of illuminated mini-tower block. It is completely silent and runs off a standard Raspberry Pi power supply. I'd be quite happy to leave it printing to itself, although you do need to come back and top up the vat with resin if you are printing something tall. 

This time it worked fine, and I got a tiny iBox logo stuck to the build plate. The output is pleasingly solid, although they say you should leave it in the sun or under a UV light to completely cure the resin. 

So I thought I'd go for broke and tried to print a tiny bunny. This was a disaster I'm afraid, with another lump of goo forming in the wrong place. However, I'm pleased to have made something. 

I'm not sure if I'm going to be OK with this liquid resin stuff. Everywhere you see dire warnings about the danger of the liquid touching your skin. I've got some disposable gloves on order but I spent big chunks of the evening fretting about the resin escaping and simultaneously burning a path to the centre of the earth (it's supposed to be corrosive) and poisoning me. 

I guess I might get used to it. It's totally different technology from printing with Una providing a new set of problems to deal with. I feel like a heart surgeon who is not very good at it and has switched to brain surgery in the hope that might be easier. I'm impressed with the iBox machine though. It really does work as advertised. I can now think about producing tiny components.  If I can get over the fear of the resin. 

If you are after a good, cheap 3D printer I think I'd still advise you to go for a conventional, filament powered, one like Una. There are some quite nice devices out there in kit form. Take a look at the nFire device on Kickstarter too. But if you fancy pushing the frontiers a bit and you want small, higher quality, prints then iBox is worth a look. 

NFire 1 3D Printer on Kickstarter

Alex from C4DI has recently launched his NFire 3D printer on Kickstarter. It's a good looking beast, as you can see. The ideas is that you can easily swap out components and print larger pieces or add a second extruder. The price is very competitive (particularly if you managed to snag one of the early bird offers) and it uses a very nice hot end (the bit that actually extrudes the filament.

Worth a look if you are in the market for a low cost and extensible device.

iBox Printer has Arrived

Last year I backed the iBox printer project on Kickstarter. It is a tiny 3D printer that uses UV light to solidify resin. It's a more precise way of printing than my Ultimaker, which is why I fancied having a go with it. Normally light powered printers like this are powered by video projectors and have highly expensive optics in them.

The iBox printer uses a bunch of ultra-violet leds and a small high resolution LCD panel to control which bits get printed. It can only print small objects (around the size of a chess piece) but since the resin is kind of expensive I don't really fancy printing anything large. And anyway, I've got Una to print the large stuff.

The iBox prints "upside down" in that the build plate (which is not shown in the picture) is dipped in and out of the resin, with a new layer being deposited underneath the previous one. Each layer needs around 20 seconds to harden, but the great thing is that every layer takes the same time to print, which is better than the Ultimaker, where larger things take the print head ages to fill in.

The device is well put together. It uses a Raspberry Pi to control it and tiny stepper motor to drive the printing plate up and down. The Pi has a WiFi interface and you control the printer via an in-built web server where you can upload objects for printing and start print jobs.  

I've not got around to firing it up just yet, but I'm looking forward to having a go.

Put "Windows 10 on Everything" with my LogoBlaster

I've just arrived at the hotel where we're staying for the Windows 10 celebration event. I've unpacked a few gadgets...

I'm helping out on the Internet of Things front, and on Sunday night I had a great idea for a device I could demonstrate.  Which I've built. In 36 hours. Go me.

I call it the "Windows 10 Logo Blaster". It really can put "Windows 10 on everything". It's a Raspberry Pi coupled to my lovely little projector. It runs a Windows 10 application that lets you select logos and images to "blast" onto the surroundings.

These are the 3D printed components. A tray for the Raspberry Pi, a cover that supports the projector and a handle which contains the trigger buttons. I've learned a bit over the years, and I now make designs that are easy to construct. As opposed to ones which can contain the components, but you can't actually get them inside.....

You can see how it all fits together here. Its showing the Windows 10 boot screen on the wall. When the program is running it shows different logos that you can switch between by pressing the buttons on the handle.

It works a treat. Battery life isn't great, but it does work. And I really can put Windows 10 (or at least one of its logos, onto everything. Tonight we've been told to wear white shirts as part of the event dress code, which should make the images show up a treat........

I'll put the designs and the software up on Github when I get back to Hull. I'm amazed that we now have tools and software that will let me go from idea to product in such a short time.

I'm really looking forward to the event tonight. I just hope everything works.......

C4DI Hardware Meetup - You Should Come Along - Really

If you live in the Hull area and have any kind of interest in technology there's a very good chance you'd enjoy a C4DI hardware meetup. They are first Thursday of every month and we have a mix of folks who like playing with computers and hardware and stuff. This month we had a Raspberry Pis of various flavours (which sounds wrong but it's right), flashing lights, amazing embedded devices you can get for less than a fiver and some brilliant discussions amongst other things.

Keep an eye on the Hull Meetup site for the next one.

Printing a Microsoft Band Stand

One of the nice things about having a 3D printer is that you can, er, print things with it. And so when I wanted a stand for my Microsoft Band I was able to find a design on Thingiverse and then make one.

This is actually the second attempt. The first printed fine but unfortunately because of "squeezage" (something that happens that makes holes smaller because of the way the printing takes place) the slot for the cable was far too tight. I scaled up the design by 1.15 and this has given me a lot more slack. Perhaps 1.12 or so would be perfect.

Anyhoo, I'm very pleased with the result, which means I can just drop the Band on the stand at night and have it freshly charged in the morning. The Band actually has a sleep tracking function, but I've not tried that yet.

Red Nose Day Tags Now Available

If you have discovered that what is missing from your life is a small, 3D printed piece of plastic with a unique arrangement of disks and squares on it, in a variety of colours, then I have just the thing for you. A Red Nose Day tag.

They are on sale in aid of Red Nose Day from our Departmental Office in Computer Science. They look great on a key-ring or as novelty ear-rings. Every one is unique and we will be using them in the lecture on Friday for some fun and games. They only cost a pound each. Bargain.

And don't forget that you can sponsor me, and maybe get me into that tutu, here.

Seventy Degrees Print Bed for Perfect Prints

I've been doing a lot of 3D printing lately. For some reason I've got it into my head that it might be neat to sell little 3D tags as part of the Red Nose Day event. Which means I have to print them. Una, my lovely 3D printer has been misbehaving a bit of late, prints have not been adhering to the print bed very well and their undersides have been a bit rough.

Last night at C4DI I was talking to Robert and he reckoned the way to get perfect prints was to print with no adhesive on the bed and whack the printing bed temperature up to 70 degrees (which is actually rather hot for my tastes).

Anyhoo, I tried it today and it works a treat. The PLA sticks to the clean glass surface and then when everything cools down the prints just pop off the print bed with no problems. And each print has a lovely glassy smooth finish on the bottom.

I'm kind of annoyed that I didn't try this earlier. Why would I have a heated bed on the printer if I didn't actually make it properly warm? Anyhoo, I'm now turning out lovely tags. They'll be on sale next week.

3D Printed Red Nose Day Tags

Tags Ready for printing

Tags Ready for printing

Red Nose Day is a UK charitable appeal. I do Lectures in Rhyme for it and all kinds of silly fun stuff. If you want to sponsor me for the next one you can do so here:

http://my.rednoseday.com/sponsor/robmiles

Last time we had a Red Nose Day I had some RFID tags that I used as the basis of a raffle. The holder of the winning tag won a rather nice Gadgeteer kit.

This year I thought I'd try something different. I thought I'd 3D print some tags and sell those instead. Each tag is completely unique thanks to a Python program that I've written that creates a combination of square and round layers of different sizes on the top of each one. Above you can see how this works. Each tag has five layers on top, of which two are square, the rest round. The square layers are rotated a random amount too so that there is plenty of variation.

I'm going to print only one of each tag design, except for the winners, where I'll print a "golden" tag as well.  We'll draw out the golden tag at the lecture on Friday 13th and find the winner. 

Printed tags. I'm going to do lots of different colours.

Printed tags. I'm going to do lots of different colours.

I'm quite intrigued by the idea of using software to produce 3D printed objects which are unique. This lets me explore the field in a good cause. 

The tags will go on sale later this week at a two pounds each. You can do what you like with them, they'll come with a keyring attachment, but you could use them as unique earrings if you were so inclined. And the more you buy, the more chance you have of winning our top secret big prize.

Note: Sharp eyed readers might have noticed that some of the red tags above have more than two square layers. These are test ones that I produced while tweaking the code. 

I Want a Microsoft Band

Microsoft have just released their Band, a smartwatch/fitness device that looks really nice. They are selling very well apparently, which means that I might have problems getting one when I head out to Seattle for the MVP Summit. And I really want one.

Now, I fully realise that the pursuit of gadgets is ultimately fruitless as they lead an ephemeral life, doomed to be superseded by the next iteration and driven by a marketing beat. You could argue that people who try to validate their existence by surrounding themselves with the latest technology are perhaps only proving their ultimate shallowness. And in the end the accumulation of material goods is ultimately futile (for a full discourse on this matter listen to the wonderful "Mountains'O''Things" by Tracy Chapman).  

But I still want one. 

If anyone finds themselves in a position to get me one (medium size should fit I reckon as I'm, half way up the strap on my Pebble) I will do the following for them, in addition to paying for the device:

  • supply them with a printed, autographed copy of the latest C# Yellow Book
  • write a poem for them (I am a published poet) on any subject they nominate
  • provide them with a unique Windows Phone Controlled Wedding Light,  in case they have a daughter getting married in the near future who needs table decorations. I'll custom build it with a choice of base colour and ship it to you anywhere in the world. 

Like I said, I may be shallow and gadget obsessed, but I really want one of those bands.

3D Selfies to Celebrate Kinect V2 Release

To celebrate the release of Version 2.0 of the Kinect for Windows 2 SDK I printed a couple of selfies of me using my Carbonizer program and changing the filament half way through the print to get a dual colour effect. I'm quite pleased how they came out. I wish I'd kept my head still during the scan so that my features show up a bit better. Then again....

With the latest release of the software we can now put Kinect for Windows apps in Microsoft Store. I might see about a formal release of the Carbonizer program. Microsoft have also announced a new $50 adapter that lets you use your Xbox Kinect with your PC, which is nice. You can find out more here

Rather Useful Seminar on Creating 3D Objects from Software

Fun was had at the Rather Useful Seminar today. We were looking at the way that we can create objects using software. We started of with a vertex (a posh name for a position in 3D space), combined three of them to make a triangle and then stuck a whole bunch of triangles together to make a mesh that describes a solid shape. Above you can see what happens when I use cos and sine waves to fiddle with the height of the surface. 

Then we went into Python inside FreeCad and I create a 3D model of the weather forecast which I did last year as well. 

The point I wanted to make is that all of this is software, none of it is magic, and if you want to write programs that make solids You can find the slides here.