Making a lightbox

Yesterday I had a bit of a cold. Today I seem to have got all of it. So I feel rubbish; what better time to do something silly. I've decided to make a letter light for number one grandchild. See if you can use your skill and judgement to work out her name from the above picture. 

I found a really nice design on Thingiverse for letter boxes, but I would have had to stick them all together and make a box to put them in and so on and so on. No fun. So I've written a little Python program that runs inside FreeCad to grab the STL designs, convert them into FreeCad shapes, stick them all together, create a backplane for the light box and then a plinth to put them in. I've even added a hole for the power socket and wall mounting holes. 

I've discovered that I can just handle a six letter word if I print diagonally on Una my Ultimaker original - still doing a sterling job after six years. The light boxes are 30mm in size and a perfect fit for some waterproof neopixels that I had lying around. 

I'm printing out the bits and fitting them together at the moment. I'm going to make a modification that lets you make a box with multiple lines and then when it's all working well I'll put the code up on GitHub.  

Air Quality Sensor Version 1.0

If you think that all I've done over the last week is work on my Air Quality sensor you'd be wrong. But I have been quite busy with it. I've now got a proper menu system with messages and numeric input. Plus a box. The box has been particularly fun to design, especially as the Heltec micro controller, in common with lots of similar devices, doesn't seem to provide any way that it can be fitted into a case. I've ended up making a little clamp that holds it in position. I'm not happy with this, but then again I'm not crazy about my looks either - but what are you going to do? 

To say that the case is printed version 1.0 it has gone together quite well. I'm using the "dead cockroach" assembly technique, where you regard the chip as a dead cockroach lying on its back and connect the wires to the upturned legs. There are no components other than the devices that I'm wiring together. The only tricky bit is that the clock and the temperature sensor share the same SDA and SCL lines and so I've had to make up some custom cables. But it's all working, and now I have a box with all my sensors and whatnot that I can start to to build software for. 

This is the ugly truth about what's in the box. We'll gloss over the way that the wires for the RTC are too short to allow it to be fitted onto its mounting post, and the wire for the sensor is far too long......

The next step is to add a "WiFi Setup" mode that can be used to get the device onto the internet and then we can start pushing readings into the cloud. You can track the project on GitHub here. Bear in mind that this is a work in progress, and so nothing is fixed. This is all part of the Connected Humber Monitaire project, you can find out more here

Building an Air Quality Sensor

I've been having proper fun today. I started with one of my tiny Heltec embedded controllers and an urge to connect it to an air quality sensor and a temperature/air pressure/humidity sensor. 

It wasn't easy, but it was possible. Biggest problem was that the temperature sensor uses an i2c connection to the Heltec device, and so does the lovely little OLED panel that you can see above showing numbers.

Turns out the way to make it work is to create another Wire instance and then use that for the temperature sensor. Anyhoo, it works. If you want to see the code you can find it here.

I've written everything using message pumps and state machines so that it should be possible to have all this working together without something getting stuck. 

Hull Meetups is becoming Connected Humber

Things are changing, but not changing. The c4di Hardware Group is turning into Connected Humber. We'll be meeting up at exactly the same time, in exactly the same place, doing pretty much the same things. Only more so.

We're going to turn the group into a Community Interest Company CIC, which will make it possible for us to do even more interesting things, and give us a recognisable presence when dealing with companies and local bodies. 

For existing members the biggest change is that you can now find out about meetups and what we are doing by using the Connected Humber website. We'll be bidding fond farewell to the Meetup site that we've used in the past and we have a Slack channel for members of the group. Ping me a message if you want an invite, or turn up to the meetup this Thursday (16th August). 

We've lots of community activities planned, starting with a project to build a network of Air Quality sensors that we plan to deploy around the area. Exciting times. 

Enter the Humber Care Tech Challenge. Now.

The Humber Care Tech Challenge is in just around a month. We had the Visioning day last week and we've now got 98 ideas for projects for you to explore. I've been through them and broken them into categories to make it really easy to identify challenges and ideas to explore.

Last week I discovered, to my great delight, that we'll have Principle ICT Business Analysts from East Riding of Yorkshire Council along with developers from Amazon present at the event to help you build your solutions. I'm also working on getting the healthcare professionals behind the 98 ideas along as well.

If I was a developer looking to get into the healthcare space I would regard the chance to meet up with people like these as priceless. 

And you only have to pay five pounds to sign up, you get free food and drink during the event and, if the weather is nice, you might even get to go for a paddle in the sea.

For many years I've organised and taken part in tech challenge events of various kinds. I've watched them change lives. Come along in September and let this event change yours.  Just press the button below.

Hull Pixelbot at The Digital Awards

I'm totally gobsmacked (a great phrase) to discover that the Hull Pixelbot has been made a finalist in not one, but two categories in the The Digital Awards 2018.  

"The little robot from Hull" is up for an award in the "Best Hardware" and "Best Use of Technology within Education" categories. Awesome stuff. Thanks so much folks. The awards ceremony is in September.

There's some impressive competition in the categories, including some from companies that are also based at c4di. I'm really pleased just to have made it as a finalist. If you want to read what I wrote about the robot, you can find my entry description here

The Railway Pub in Cottingham is Awesome

Do me a favour. And yourself. Go for Sunday lunch at the Railway in Cottingham.  The food is great, the staff friendly and helpful. And should you fall down the steps on the way out they are completely and utterly awesome. We found this out today when one of our lunch party was unlucky enough to miss-position his walking stick and take a tumble on the way out. 

The landlord took control of the situation, called for an ambulance, kept us company while it arrived, monitored the unfortunate tumbler, got us a sunshade and seats for us to sit on and was generally splendid while I flailed around failing to be useful. The ambulance turned up after a little while and as it left he and his staff were working efficiently to clean up the mess that we had made. 

I told him how impressed I was with the way he had handled the situation, and that I would be telling all my friends to get down to his pub pronto. We had the Sunday roast and it was great with a really nice range of home cooked vegetables. And we'll be back. Hope to see you there.

While I'm in a thanking mood I really should also say a huge thank-you to the ambulance crew and the folks down at casualty in Hull Royal Infirmary who stuck the patient back together again (they use glue on cuts now - who knew?) and got him back on his feet in good time. Recovery is progressing nicely. 

Whitby Steam

Today finds us on the road to Whitby. A wonderful place, if a bit colder than we anticipated first thing in the morning. We'd come for the steam rally and a fish pie. We got all that, plus fantastic weather and a ride in the clifftop lift (well worth 60 pence of anyone's money).

If you've not been to Whitby you are so missing out. And if you've been to Whitby and not had the fish pie at the Magpie Cafe then you're missing out too.

Mission Impossible: Fallout

Mission Impossible: Fallout is a fun film about atomic bombs. It has just the right amount of jeopardy, wisecracks and jaw dropping sequences to make it work splendidly.

One of the things that I loved was the special effects. It turns out that there are two ways to shoot a "helicopter out of control" scene. One way involves a green screen and a lot of computing power. And it looks a bit fake. The other involves an out of control helicopter with a lot of cameras stuck on it and Tom Cruise sat on his own in the cockpit. And it looks scary real.

Anyone expecting a light romantic comedy, or philosophical musings about the nature of life will be disappointed. For the rest of us, who turn up for thrills, spills and lots of stuff going on will leave very happy.

Humber Care Tech Challenge Visioning Day

Getting started

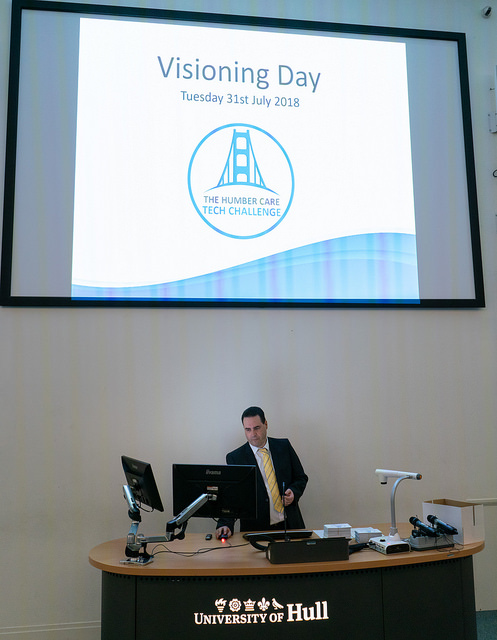
Today I went along to the Humber Care Tech Challenge Visioning Day. This is where we get healthcare professionals to tell us about their problems and explore how to solve them. It's how we are setting the agenda for the Humber Health Care Challenge event itself, which is running in September.  During the event we want teams to come up with working prototypes of solutions. But to do that we need some idea of what we are facing. 

We had some great talks from people about the problems faced in healthcare. All the speakers were very open about the huge challenges that the future is going to bring. Nobody was saying these are easy things to address. But everybody was excited by the opportunities that new technology is bringing. I made some notes of things that people said during the talks. Apologies to the speakers that I didn't get all the names and if I've misquoted at any point:

  • Your home should be a proactive part of your healthcare.
  • People frequently interact with care services because they are lonely.
  • People will tend to opt-out of automated systems if they think that they will reduce the amount of human contact that they have. 
  • We need to establish a culture that make people and families able to provide appropriate support to allow independent living for as long as possible. Say in your home. Stay in control. Stay in contact. 
  • We should strive to make it as easy as possible to deliver and monitor care, so that the carers have time to focus on the person, and not just perform support tasks. Shared records across agencies would be a great step forward in this regard. 
  • Lots of technology already in use can be used in a care context. It might just be a way of connecting things and re-purposing existing devices.
  • We must plan for how the technology will be in 5-10 years time. Not what we can do now.
  • When considering disability; you are not what has happened to you - you are what you choose to become. And you should be empowered and supported to make that journey. 
  • Machine Learning and Artificial Intelligence bring with them an incredible potential for healthcare. So do connected devices such as Amazon Echo.
  • Very simple ideas can have a massive impact. 

Filling idea cards...

After the talks everyone spent some time filling in idea cards that set out the challenges that they saw and ideas for addressing them. We're going to spend some time going through these and getting back to the delegates who proposed them to turn them into challenges for the event. Things are getting very interesting. If you want to take part (and you should) you can still sign up here

As part of the presentation we recorded a bit of video with me talking about the event and why it is a good idea. This is one of those occasions when everybody wins. Everyone who takes part will have fun, learn things and improve themselves. And they might end up creating a solution that change lives. 

Cloud Connected Camping Lights

I was in the Pound Shop over the weekend looking for camping lights. What with we me going camping in a month or so. I'm going to the Electromagnetic Field event at the end of August, and I've been buying sleeping bags and contemplating life under canvas for a few days. 

I found a likely looking light in a camping shop for a fiver but being from Yorkshire I thought I'd take a look at cheaper solutions. I found the lights above, packed in a nice little box, for a pound a pop. Astonishing value, so I bought four. 

Then I got to thinking about making the light more interesting. I've done this kind of thing before and I had some pixel rings and Wemos devices lying around, so I thought I'd have a go. Worst case I'd break a light that cost me a pound. 

This is the light dismantled. I undid the screws that held the base on popped the top off and then slid the transparent cover down and off the bottom of the light. Then I used a knife blade to pop the plastic reflector off the top to reveal the pcb that holds the 11 white leds. I'm going to replace this with a 16 led neopixel ring which just fits. You can get these rings for around 8 pounds, or much less if you're prepared to wait for them to arrive from China. 

The plan is to fit the led ring a shown above, drill some holes in the plastic support and run the wires behind through them, providing a connection and also holding the ring in position. I can bring in the hot glue later if I want to make things even more secure. 

I held the led ring in position, scratched marks on the reflector and then drilled the holes. I'm not very pleased with the bottom hole, but I don't think anyone will see it. I'm only using three of the connections, but I drilled four holes so I didn't have to remember which was the one I don't need. 

These are the wires that I made up for the connections to the led ring. I used solid core wire. I'm connecting to the ground, 5Volt and Data input lines using black, red and white wires. The colour of the wires doesn't matter much, as electricity doesn't seem to care about wire colour.

If you read the Adafruit help pages for the Neopixel ring they talk sensible things about series resistors and capacitors that you can add to improve the signal to the led ring and reduce the chances of damage. I'm leaving those out because I like to "live on the edge", but you might want to add them if you build a light like mine. 

This is the led ring after I fitted it to the reflector with the wires pushed through the appropriate holes. Looks quite tidy to me. Next up we have to take a look at fitting the processor board to the light. 

This is how the lamps are made. They have a slide switch which controls power to the led ring. It's a bit hard to see, but there's a series resistor on the positive side which is wired from the battery terminal to the switch. I'll use the switch to turn the device on and off. 

I'm going to add an ESP8266 device on the Wemos platform. I love this device and configuration, and it just fits. It will give me WiFi for connectivity and my plan is to port my wedding light software onto the Wemos platform. 

This is the device with the signal and power wires soldered in. For some reason I was nervous about soldering solid core wires onto the Wemos PCB and so I soldered in some jumper cables instead. I've done this before and it's a good trick. Rather than soldering a socket and then plugging into it (and having the worry that the plug might come out) instead I just solder the plug straight in. I'll cut the plugs off the other end and wire things up by twisting wires together, soldering them and covering with heatshrink tubing. Probably not as posh as using proper connectors, but much cheaper and at least as reliable.

I'm using one data pin to control the lights. Just because I'm moody, I decided to solder this wire in directly. I stuck the Wemos device onto the back of the reflector using some sticky velcro tape that I got from Maplin. I'm really going to miss that shop.

This is the completed processor fitted to the reflector. I've done the wiring and so I now just have to power up the device to get it going. This is also a useful stage to reach because now that I've connected the power lines for the leds and the processor together I can plug the Wemos device into the PC using a USB cable and test that the lights work. So I did this. There will now be a short break while I get the software together. 

Writing the software took longer than I expected because I found a bug. However, once I'd fixed that I turned my attention to the base of the light. I soldered some new wires to the switch and onto the battery terminals. Now I just have to connect the red and black cables to the ones on the processor and I'm good to go. 

This is the lights and the power all soldered together. I've made the wires much longer than they need to be, this is so that it will be easy to pop out the reflector and re-program the Wemos when I find another bug.

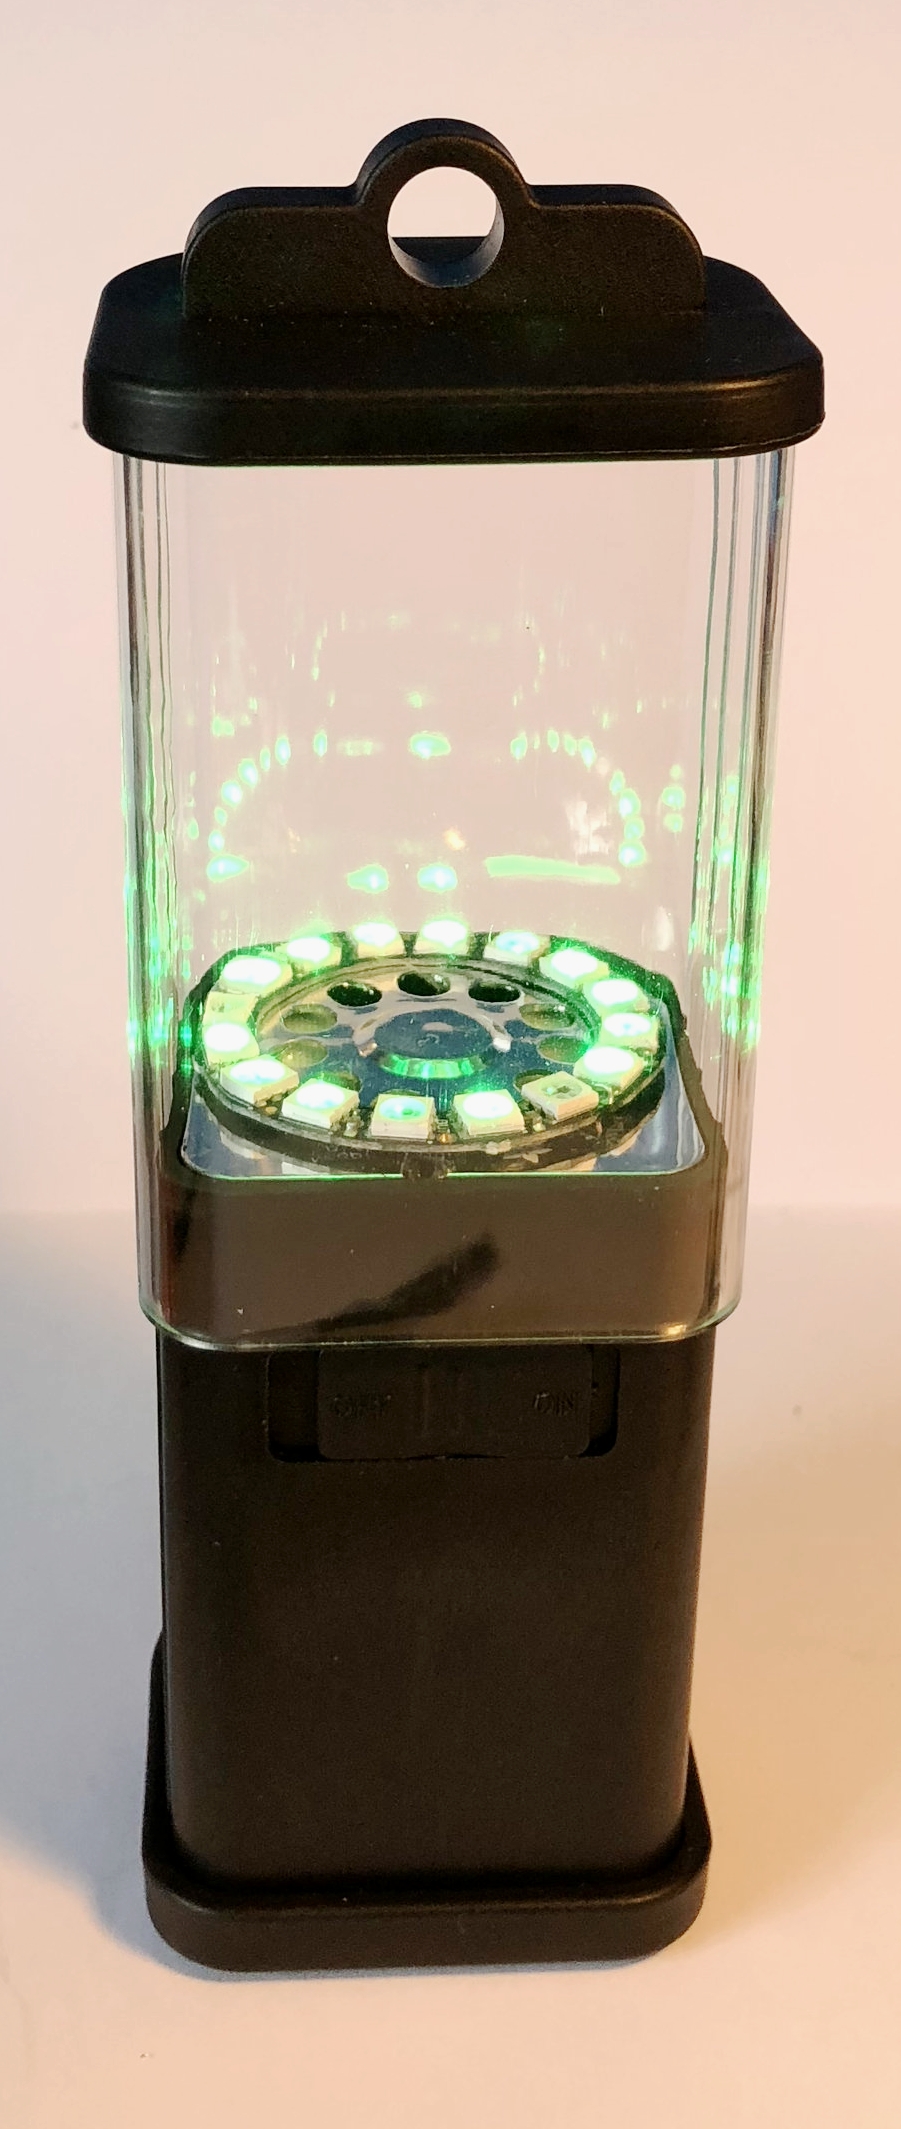
This is the light in action, just after I'd asked it to turn green.

I'm presently using MQTT to connect to the Azure IOT hub and sending text commands to configure the light. The commands are a subset of the HullOS language that I've been using on the Hull Pixelbot. Next I want to make a controller device that pushes commands up into the cloud to tell the light what to do. 

If you're looking for something to play with I can strongly recommend this light. There's a reasonable amount of space to play with - I'm thinking of adding a temperature sensor so that the light can change colour depending on how warm it is. I've discovered that I can perform my light flickering at the same time as wait for MQTT server commands and it all seems to work splendidly. I'll put the code up on GitHub when I've tidied it up a bit. 


With a bit of care you could  take the original 11 pixel ring and cut the tracks on the pcb so that each led could be controlled individually, perhaps by an Arduino Pro-Mini to get a really cheap controllable light device. 

Code like an idiot

Hmm. No matter how good you are at programming, developers will still put bugs in their programs. Including me. Lost a couple of hours today because of this little beauty.

if ((tickCount % lights[i].colourSpeed)!=0 || lights[i].colourSpeed==0)
    return;

This code has been working inside HullOS for a couple of years. No problems. However, when I tried to port the code onto a Wemos device it kept crashing with an invalid instruction message.

Wah. The idea is that the code will exit if is not time to update the colour animation (tick count is not an exact multiple of colourSpeed) or if no animation is being performed (colourSpeed is zero). 

It took me a while to figure out what was happening. Turns out this code is wrong, but under some circumstances it will work perfectly well. 

It's all to do with the % (modulus) operator. This gives the remainder that you get if you divide one number by another (or example 7 % 4 would be 3). If the modulus is zero that we have an exact multiple on our hands. So, every time tickCount reaches the next multiple of colourSpeed the program will perform an update. 

Snag is that I've been stupid, in that I use a colourSpeed value of 0 to mean that the light is not being updated. And the behaviour of a C++ program when you do x % 0 is undefined. In other words, any number modulus zero is a stupid question to ask.

To make things worse the fact that I'm doing this bad thing as one half of an or expression means that, depending on the whim of the compiler, the modulus calculation may not get evaluated when colourSpeed is zero. If the code produced by the compiler does the test for zero before the modulus my program works. If the tests are done the other way round the program explodes.

It's an easy fix, just break the single test into two tests so that I control the order they are performed:

if (lights[i].colourSpeed == 0)
    return;
if ((tickCount % lights[i].colourSpeed) != 0 )
    return;

Now we never use the value of 0 in a modulus expression.  

Oh well, just goes to show that you can learn stuff by doing stuff.....

Go see Incredibles 2

Went to see Incredibles 2 on my birthday. It's really good, you might even say it's incred...

But then you might not. However, the action is great, there are some lovely touches and the dialog is spot on. I want to go and see it again. You should see it at least once. 

However, for me the show peaked during an advert at the start for Disneyworld. On the screen in big letters it said "Where nobody has to grow up." And then on the bottom of the screen in tiny letters it said "Height restrictions apply".  

Connecting a ZPH01 Dust Sensor to Python

I've just noticed that one of the wires came of the connector while I was taking the photograph. Oh well.

Anyhoo, some time back I got a dust particle sensor to play with. Air quality is a big thing, but one that we don't have much information about at the moment. An air quality measurement device is also a perfect application for LoRa. Sensors can gather data and then send summaries over the network. As part of ConnectedHumber initiative (of which much more later) we're designing an air quality sensor with the intention of deploying some city wide.

As a start I've connected the sensor to my PC and written a little Python script that gets the readings from it. You can find the script on GitHub here, in the unlikely event that you've got a sensor just like mine.

To connect the sensor to my PC I just used a standard USB to serial adaptor, the kind of thing you use to program Arduino Pro-Mini devices. I connected all the signal pins, and also took the mode pin to ground, so that the sensor will output serial data rather than pulses. 

The sensor works fine, although I've no real idea what any of the numbers mean at the moment. The next step is to get one into a case with a Wemos or LoRa device connected to it.