Pinball theory

Theory is when you know everything, but nothing works. Practice is when it works, but you don’t know why.

I know all the theory of how the start button on my pinball machine works.

  • I know that the switches are arranged in an 8x8 grid of rows and columns.

  • I know that the micro-controller runs a bit across the columns and reads the row inputs to identify closed switches.

  • I know that the start switch is on row 3 of column 1

  • I know that the row wires are all white with a coloured stripe and the column wires are all green with a coloured stripe.

  • I know that the start switch is connected between a Green/Brown wire and a White/Orange wire.

  • I know that these wires are connected through the Coin Door Interface Board, entering on pins 2 and 7 of connector J6 and leaving on pins 1 and 4 of connector J1.

  • I know that connector J1 on the Coin Door Interface Board is connected to connector J212 on the CPU board and that the Green/Brown cable goes to pin 1 on this connector and the White/Orange cables goes to pin 7.

  • I know that the start switch signal goes through diode d4 on the Coin Door Interface Board.

  • I know that the start switch has a resistance of around 10 ohms when closed that I can measure this at the connection to the CPU board.

  • I know that other switches on the same rows and columns as the start switch work perfectly fine.

And yet it doesn’t work. I don’t think it’s called “The Twilight Zone” for nothing.

Back in the Zone

New board in action

My Twilight Zone pinball machine is the nearest thing that I’ve got to a family heirloom. Rather sadly, it’s been poorly sick recently, owing to some leaky batteries. These are rather stupidly mounted over the main processor board and covered some important chips with corrosive liquid. Although I managed to get the board back to life by cleaning it up a while back, a few weeks ago the input connected to the game start button failed, which made it rather hard to get a game.

Fortunately, even though (or perhaps because) the machine was made in the mid nineties you can still get replacement circuit boards. These are re-manufactured using the same components as the original and, once I’d got one, my machine sprang back into life.

Mending a Pinball Machine with a Toothbrush

I fired up the pinball machine yesterday. First time in a while that I've used it. Everything was fine. Except one thing. The menu button was not working. This is kind of important; it's how you select all the various options to set the machine up. With that broken I'm kind of stuck with the default settings, and I can't set the date and time (which the clock has forgotten because the battery backup has gone flat). 

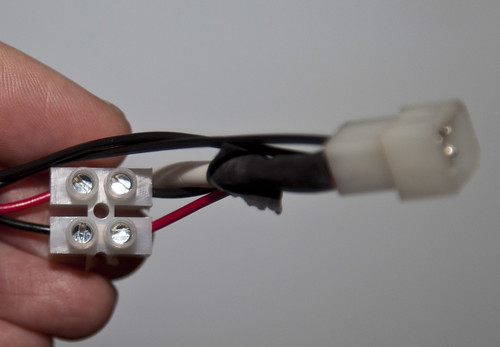
Oh well, nine times out of ten this means that either the switch is broken or a wire has come loose. Unfortunately, after a few minutes of investigation I discovered that the switch, and the wiring to the CPU board were fine. It got worse when I looked even more closely at the board itself. The batteries, which to be honest are rather stupidly located, had dumped their alkaline contents over the circuitry and left a trail of corrosion and damage. Not good. 

So today (after discovering that replacement bards are available but cost around 150 pounds) I popped the CPU board out and took a look. Step one was to get rid of all the alkaline deposit. I used a toothbrush and some diluted white vinegar to sort that out and then washed the board liberally with isopropyl alcohol to clean things up. 

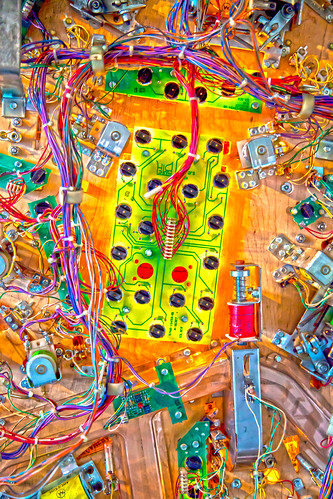
Then I spent a very happy (and I actually mean this) hour or so tracing the faulty signal from the input pin through the circuit board on its way to the processor. Pro tip: Print out a picture of the pcb so that you can draw the trace on the top, like I did above.

Anyhoo, the signal went past all the dirty bits of the board, so I made ultra sure that they were all squeaky clean and there were no deposits bridging any of the connections. I also used my meter to ensure that all the signal paths were OK. After I'd popped the board back in I fired things up and I had my enter button back. Yay.

I'm going to keep an eye on the batteries from now on. I'm going to play more pinball. And I'm going to get another toothbrush.  

Pinball Wizardry

Took a trip into Lincolnshire today to take a look at the Christmas Cracker Pinball event. Ross has an enviable collection of pinball machines and we were all able to go and have a play on them. I wasn't able to stay for the competition part, but I did get a bunch of pictures of some of the tables. There was a range of machines from electo-mechanical devices all the way through to ones with large displays. Great fun. Perhaps I could spend the 12 months or so practicing and then have a proper go next year. 

The Correctifier

Correctifyer 

We found the source of the pinball problem from last night. An extra we had bought had been supplied with incorrect wiring, sending power to one of the opto leds the wrong way. It seemed to survive this mistreatment though, and we just had to add my “Correctifier” (patent pending) which swaps the wires to make them the right way round.

Pinball Underside

This is the kind of wiring that we are working with, behind the flashing lights…..

Pinball Hacking

The Zone

The best, in fact the only, good investment I have ever made was in my Twilight Zone Pinball machine. I got it ages ago from Richard, when he went over to the USA. It is huge, noisy and doesn’t always work very well. A perfect fit with me.

Tonight we spent some time playing with the machine in the best possible way. We took it to pieces and added some parts that I got in Australia while over there for the Imagine Cup. I’m always blown away by the sheer mechanical complexity of these things. Anyhoo, we managed to replace one faulty part (the clock you can see above now has four working lights) and break another. So I guess you could say we broke even on the day.