3D Printing at an angle

Followers of my blog (yes, that’s both of you) will have been observing the fun and games I’ve been having trying to print a handle for my 3D printed camera. The problem is that if you print the handle vertically there is only a small surface in contact with the print bed. As the printing gets higher the print head becomes more and more likely to push the workpiece off the print bed. When it does you get a tree.

I tried printing with the handle flat on the print bed, but that caused other problems. There is a large open gap for the cable release that runs the length of the handle. This can’t be printed without extra support and the support material proved impossible to remove. I ended up with a handle that was solid all the way through So, in the end I tried something I’ve not done before. I tipped the whole workpiece by 45 degrees. This removed the need for any internal support.

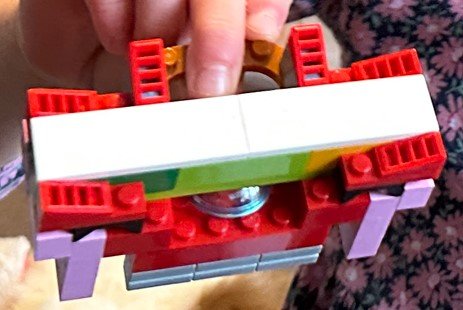
Above you can see how it works. The gap in the middle of the handle doesn’t need support and there is now a huge area of the workpiece in contact with the print bed so it grips really well. It worked a treat. The support came off very easily and left a surprisingly smooth finish all over the handle

If you’ve got something that needs internal support you might like to try the same thing. I used Cura to slice the model and the print preview (you can see it above) to check for any overhangs.

This might be a good technique for printing very small things, as it provides a larger base. It also removes any problems with the workpiece lifting up from the bed on the corners, which can be an issue when you try to print large objects.

Using Bolt Inserts in 3D printed objects

I assembled the 3D printed camera today. I used the fittings I got last week. It turned out to be quite straightforward. I popped the special tip on the iron and set the temperature as low as possible (200 degrees). Then I picked up the fitting with a pair of pliers, popped it on the end of the tip and pushed the fitting into the hole in the 3D printed camera body.

Above you can see the result. I can now screw a bolt into this fitting to hold the lens in place. This is a really great way to screw things together. I’ve had a lot of success just using bolts in 3d printed holes, but this should be stronger and won’t wear out if I need to remove and replace the bolts.

This is the finished fitting in place with the lens attached. It turns out to look quite tidy. Next thing to do is make the handle and then take some pictures.

Lego Ghetto Blaster

It’s become a kind of ritual. When we go up town in Leeds we visit the Lego store and fill a plastic cup with bricks from their “pick and mix”. I like doing this because you can get a huge number of one particular Lego piece. On a previous visit I got an enormous number of Lego gear levers and we used them to make a brush, among other things. This time we got some funky angled pieces and I used them to make a Lego Ghetto Blaster with six speakers and a sub-woofer. Great fun.

Mudfall

Today was going great right up to the point where I fell on my back in the mud. I was just about to shout “Careful, it might be slippy” to our six year old charge when I illustrated this fact to great effect by falling over. Fortunately no lasting damage was done, although I did have to spend the rest of the trip walking round in a slowly solidifying coat and jeans.

Watch Extraordinary Attorney Woo

Extraordinary Attorney Woo is a Korean TV show about an attorney with autism finding her way around a big law firm. Most of the episodes are self-contained although there are also a few longer running story arcs and a love story. Some of the stories give really interesting insights into the Korean way of life, although sometimes they do get a bit bogged down with procedure. I think it does a good job of balancing the issues presented and watching it certainly teaches you lots about the things faced by folks on the autistic spectrum. I really like it because the whole thing is fundamentally uplifting (although not every case has a happy ending). Well worth a watch if you happen to have Netflix.

Failday the 13th

Today I recorded 8 demo videos and every one of them failed in some way. By half way through I had a “I wonder what is going to go wrong this time” running gag going in each recording. The good news is that I’ve now finished all the videos for the book. All 67 are complete and uploaded. Now we have to make sure that the QR codes and the links in the book text all line up.

Bolt inserts for fun and profit

These arrived today from Amazon. I’m looking forward to having a go with them. And no, they are not bullets. They are for placing brass inserts into 3D printed plastic. You put them on the end of a soldering iron and heat them up so that the plastic melts around the insert. The inserts have screw threads in them. If I can get this right I can make 3D printed objects which I can screw together properly.

These are the inserts. They take m3 bolts.

Rob's Video Recording Tips

I’ve recorded over 50 videos for the new book. So now I think I’m qualified to be able to give advice on how to make videos.

  1. Use a proper tool. I’m using Camtasia, which is wonderful. I’ve built a template and now I just have to make a new file from it, add the video bit in the middle and then hit publish.

  2. Build a workflow. For me the workflow starts with the name of the video in the book. I copy this into the filename for the video in Camtasia, which then uses that as the name of the video I publish onto YouTube. Then, when the video has published I copy the link back into the document and then use Edge to make a QR code (you can make a QR code for a url by right-clicking the site and then selecting the option from the menu that appears). I copy the QR code into the document and then save the image in the chapter file. Then I move on to the next one.

  3. Keep going if it all goes wrong. Maybe I’m wrong here, but I’ve done fifty videos this way and I’m not going to change. I used to spend ages trying to make my videos perfect. If I made a mistake I’d go back and re-record that bit. If a demo failed I’d re-record that too. But then I decided that “The perfect is the enemy of the good”. My videos don’t need to be perfect. My lectures certainly never were, and there was no way of rewinding those and going again. And besides, the bits that went wrong were always the bits that the students found the most interesting. So now I do every video in exactly one take. If it goes wrong I fix it and then carry on. I do make good use of the ability to pause recordings though. If something fails I’ll pause, fix it, and then resume and explain what happened.

  4. Don’t use your development machine for the videos. I’ve been caught out in the past when my sample code fails to work on the user’s machine. This is usually because there is something on my machine that I’ve forgotten, perhaps a device driver or a setting, which makes it work on my machine. Now I use the cheapest, lowest specification machine I can to record the videos. I install everything from scratch on a brand-new installation of Windows and go from there. I’ve lost count of the number of things that I’ve discovered testing the exercises this way. I’ve used a virtual pc on my machine in the past, but I really like the idea of having real hardware. I’m presently using a super cheap laptop for all the videos.

  5. Remember to be yourself. You and your viewer are going to be together for a long while (especially if you decide to make over 50 videos). You need to be able to relax while recording until you reach the point where you can properly be yourself.

Blackfinger

I’m 3D printing a camera at the moment. I’ve discovered that one of my early design decisions was not the best. It turns out that white PLA is not the most opaque colour I could have chosen. Cameras that let the light in are not optimal.

So today I decided to remedy that by painting the inside of the camera with matt black paint. I bought a spray can of the stuff, found a place in the garden as far away as possible from everything else and set to. It worked rather well. I’ve put on two coats and it is now looking a lot darker inside the camera, which is a good thing. The only snag is that it has turned out to be impossible to stop the black paint getting onto the outside of the camera (at least for me) so the next part of the plan is to paint the outside of the camera black too. That way I also get even more opaqueness.

The really good news is that the paint I’m using seems to stick really well to PLA. The only other snag has been that I now have a black finger (the one that has been pressing the button on the spraycan)…

Video payoff

I’m recording video walkthroughs for my Begin to Code Cloud book at the moment. I’m really pleased I’m doing this. Today I found an horrendous issue with a setting which broke a bunch of demos in the book text. Moral of the story folks: don’t just use your main machine for demos you want to give away; it will have configurations that make things work for you that won’t work for anyone else….

Broken Mamiya

After watching a few YouTube videos about the Mamiya 645 camera I’d convinced myself that I knew enough about the camera to be able to venture onto eBay and buy a “for spares or repair” camera that came up for sale. It was a nice set of bits, including a waist level finder, a lens and a metered prism. It also included a camera body. Well, the camera arrived last week and I call it my “downstairs” camera as it looks as if it has been thrown downstairs at least once or twice. The lens works fine, but has a bit of a ding in the filter mount. The waist level finder works fine too, even though the mounting on one side has broken. The camera body is a bit of a mess though. By fiddling with it I’ve managed to lock the mechanism up completely. I’ve nothing against the seller here, nothing was sold as working. And I still think it was a great deal for the price. I’m gong to pop it back on eBay and see how much I can get for a properly broken device.