Fixing a leaky camera

The hair is probably one of mine. I need a haircut.

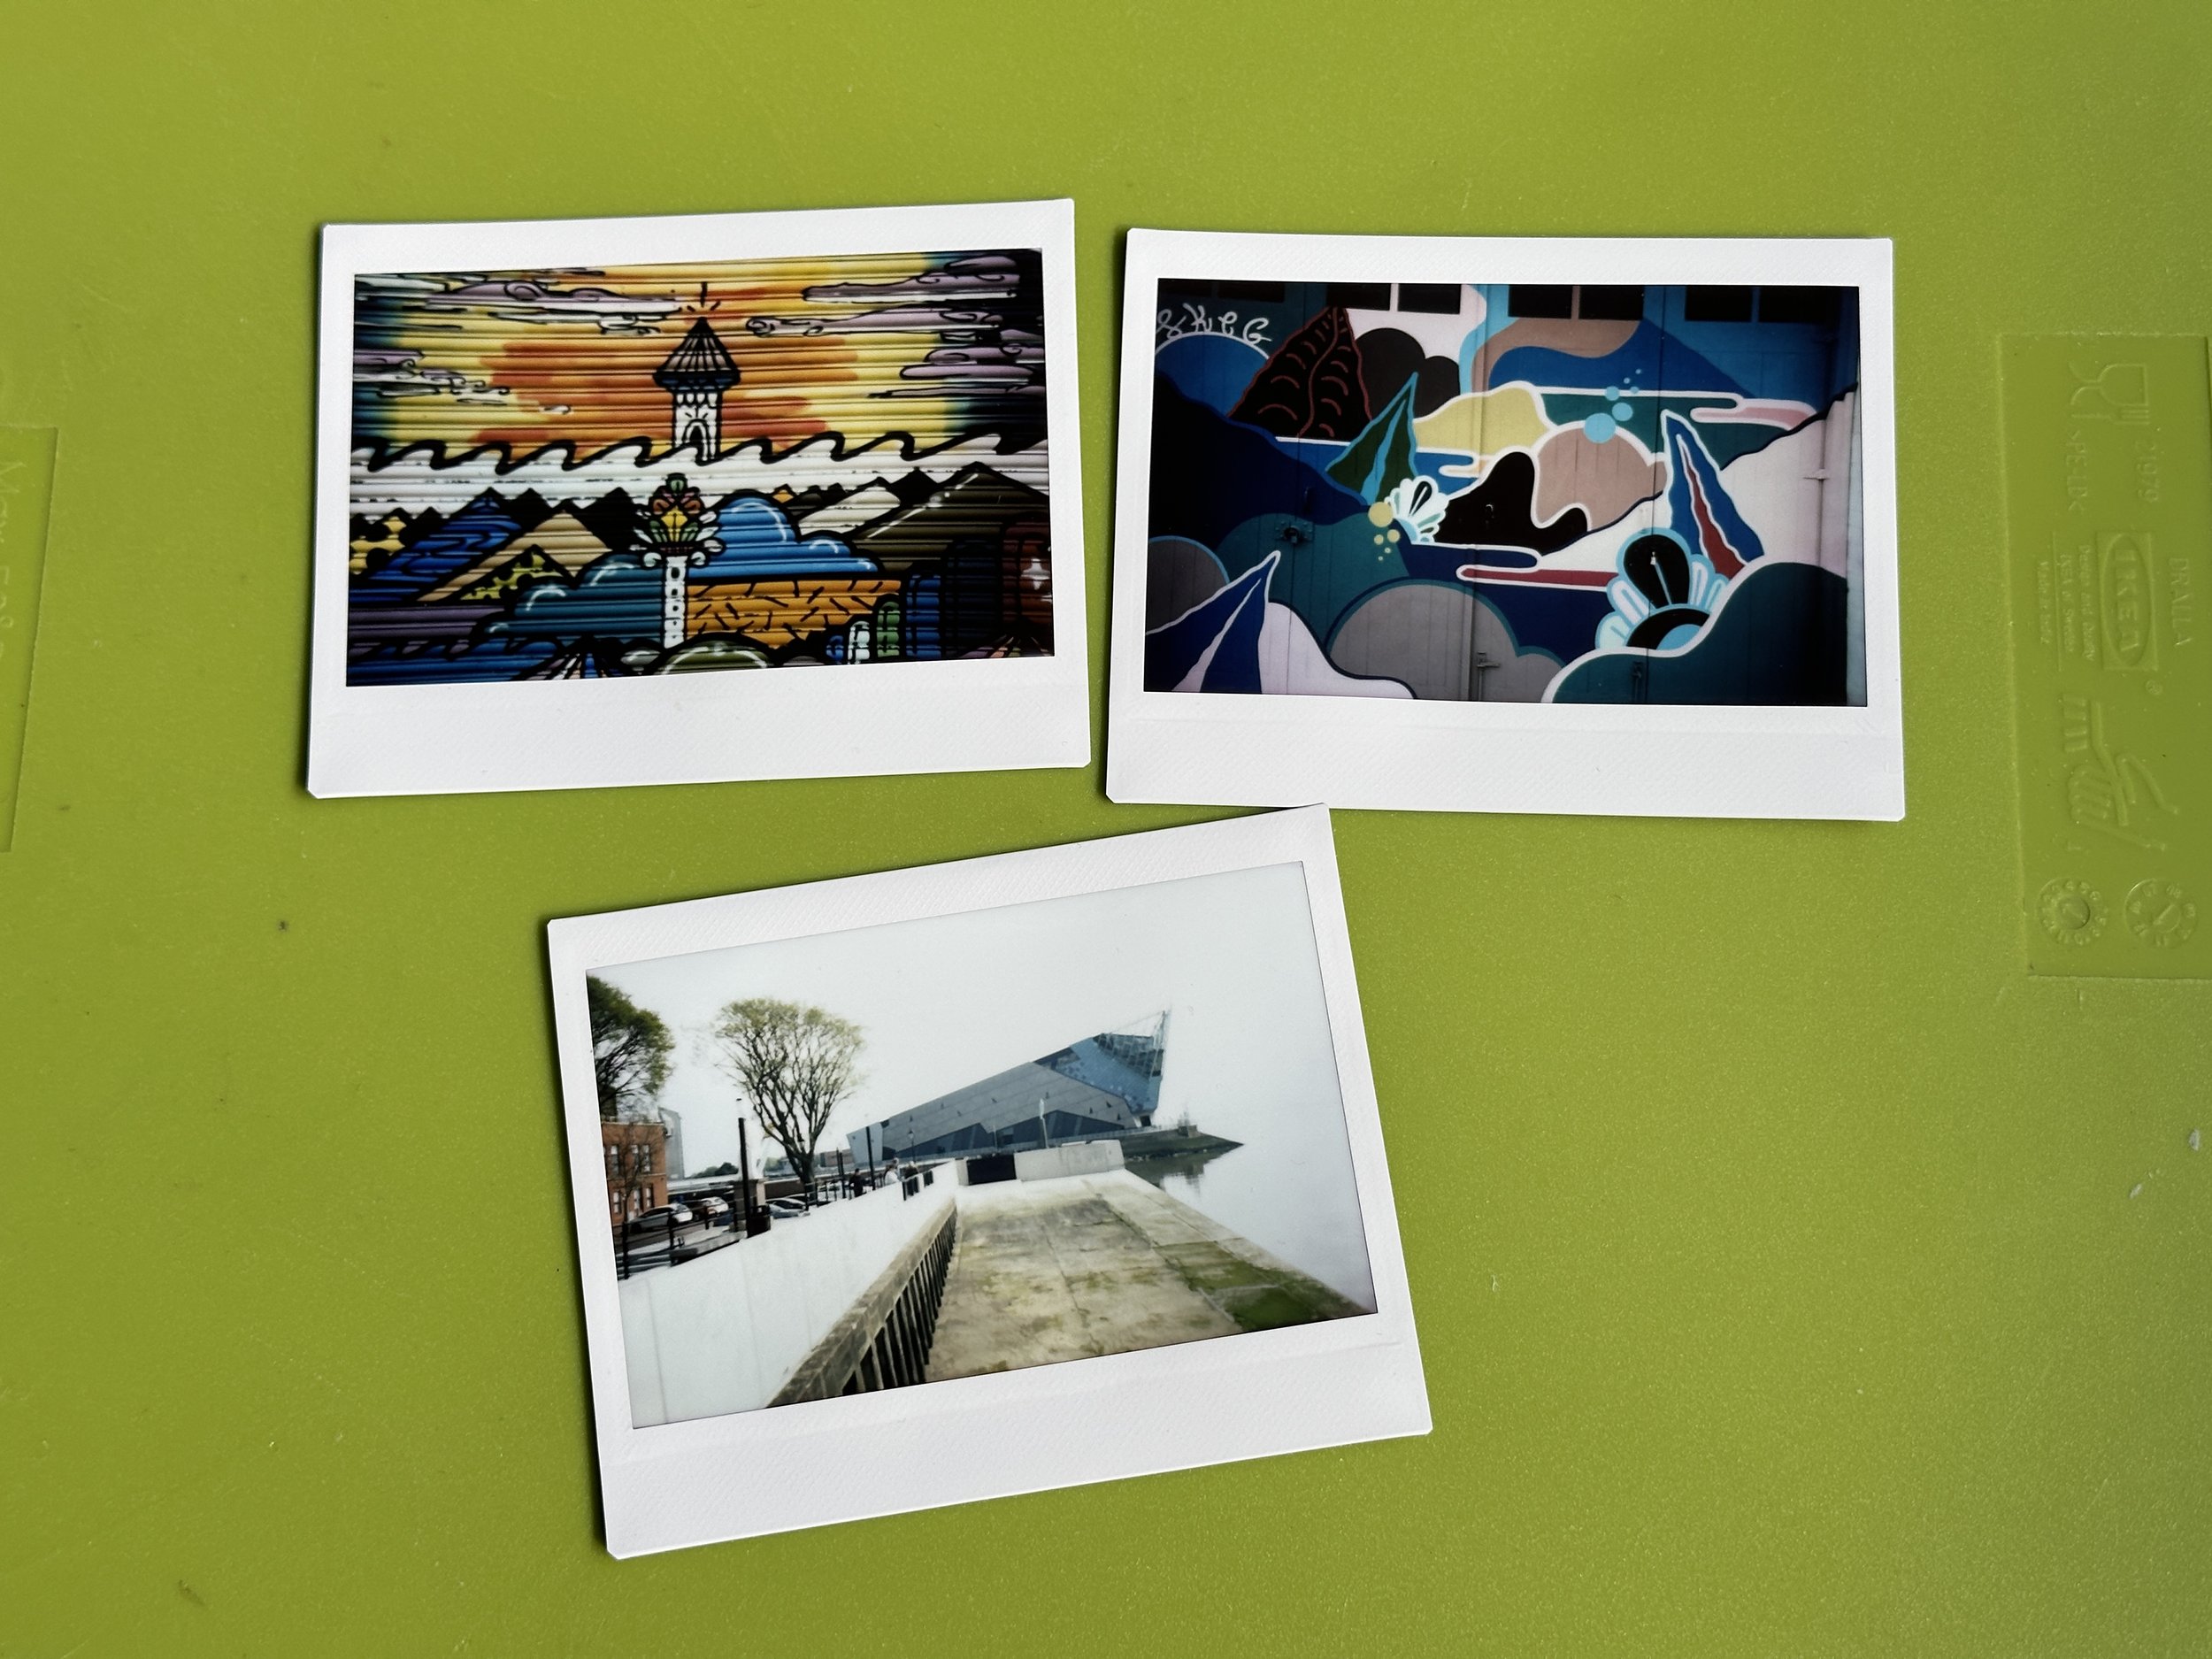
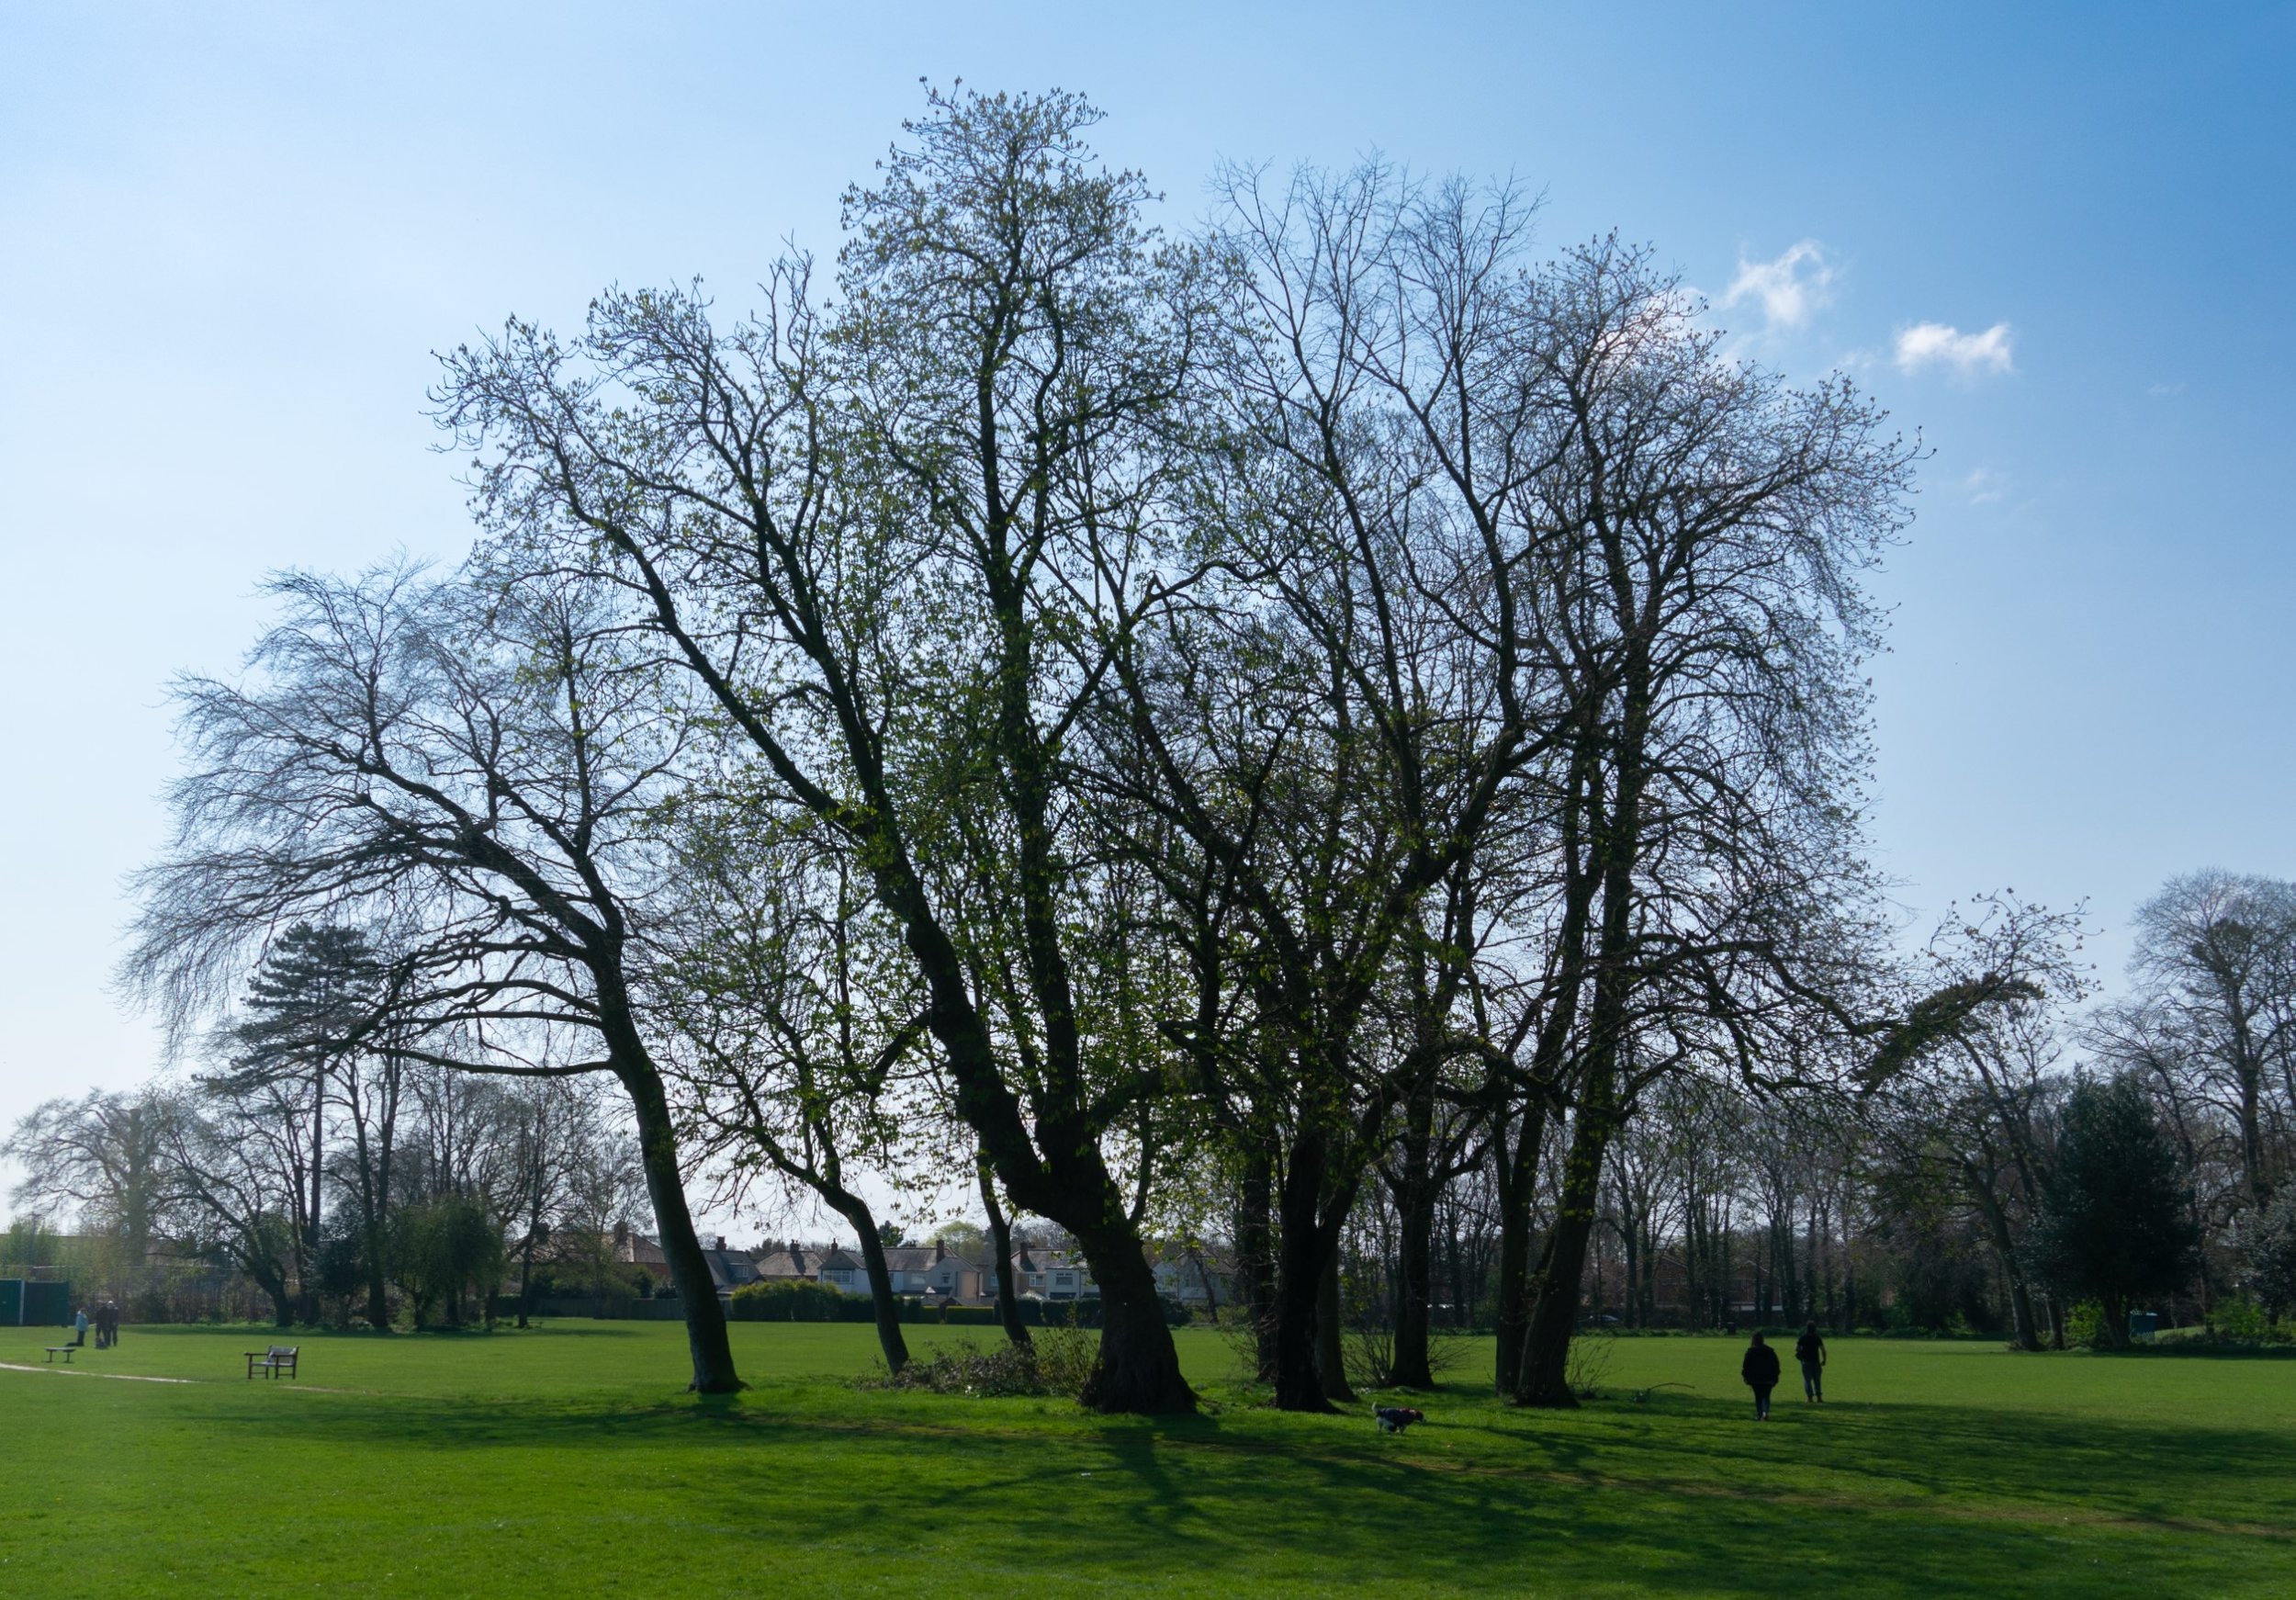
My 3D printed camera leaks light. It works perfectly fine indoors but take it out into the sunlight and things go badly wrong. The pictures have an “other worldly” quality but I’m not always going for that. Number one son suggested that I wait until it gets dark, put a powerful light inside the camera (there’s plenty of room) and then see where the leaks are. The first discovery was that some of my black painted areas were not very black. So yesterday I spent some time painting my hands, trousers, shoes and camera with more black paint. The paint ran out to the point where the spay only worked when held vertically, so I had to hold things in front of the nozzle to paint the bits that needed an extra coat. Hence my attack of “black fingernail”.

Tonight I spent a happy half hour in the dark looking for leaks and applying copious amounts of black tape to leaky joints in the camera. I think it is mostly light tight now.

Adventures in Spot Metering

I’ve bought a new photographic gadget (audience looks shocked - several people at the front faint with surprise and have to be carried out…..). It’s a spot meter. You use it to get the best possible results when you take a photograph. Film can only handle a certain range of dark to light. When you set the exposure of the photograph you want to map the range of the film onto the areas of light and dark in the scene that you want to see in the image.

You look through the spotmeter and it shows the light levels in a tiny portion of the scene. You get the levels of the dark and light regions and then set an exposure that will work over that range. I’ve started with a very simple approach. I’m just finding the darkest area and then setting the exposure to two stops below the reading I get from the meter. The spotmeter gives a reading assuming that it is looking at something which is grey. If I push that grey value down towards black I should get a sensible exposure.

I think I’m getting better

Achievement unlocked: designed KiCad circuit board

I’m rather proud of this. Please don’t find a fault in it…

I’ve finished my design for the chord keyboard. There are lots of key locations but you only put one switch in each column. This makes it easy to make left or right handed versions. I’ve added connections for a tiny OLED screen. You fit the display the the side that you are not using.

Next thing to do is to send it off to get some boards made. Rather exciting.

The KiCad selection filter is awesome

the work of a genius

One of the great things about KiCad is that it seems to have been built by engineers for engineers. This makes it a bit tricky to get your head around when you start, but once you start using it you appreciate they way that things have been built to make using it easier.

One case in point is the amazing Selection Filter you can find in the PCB editor. There are lots of things in your PCB design and it can really tricky to just select one thing when you are editing. Tucked down in the right-hand corner of the editor you can find the Selection Filter. This lets you set what you want to be able to select with the mouse. If you are moving footprints around to place them on the board you only want to select them, so you set it as above. If you want to work with tracks you can do that too. Really useful.

Grappling with KiCad

This is the view from the underneath of the board

One of my new year resolutions this year (apart for the one to by a 4K monitor - ho ho) was to make my own printed circuit board and have it made. The Bluetooth chord keyboard seems to be an ideal device for this. The number of connections is limited. I’m using the wonderful PICO LiPo shim (of which more later) for the power management so I just have to wire up the switches and the display.

I’ve played with KiCad before but I don’t make enough circuit boards to have built up much experience with it. Every time I use it I get tangled up in library management and fretting about schematic designs and footprint files. Today was no exception. I found a PICO-W design schematic on GitHub and tried to add it to my project. This did not go well. The model seemed to be missing important files (or at least I couldn’t find them). All the instructions seemed to imply that what you want to do is add your components to a library on your machine so you can easily add them to projects. I much prefer to make all my projects free-standing so I’ve put all my files in with the designs.

It got a lot easier once I worked out that libraries in KiCad are just folders that contain stuff, and when you browser a library you are just traversing that folder. If you put the files in the right place they just get picked up and all is well. You assign a footprint file to the schematic component and this is picked up by the PCB. Above I’ve used the “push button switch” component in the schematic. I then assign this component to the key socket that I’m going to be using on the board.

Above you can see the PCB view of part of the circuit. If I was using a different component I’d change the footprint file. The schematic and the footprint editor are used together. You can update the design in one from the other. You start by drawing the schematic and then you import that circuit into the footprint editor and start laying things out. After a while it becomes quite fun.

PICO Examples vs OneDrive - Fight!

Size comparison with an SD card. Remember them?

I’m doing some work on the Raspberry Pi PICO. To make things easier I bought a debug probe. It’s tiny. It comes with all the cables that you need for your PICO, but you do need to solder three pins onto your PICO device to connect it up. That is, unless you get the much sought-after “H” versions of the PICO which come with pre-soldered pins and a tiny socket that connects directly using the cable provided with the kit.

It works a treat. Rob’s pro-tip: read the instructions very carefully and do all the steps, otherwise getting it working takes twice as long.

I installed the PICO SDK using a script you can find here. The script works fine, but by default it installs the examples into one of your document folders (or at least it did for me). I use OneDrive for file synchronisation and the next thing that happend (at least on my machine) is that OneDrive went nuts and started uploading thousands of tiny files into the cloud. I don’t remember seeing an option to install the examples somewhere else when I ran the script, but if you do the install I’d strongly recommend you look for it and put the examples somewhere in a folder which is not being synced with the cloud.

20Q - a harbinger of ChatGPT

In 2005 I bought a little toy called 20Q. It’s seems to be able to work out what you are thinking off. It asks 20 questions and then makes a guess. If it gets it wrong it asks 5 more and then tries again. Today we managed to beat it by thinking of “coffee table”. It thought we meant “whiteboard”. So it’s not perfect. But it is darned impressive. And around 20 years ago it was even more so. Of course its not clever. It uses a neural net that was derived from users who logged onto a website to play the game. The developers managed to cram enough of the questions and answers they had harvested from the site into the device to make it work.

I don’t recall it being that much of a sensation when it came out, but it is very interesting to compare it with ChatGPT. Both devices take in lots of information and then respond to queries about it. Both give you the impression that they know what is going on, when really they don’t.

You can’t buy 20Q devices any more, but you can play online and there is also a mobile application. I got out our original device which still works really well and really impressed a certain six year old of our acquaintance.

Final Draft of the book has arrived!

Well, this is exciting. The final draft of Begin to Code: Building Apps and Games in the Cloud has arrived. I’ve got a couple of days to go through it before the book goes to print on Tuesday next week. It’s taken pretty much a year to do. 545 pages plus another 35 or so in the online glossary. Over 50 code samples, 25 sample applications and 67 videos. Phew….

Connected Little Boxes remote control

If you want to change the colour of the “Rob” light in my room you can scan the QR code above and then use the menu that appears to pick a colour. You can also follow this link or click the image.

The site that I’ve built lets you create collections of commands to send to Connected Little Box devices. It also lets you download the firmware into an ESP8266 or ESP32 powered device and then attach it to the Connected Little Boxes network.

I’m going to be making a bunch of videos and releasing all the code for you to play with. It’s going to be fun.

Writing code with Chat-GPT

I’m still playing with ChatGPT. It’s turning out be quite useful. Today I asked it this question:

A command group contains a name and a url value. A command group also contains a number of commands. Each command contains a name, description and url value. A command also contains a number of messages which contain a device identifier, message string, name and description. The data objects are stored in a Mongodb database. I want to edit all these items using a web page generated using Express and using Mongoose to interact with the database elements. What routes and express page templates would I need?

ChatGPT came back with a useful description of what I needed to and I was able to ask more detailed questions about specific elements of the code that it suggested. I was then able to ask for sample code for the Express pages and the route handling code. This was all very impressive. It didn’t save me a lot of work because I’ve already implemented the system as described, but it was interesting to see that it produced a design and some code that was pretty close to what I’d written.

If you need some code writing you might like to try creating a description of what it needs to do and then dropping it into ChatGPT. At the very worst at least you’ll have a good description of your problem, at best you might get something useful back.

Laser Rangefinders are cool

A while back I ordered an awesome little laser rangefinder. It arrived last week and I’ve found an excellent holder for it which I can use on my 3D printed camera. I printed the holder this morning and above you can see my fully tricked out camera. It has a viewfinder, level and now a range finder. It might only be able to take one picture at a time, but it certainly looks the part.

The power of the backend....

I spent a big chunk of today trying to work out why my software was putting two entries into the database whenever a device connected to the system. I’m adding logging so that I can detect if a device is resetting more than it should. After commenting out lumps of code and generally getting very confused I eventually worked out that as well as the test code running on my PC there was of course also a version of my system running in the cloud. So it was responding to device messages and writing to the database alongside the code running on my machine. I think I need separate development and test databases……