Do not try this at home
/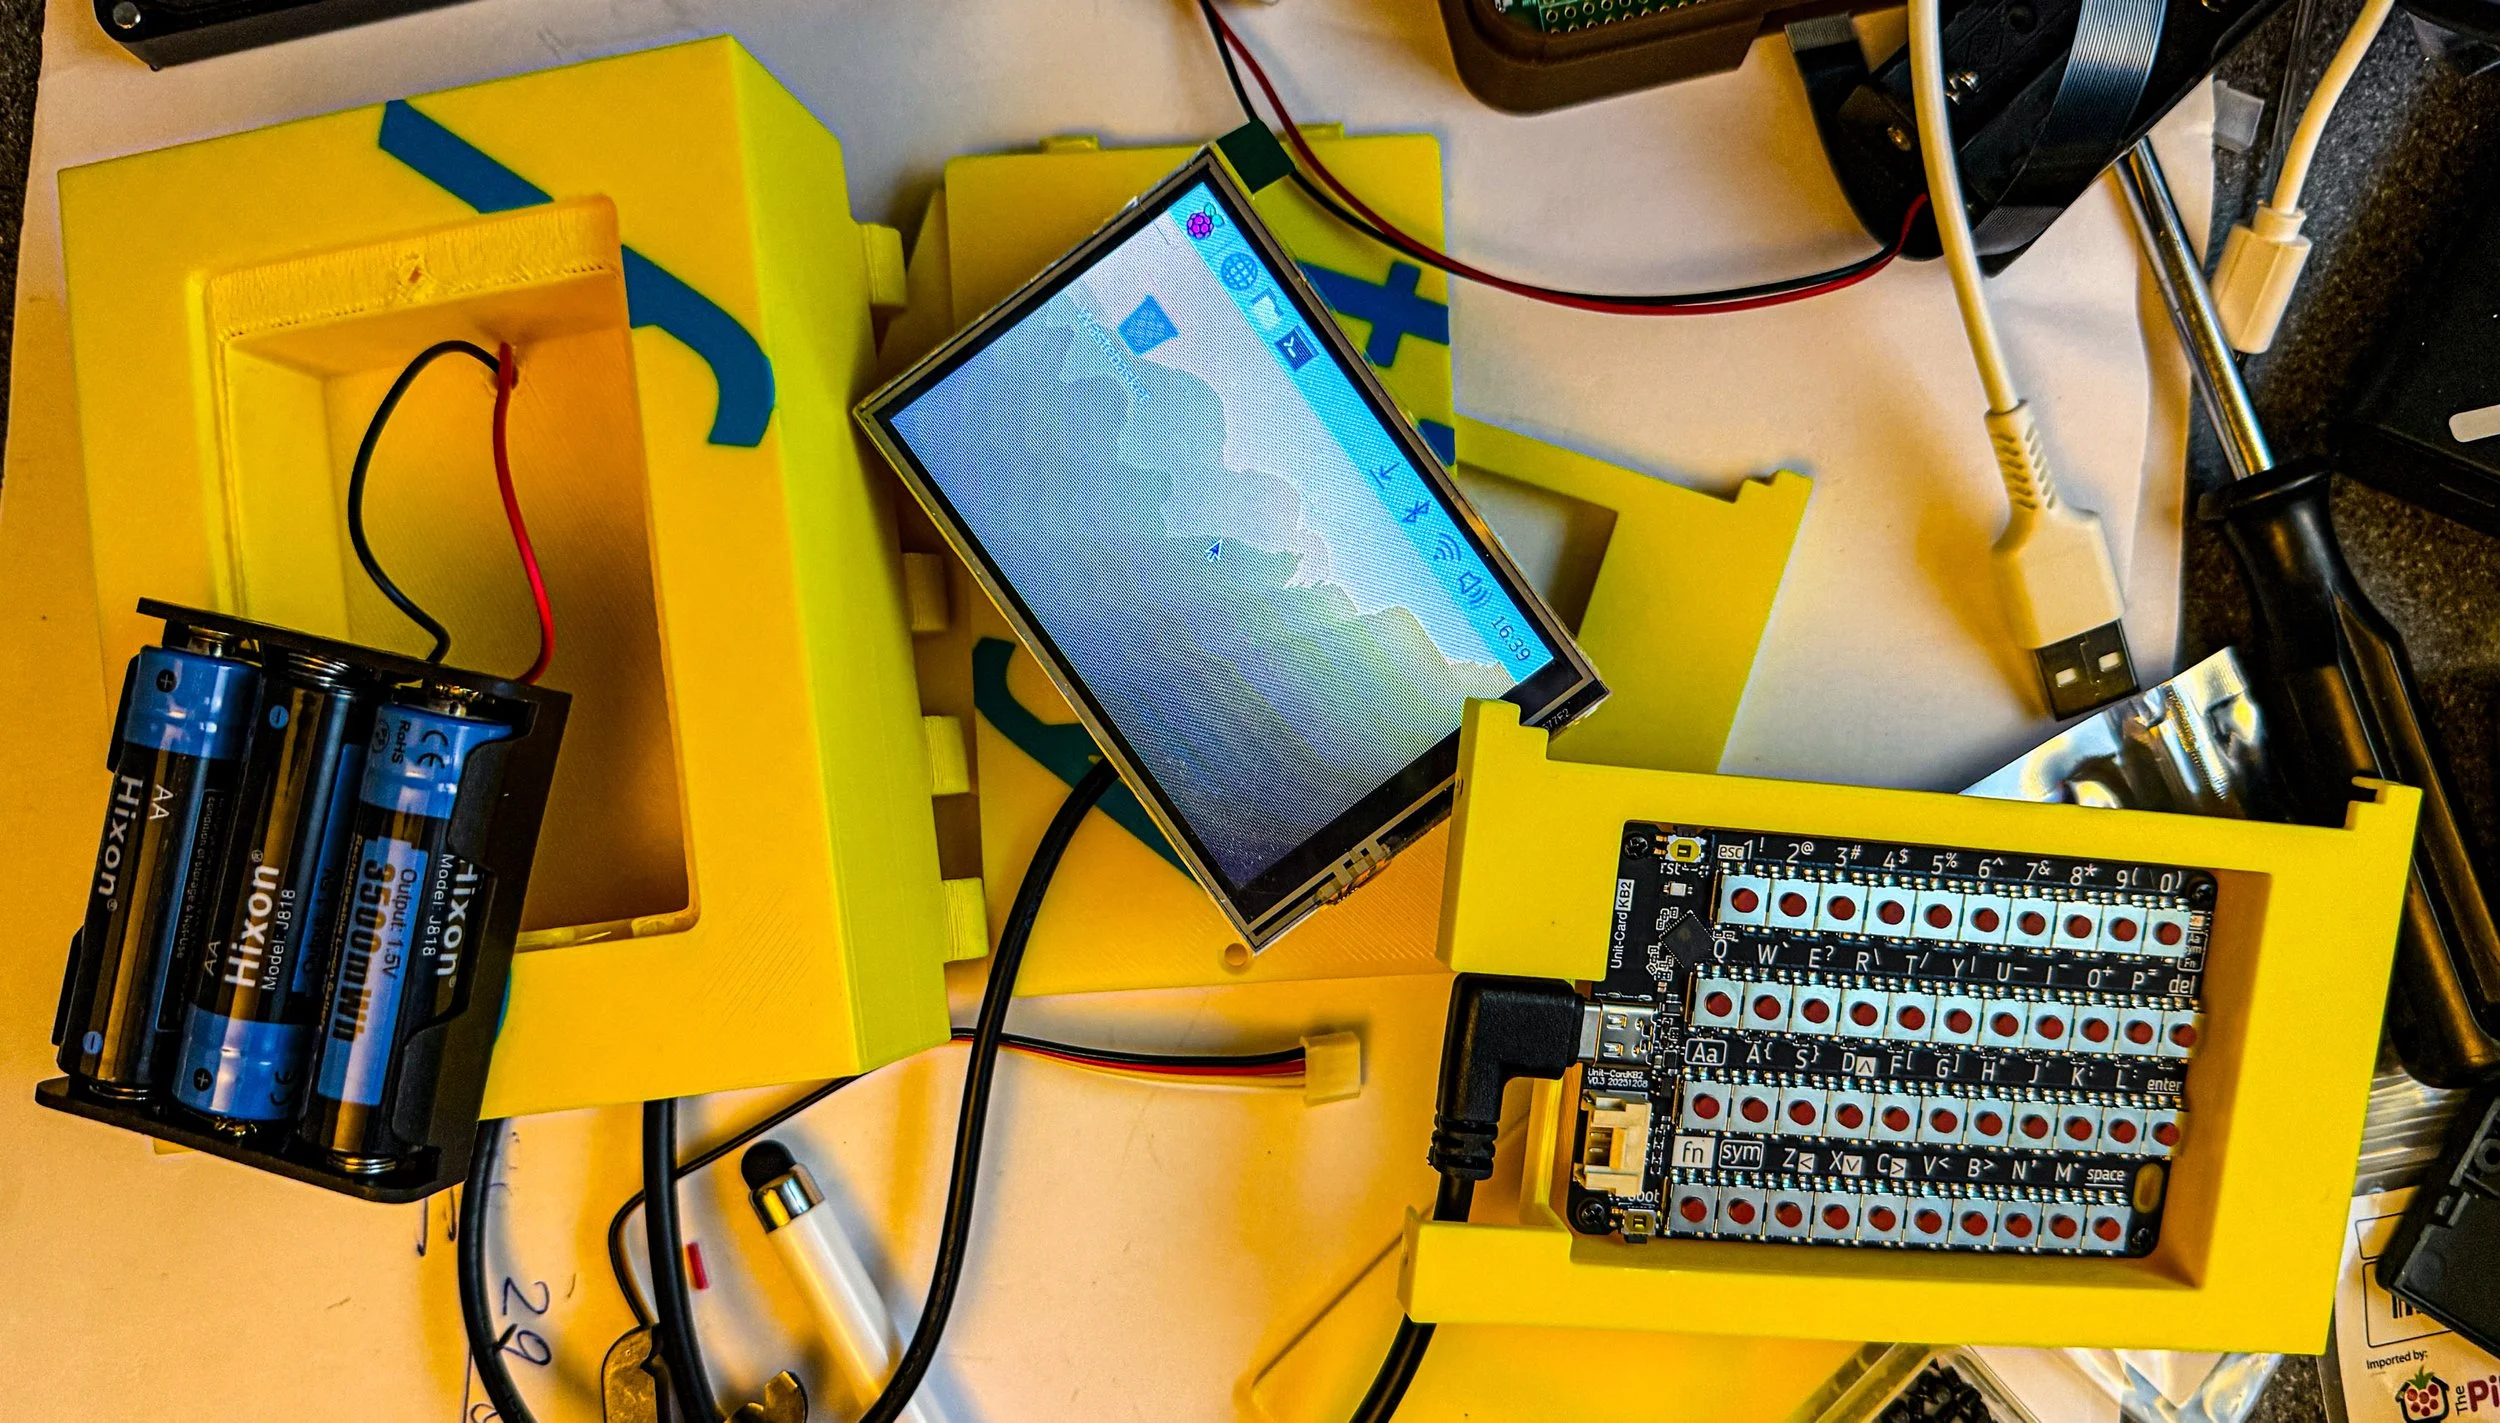
It turns out that it is possible to power a Raspberry Pi, keyboard and screen from three AA batteries. But you wouldn’t like the results.
It turns out that it is possible to power a Raspberry Pi, keyboard and screen from three AA batteries. But you wouldn’t like the results.
This is a great time to be building systems. Unless of course you need to buy any hardware. In which case the device you want will be either super-expensive, unobtainable or both. If you fancy a Raspberry Pi 4 or 5 look forward to some hunting and a big bill at the end. But remember that you don’t always need the latest and greatest. If you want to make something to monitor a bunch of sensors and host a website, or run in a little interactive display, you might find that an older (and much cheaper) Pi will do the trick. You will also have a lot more luck getting one for a not-extortionate price.
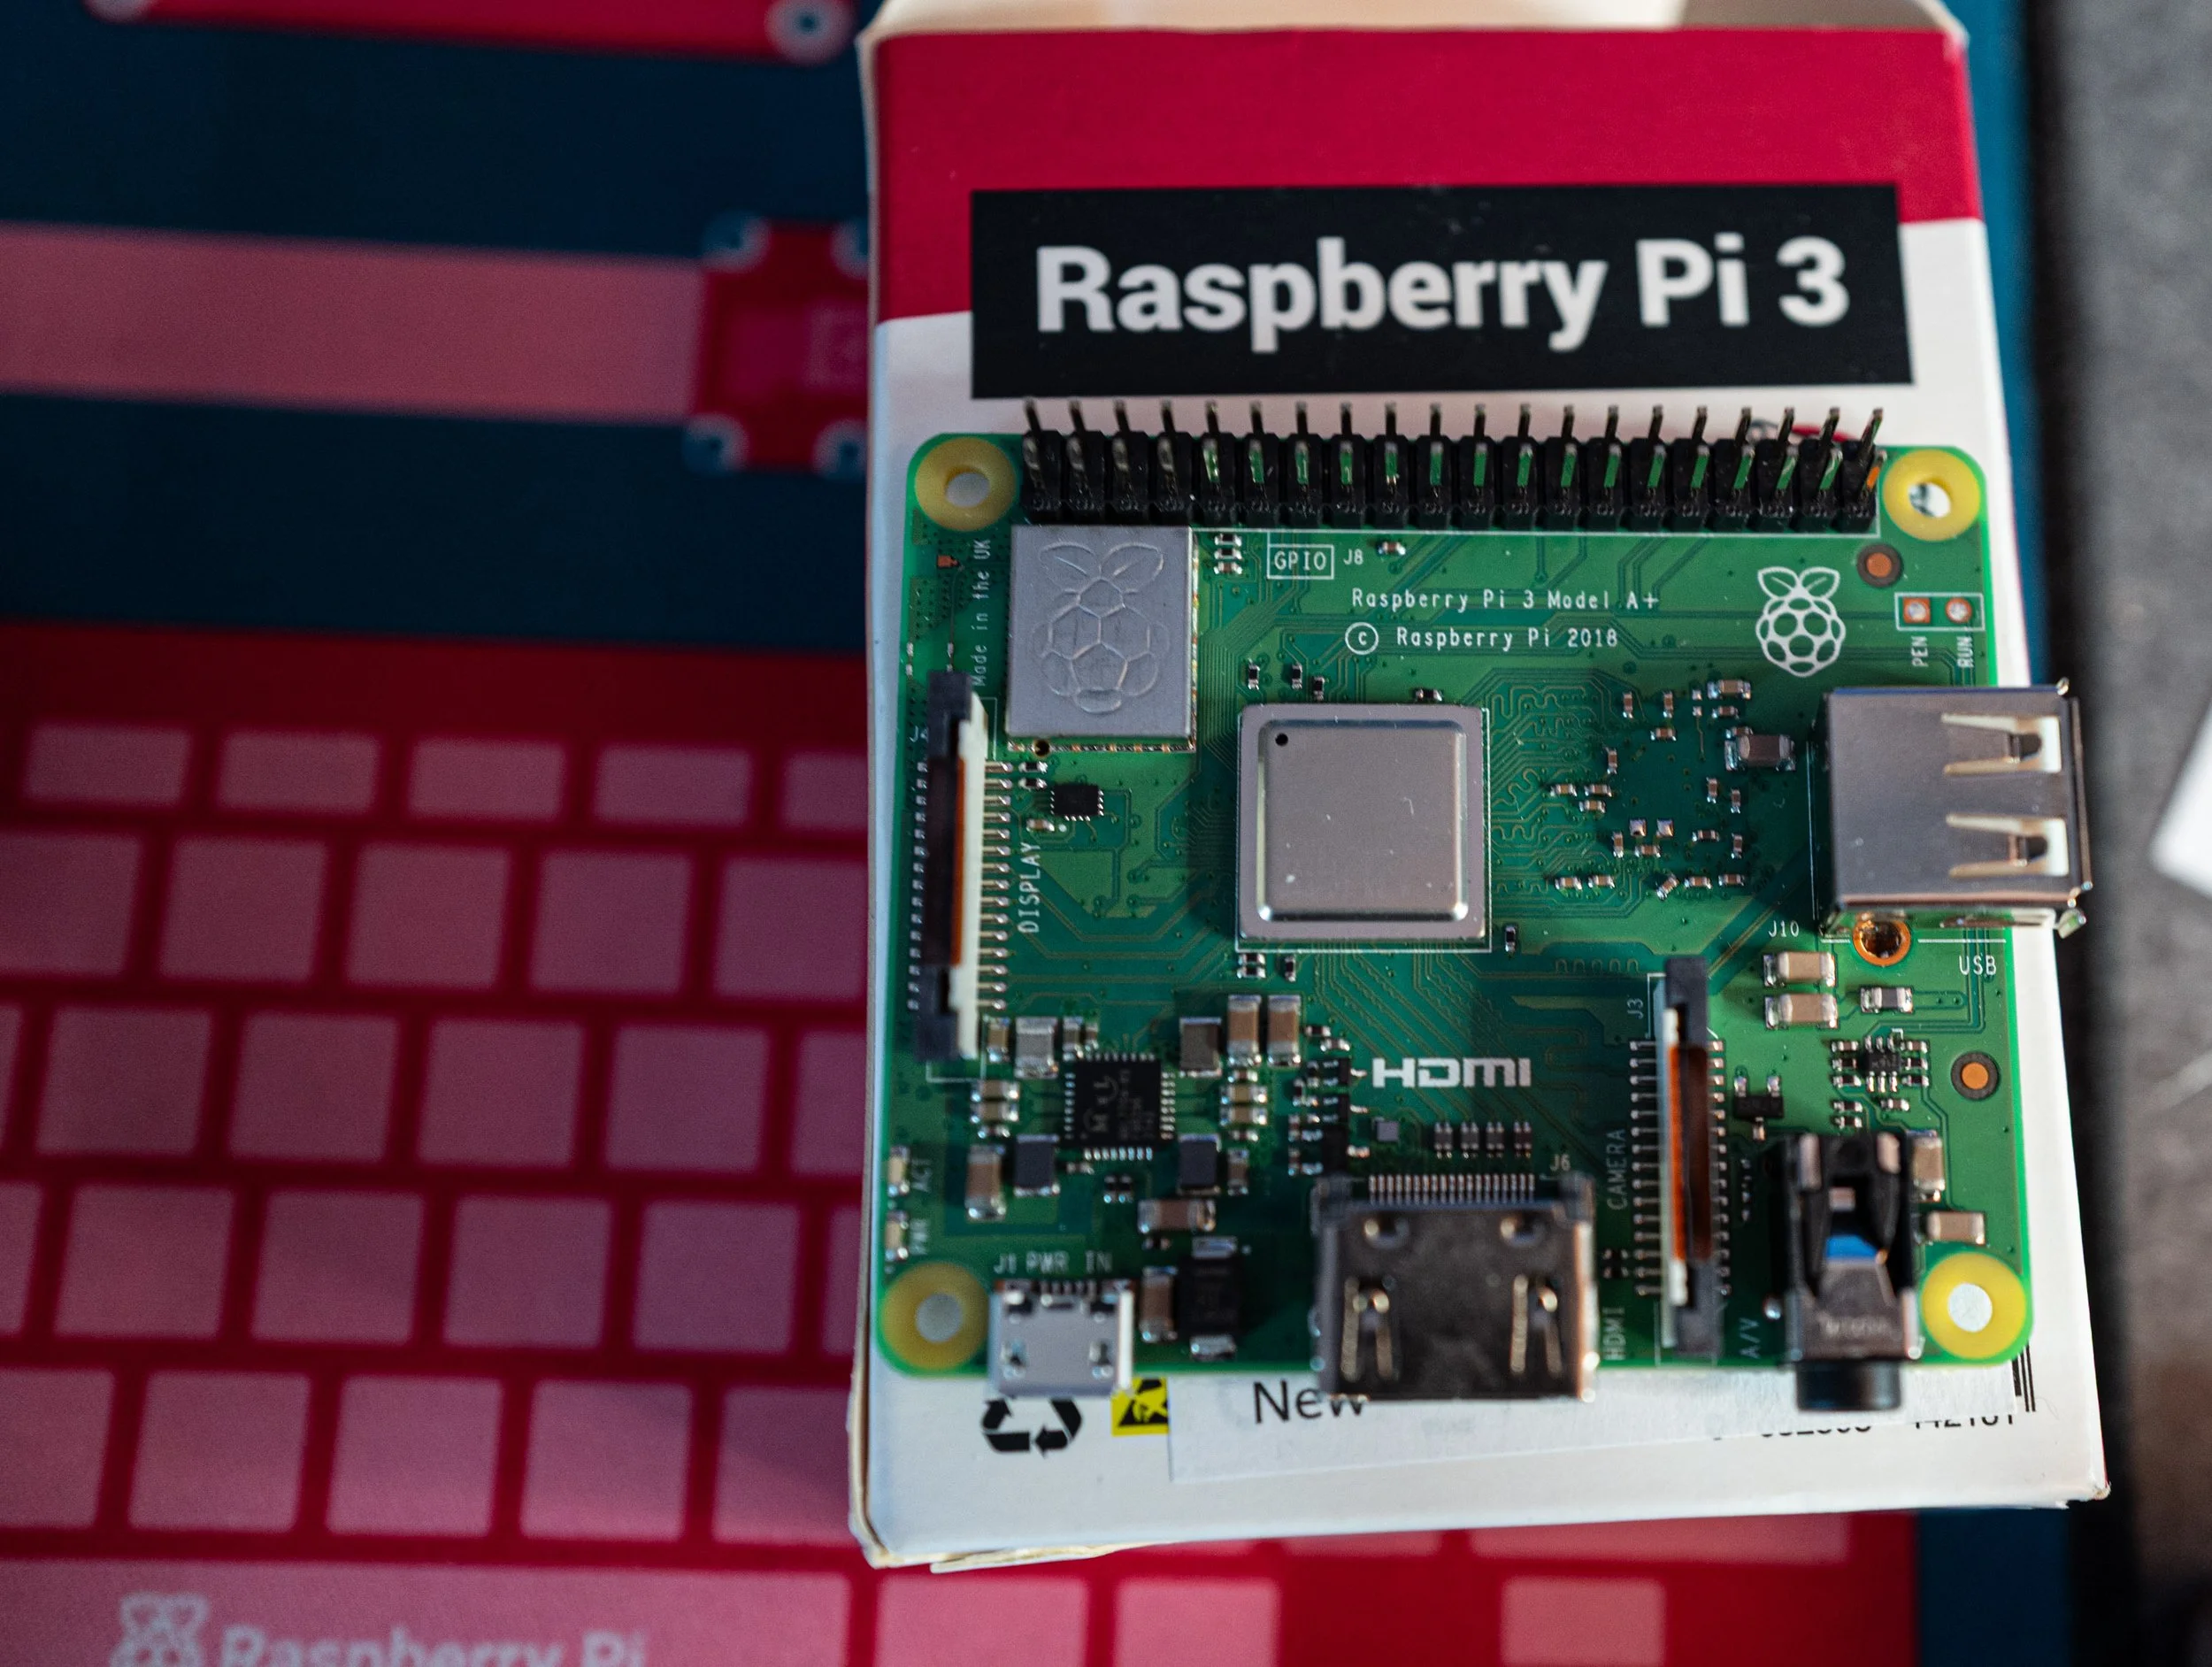
Which brings us to the Raspberry Pi 3a. This is basically the same hardware as my favourite (but totally unobtainable) cheap Pi, the Pi Zero 2 W. But the 3a comes with proper usb and HDMI ports and even an audio output. It is also available to buy right now for a not too eye watering price. Worth a look.
I have a Raspberry Pi server called bigbrain. Normally I can reach this machine on my local network using:
bigbrain.localThis works using mDNS (Multicast DNS). Addresses ending with .local are handled specially. Rather than asking an outside world name server to resolve a name to an address, when a device sees an address ending .local it will use a local service that listens for devices that broadcast addressing information on the local network. On a Raspberry Pi, mDNS is normally provided by a service called Avahi. Avahi announces the name of the machine on the local network so that other devices can find it without needing an entry in a conventional DNS server.
This morning I noticed that bigbrain.local didn’t work any more. This was a bit worrying, it’s the machine that hosts the custard cream server, among other things. I logged in using the Raspberry Pi Connect service and was pleased to discover that the machine was still working. The first thing to I needed to check was whether or not the Avahi service was running. I opened a terminal window and typed:
systemctl status avahi-daemonAvahi was running, but the output contained an important clue:
Host name conflict, retrying with bigbrain-2and:
Server startup complete. Host name is bigbrain-2.local.This explained why bigbrain.local wasn't working. Avahi thought that another machine on the network was already using that name. Rather than create a conflict, it had renamed its mDNS identity to:
bigbrain-2.localMy first thought was that I might have booted another Raspberry Pi containing an old copy of the bigbrain system. If two machines both have the hostname bigbrain, they will both attempt to advertise themselves as bigbrain.local.
But I wasn't certain that I'd actually done this, which raised a slightly less comfortable question: was an unknown device appearing on my network?
Fortunately, the system log provided some more information.
The conflict had occurred at 02:55 on 22 September:
Sep 22 02:55:17 bigbrain avahi-daemon[585]:
Host name conflict, retrying with bigbrain-2
Looking at the Avahi journal around this time showed something interesting. For several minutes before the conflict, Avahi had been repeatedly registering and withdrawing network addresses.
At 02:55:17 it withdrew the addresses associated with both network interfaces and then registered them again. Five seconds later NetworkManager reported:
dhcp4 (eth0): state changed new lease, address=192.168.7.107So something was definitely happening to the network at the same time that Avahi decided there was another bigbrain.
I use a system called eero to provide Wi-Fi access at home. It turned out that the eero network had automatically updated its software earlier that morning. The update caused the network infrastructure to restart. At 02:19 on 22nd September. That provided a much more convincing explanation.
As the network came back, DHCP leases, IPv6 addresses, multicast groups and mDNS advertisements all had to be re-established. The Avahi logs showed exactly this kind of activity.
There was another complication. bigbrain was connected to the same local network in two different ways:
              bigbrain
             /        \
          WiFi       Ethernet
           |             |
    192.168.7.22   192.168.7.107
           \             /
            local network
Both interfaces were therefore participating in mDNS on the same network and both represented the same machine with the same hostname.
Normally this works. But during the disruption caused by the network restart, Avahi apparently saw enough conflicting information to conclude that somebody else was already advertising bigbrain.local.
It did the safe thing and changed its advertised name to bigbrain-2.local.
Once the network had settled, restarting Avahi:
sudo systemctl restart avahi-daemonallowed it to register bigbrain.local normally again.There was no evidence here of an unknown machine or a security compromise (which was nice). The hostname conflict occurred during a period of substantial network reconfiguration following an eero software update. But the incident did expose an unnecessary complication in the server configuration.
The Raspberry Pi was connected to the same LAN using both Ethernet and Wi-Fi.
There are situations where having multiple network interfaces is useful, but a fixed server generally isn't one of them. Two connections to the same network mean two IP addresses, two routes onto the LAN and two interfaces participating in multicast protocols such as mDNS. Most of the time the networking software sorts everything out. When the network is being restarted or reconfigured, however, things can get more interesting.
For a Raspberry Pi being used as a server, the simplest rule is therefore:
If you have a wired Ethernet connection, use Ethernet and turn WiFi off. If you need WiFi, use WiFi and leave Ethernet disconnected. Don't routinely use both to connect the server to the same local network.
I’m going to disable the Wi-Fi on bigbrain. Networking is complicated enough without giving the packets a choice of doors.
The black and the red wires are nice and chunky
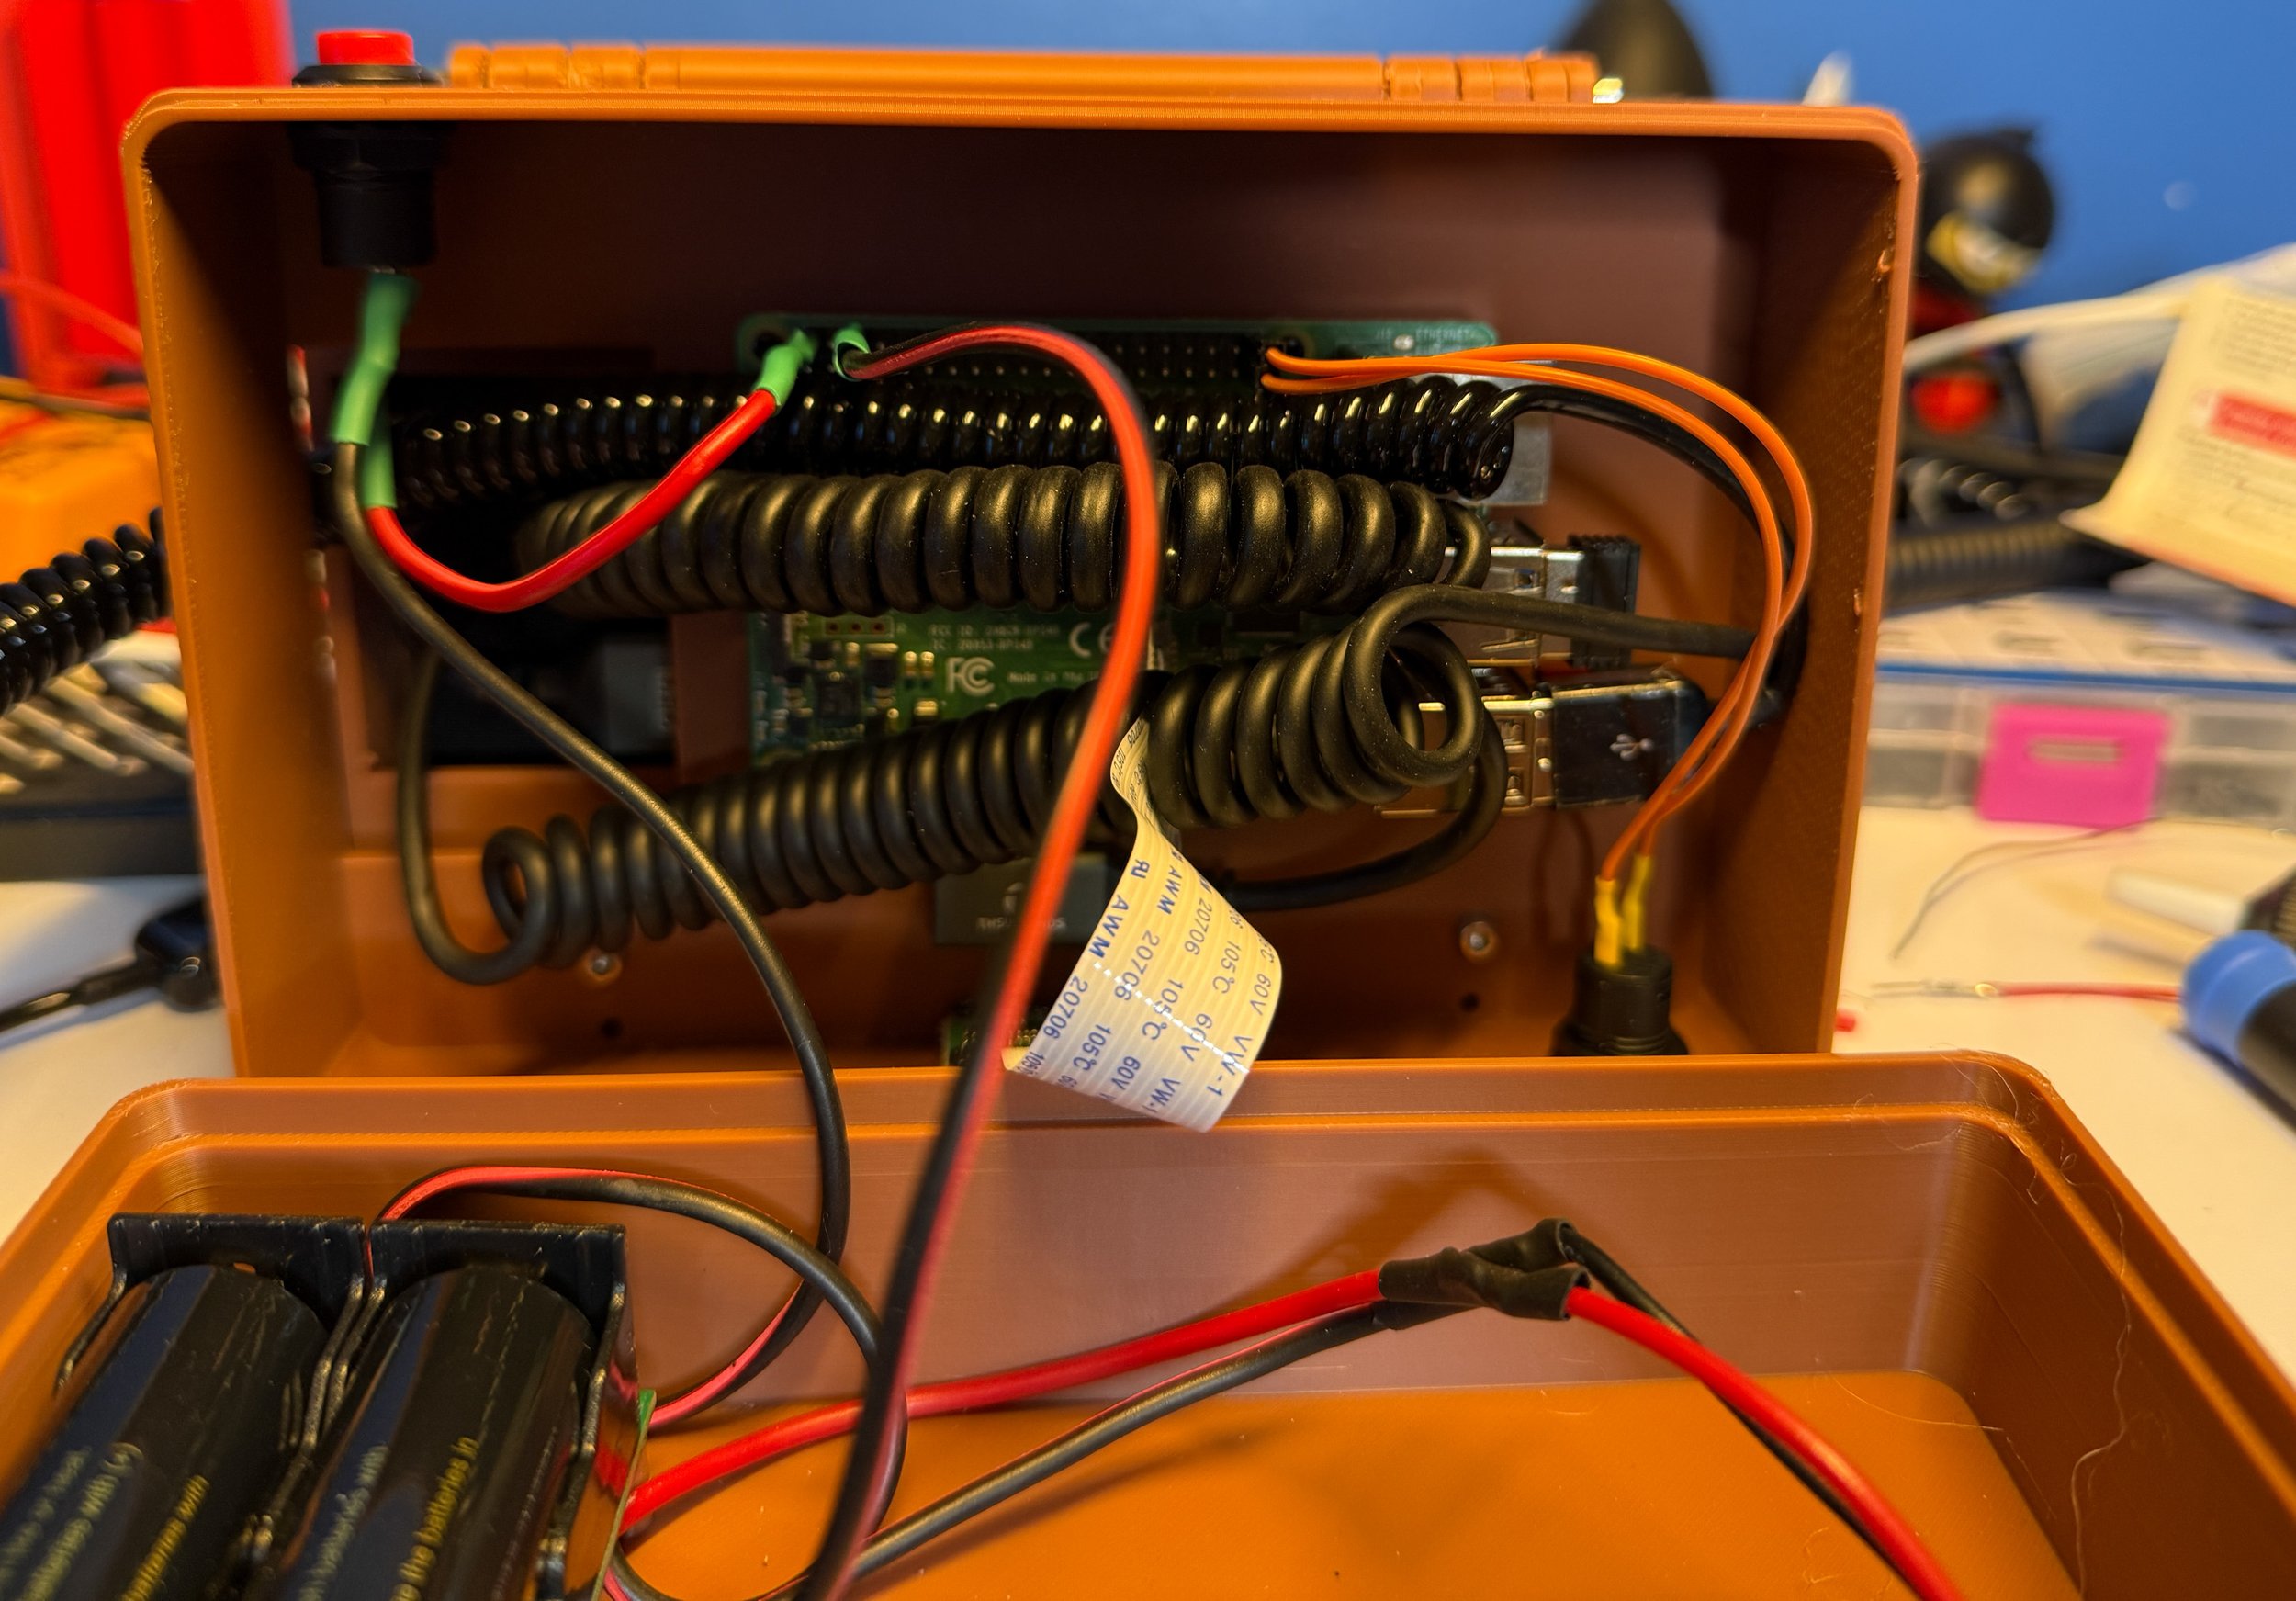
The “Bourbon Classic Camera” is very nearly finished. It’s been in this state for the last few weeks as I add a range of “finishing touches” including things like a screen that works and a power supply. Today I was wiring in the UPS unit that I’m using to power the Pi directly and it didn’t work. That is, it would get into the boot process, reach the point where the screen is supposed to light up and then stop. Oh well. As I’ve said before, power supplies are always a problem.
I’m doing something mildly naughty, in that I’m putting the power into the Pi via the 40 pin “hat” connector. This works, but it bypasses all the funky power negotiation that you get when you use the usb c connector. It means that you can provide five volts, and only five volts, and they had better be stable and able to deliver the current the Pi needs.
Mine weren’t. Mainly because I’d used dPont cables. These are fine for moving data around (although personally I prefer to wire wrap) but they just don’t have the copper thickness for power. The wire ends up being a resistor in series with the power supply. This means that the more power the Pi wants, the lower the supply voltage gets.
In the end I used some speaker cable from way back (another reason never to throw anything away). I also soldered pin connectors directly onto the wire and made sure that they gave a good positive connection. All is well now, and the Pi gets through the boot process and works a treat. So, if the device in your build is running slow or not running at all, you might want to think about using thicker wires for the power.
My AI Picture Ink Display has been running for a few months and it’s been nice to see a different crazy picture appear every now and then. But recently it has taken to failing. I, of course, instantly assumed that my software was broken, but it turns out to be a hardware issue with the memory card in the Raspberry Pi. The Stable Diffusion program that makes the pictures works the file store very hard, repeatedly reading and writing data, and this can result in the storage device failing. I diagnosed the problem by taking a look at recent Linux kernel messages:
dmesg -T | grep -Ei 'error|ext4|mmc|i/o|corrupt'The statement above filters the error messages for ones about storage issues. In this case, the important message was:
I/O error, dev mmcblk0, sector 22491848 ... (READ)mmcblk0 is normally the Raspberry Pi's microSD card. An I/O error at this level means Linux attempted to read data from the storage device and the operation failed. The most precious thing on any computer is the data, in this case the pictures that had been generated, so while the system was still working I needed to get those files off the machine. I used a USB memory stick. I plugged it in, waited a few seconds for the Pi to notice it, and then checked to see what devices were available.
lsblk -fI got this:
That told me that the usb memory key was working and had the path of “/media/rob/HP v100w” (note that this contains a space). You will get a slightly different path. Now I could copy the contents of the generated_images folder onto the USB device.
cp -av /home/rob/generated_images/ "/media/rob/HP v100w/"The quotes around the destination are necessary because the USB drive's name, HP v100w, contains a space. The trailing / on /home/rob/generated_images/ means copy the contents of the directory into the destination directory. Once the copy was complete, the next thing to do was make sure that any cached writes to the usb drive were complete:
syncThen then I could unmount the USB drive:
sudo umount "/media/rob/HP v100w"Now I had a copy of the folder on the drive. If my Pi was running with the desktop this would have been much easier, I could have done it all in the File Explorer application. But the image generator runs “headless”. One tip: if the USB drive is not picked up when you plug it in, try using a different USB port. You should see blue and black usb sockets. I’ve found that for usb drives the black ones work best.
As for the suspect memory card; once I’ve got all my files off it the card is going in the bin. And I’m going to look into running the program on a device with a “proper” solid state disk. This will go faster and should not be susceptible to wear like this.
A little while back I wrote a blog post telling folks (and future me) how to set up secure sockets so that you can log into remote devices without passwords and create Visual Studio Code remote sessions. Here’s the follow-up, which tells you how to use your SSL keys to give a device access to your private GitHub repositories.
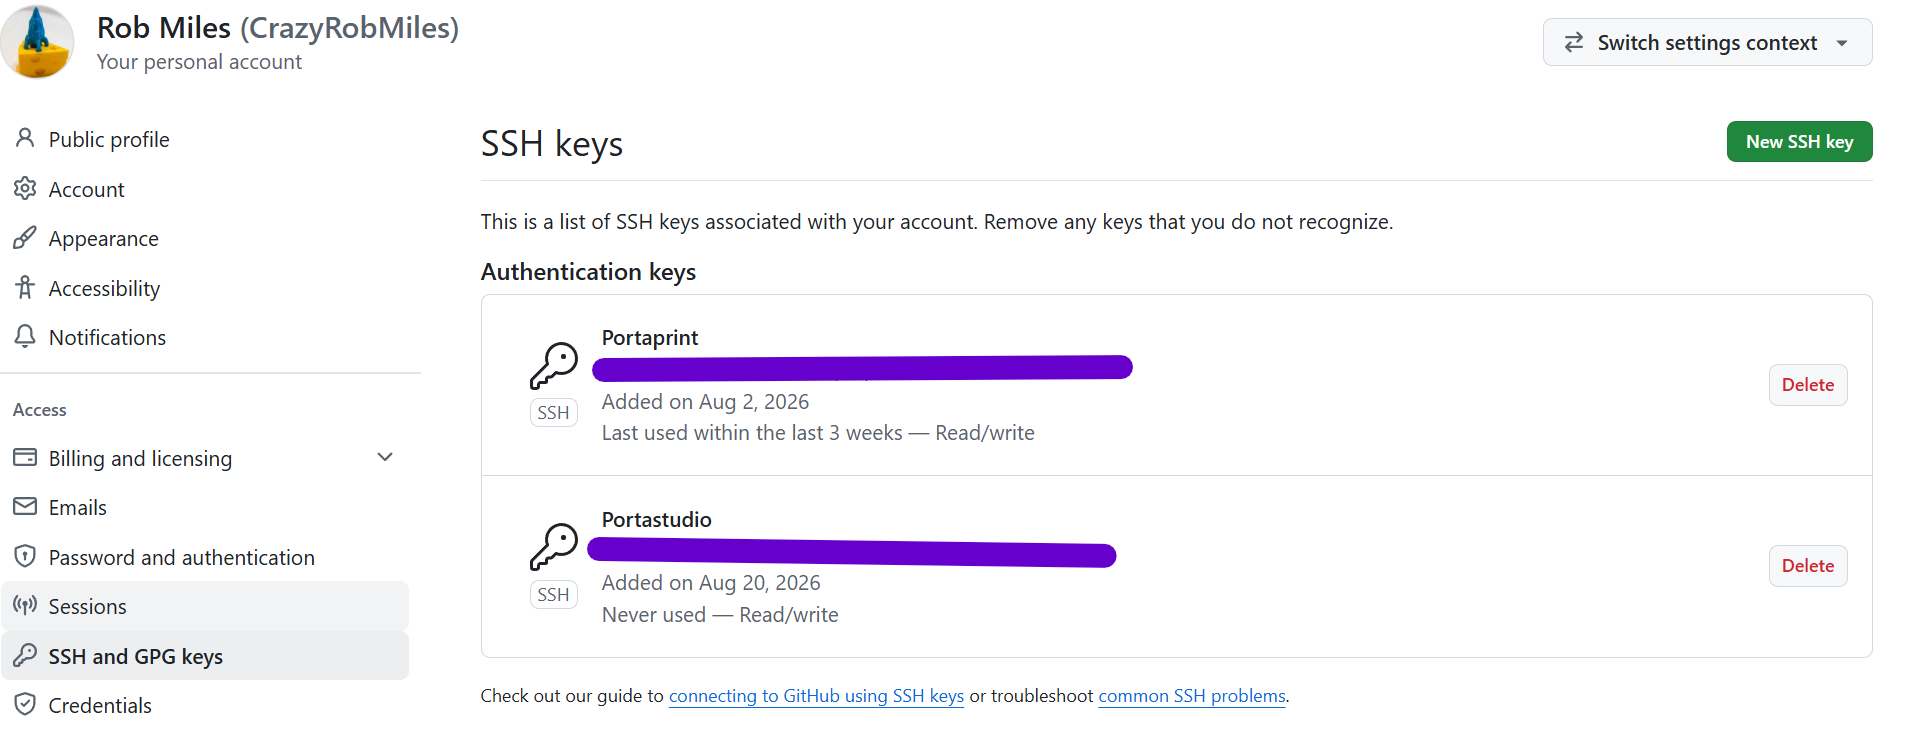
I like to keep my repositories private until I’ve got them kind of sorted. This makes it tricky if I’m deploying to a newly set up remote Raspberry Pi, since it needs GitHub credentials to access private stuff. The best way to solve this problem is to put a copy of the device SSL key onto your GitHub account. It’s easy to do and works a treat. Start by going to GitHub and opening your personal Settings (the one at the top right, not the settings for a particular repository). Then click SSH and GPG keys.
You can see my keys here. Now click New SSH Key. A dialogue will appear asking for two things: the name for the key and the key itself. I use the machine name as the name. You can find the key in the file id_ed25519.pub in the local .ssh folder of your new machine. This file was created when you did ssh-keygen to set up ssh on the machine. Enter the info and close the dialogue. Once you’ve done this you can use the ssh form of git clone to grab private repositories from GitHub.
git clone git@github.com:CrazyRobMiles/custard-cream-camera.git
You’ll need to put your GitHub username and your repository name into the above command. Note that the https way of referring to repositories won’t work.
GitHub will send you an email to tell you when you’ve set one of these up. It also lets you track the last time the key was used. You can remove keys that you are not using.
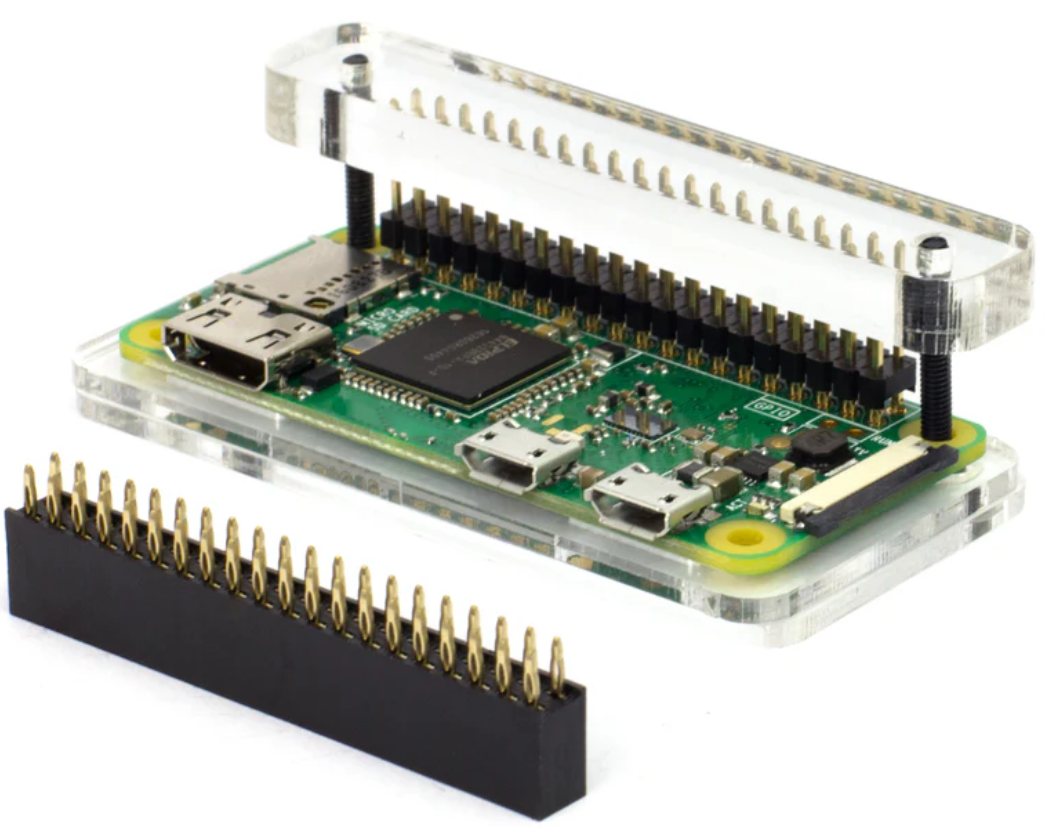
I thought I’d add some lights and whatnot to my printer server. This means adding header pins to my Pi. I thought I’d use the hammer headers from Pimoroni rather than do soldering. I bought a bunch a while back because they were reduced. They are reduced at the moment too.
The idea is simple enough. Pop the Pi on the jig, insert the headers, pop the cover thing on and then bash it with a hammer until the pins are in. Except that I got a bit too keen and bashed the pins all the way through the board (don’t do this). “Never mind”, I thought. “I’ll just pull the pins back a bit and all will be well”. It wasn’t. I then spent an entire morning trying to work out why my pixels weren’t lighting up before discovering that if the pins go all the way through the board they don’t make proper contact. If you have a go with these make sure that you arrange things so that the pins don’t go very far out of the other side of the Pi.
I got the board to work by soldering all the pins into place. And on the journey to this I discovered lots of fun things about controlling neopixels from Python on a Pi. Pro tip: your code has to run in supervisor mode. It really made me want to go back to using a PICO where it all just works.
Anyhoo, I’ve got my leds working now, which is nice.
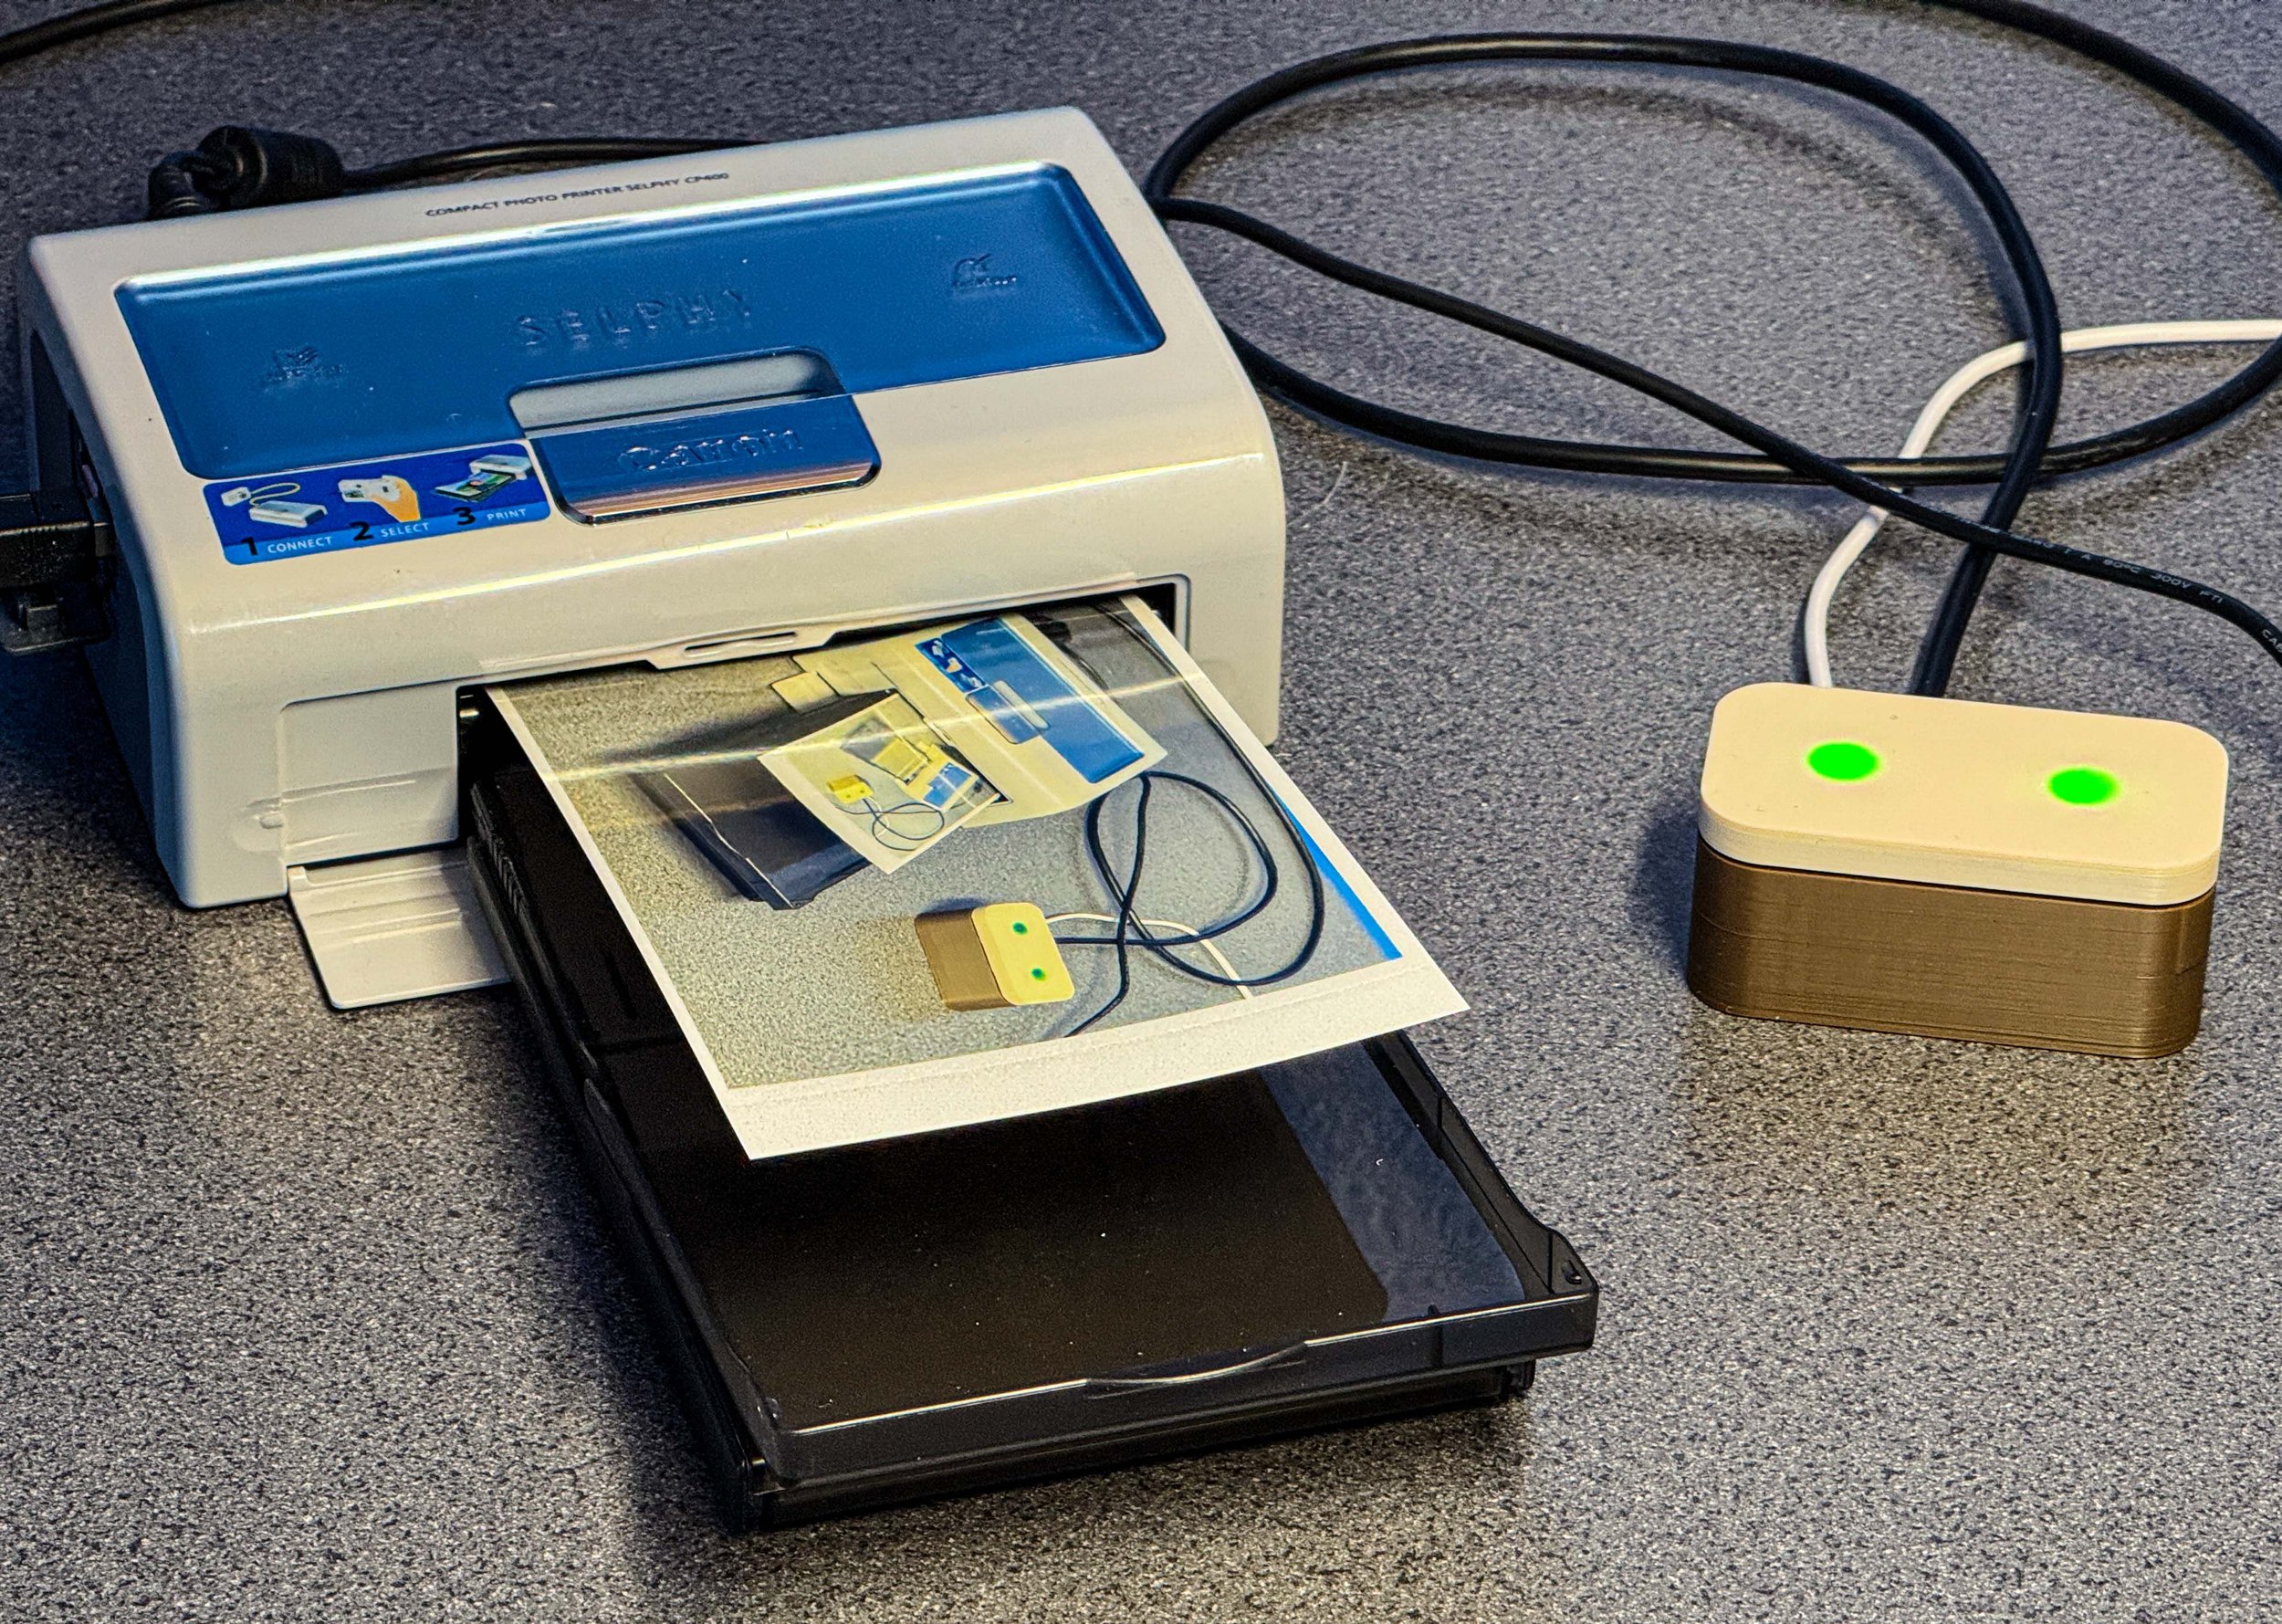
I’m writing an article about using a Raspberry Pi as a printer server. I’m using the cheapest Raspberry Pi, the Pi Zero W. It’s a great way of making cheap colour printing available to your household. Above is a picture of a printer printing a picture of a printer printing a picture of a printer. The thing on the right is the Pi powered print server. Two green lights is a good thing.
Secure Sockets are super useful. And it is worth knowing how to set them up for use on a Raspberry Pi. I’m just documenting these things here so that I can refer back to this post whenever I need to remember what to do.
The situation is this: You’ve just set up a new Raspberry Pi using the wonderful Raspberry Pi Imager software. You’ve set the machine name, enabled SSL and configured the WiFi so that the Pi will wake up and connect to your network. Next you need to make it easy to connect to. Let’s start with the first part, creating an SSL identity on your new Pi.
You perform this first step on your Pi. You’re going to make a folder to hold keys and a unique key that will identify this device. The first thing you do is connect from the console on your computer (in my case a Windows PC) to your new Pi. If you’ve set the Pi up to use SSL and Password authentication (which is what I do) then you open a command prompt on your PC and type:
ssh printserver.local -l rob
The ssh command above has two arguments. The first is the network address of the machine on the local network. This is the machine name followed by “.local”. I’ve just made a new machine called printserver, so I’m going for printerserver.local. The second argument (after the -l - which is lower case L by the way) is the username that you created on the Pi. If you leave this out the ssh call will use the username from the machine you are using to connect. If you call yourself the same name on everything this will work, but it didn’t for me. I created the pi with the username “rob” because I am an egomaniac. Your name might be different.
After you have entered this command you will be asked to confirm that you want to add this machine in your local key store on your PC. You do, so say yes. Next you will be asked for the password for the user on the Pi (in my case the password for rob) and then you will be logged in as a terminal user on the machine.
Now you want to give your new machine a unique identity in the world and set up a key storage location. Issue the command below:
ssh-keygen
You will be asked a series of questions. Just press return after each of them. Now you have a key storage on your device, along with an SSH key for that device. Now you switch back to the terminal on your PC. What you are going to do now is copy the key from your PC onto your new Pi. This is good because it means you’ll be able to open an SSL ternal session without entering a password. It’s also good because any programs that want to use SSL (for example Visual Studio Code remote terminal) will be able to work seamlessly.
cat ~/.ssh/id_ed25519.pub | ssh rob@printserver.local 'mkdir -p ~/.ssh && cat >> ~/.ssh/authorized_keys'
This is one long command. For the record, cat is a command to copy files, I sent mine using the username rob and to the device printserver. You will probably need to change your command. This pre-supposes that you already have keys on your computer to send. You can use the command ssh-keygen on your computer to set that up first if you need to.
If you have done everything right you should be able to login using the ssh command we saw at the top of the post and not be asked for a password. Which is nice.
I quite like dew-lumen-shell
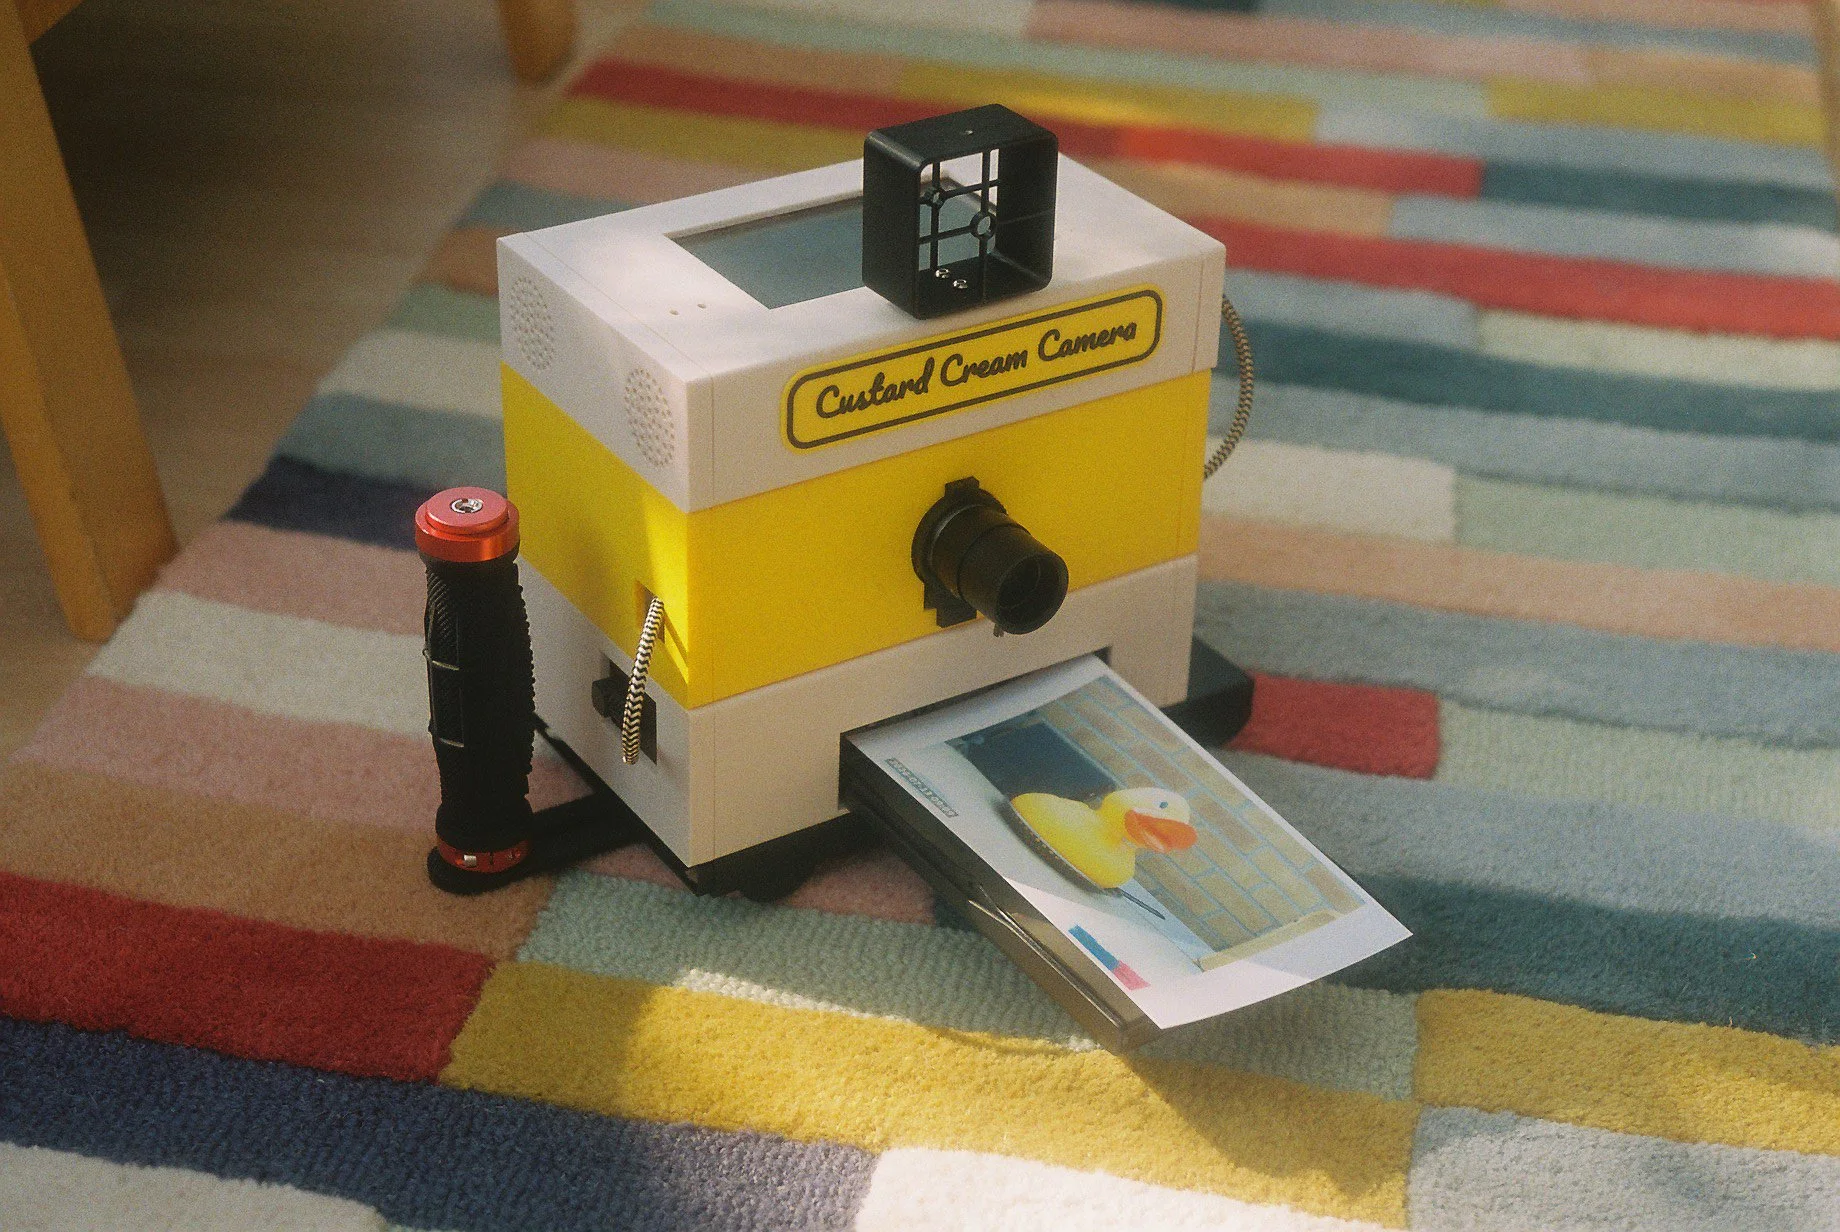
The Custard Cream Camera is backed by the Custard Cream server, which you can find at: https://custardcream.cam/ The camera has a “publish” command that sends pictures to the server for the whole world wide internet to scrape.
You find pictures by their unique three word address or you can just view random shots. The really interesting thing about this server is that it is running on my desk. I’m using a Raspberry Pi 5 to host everything. It’s connected via a Cloudflared connection which does all the clever mapping between the domain name (custardcream.cam) and the node.js application that hosts the site.
It really is very easy (and surprisingly cheap) to get a web presence using a tiny computer you might already own and a little bit of configuration.
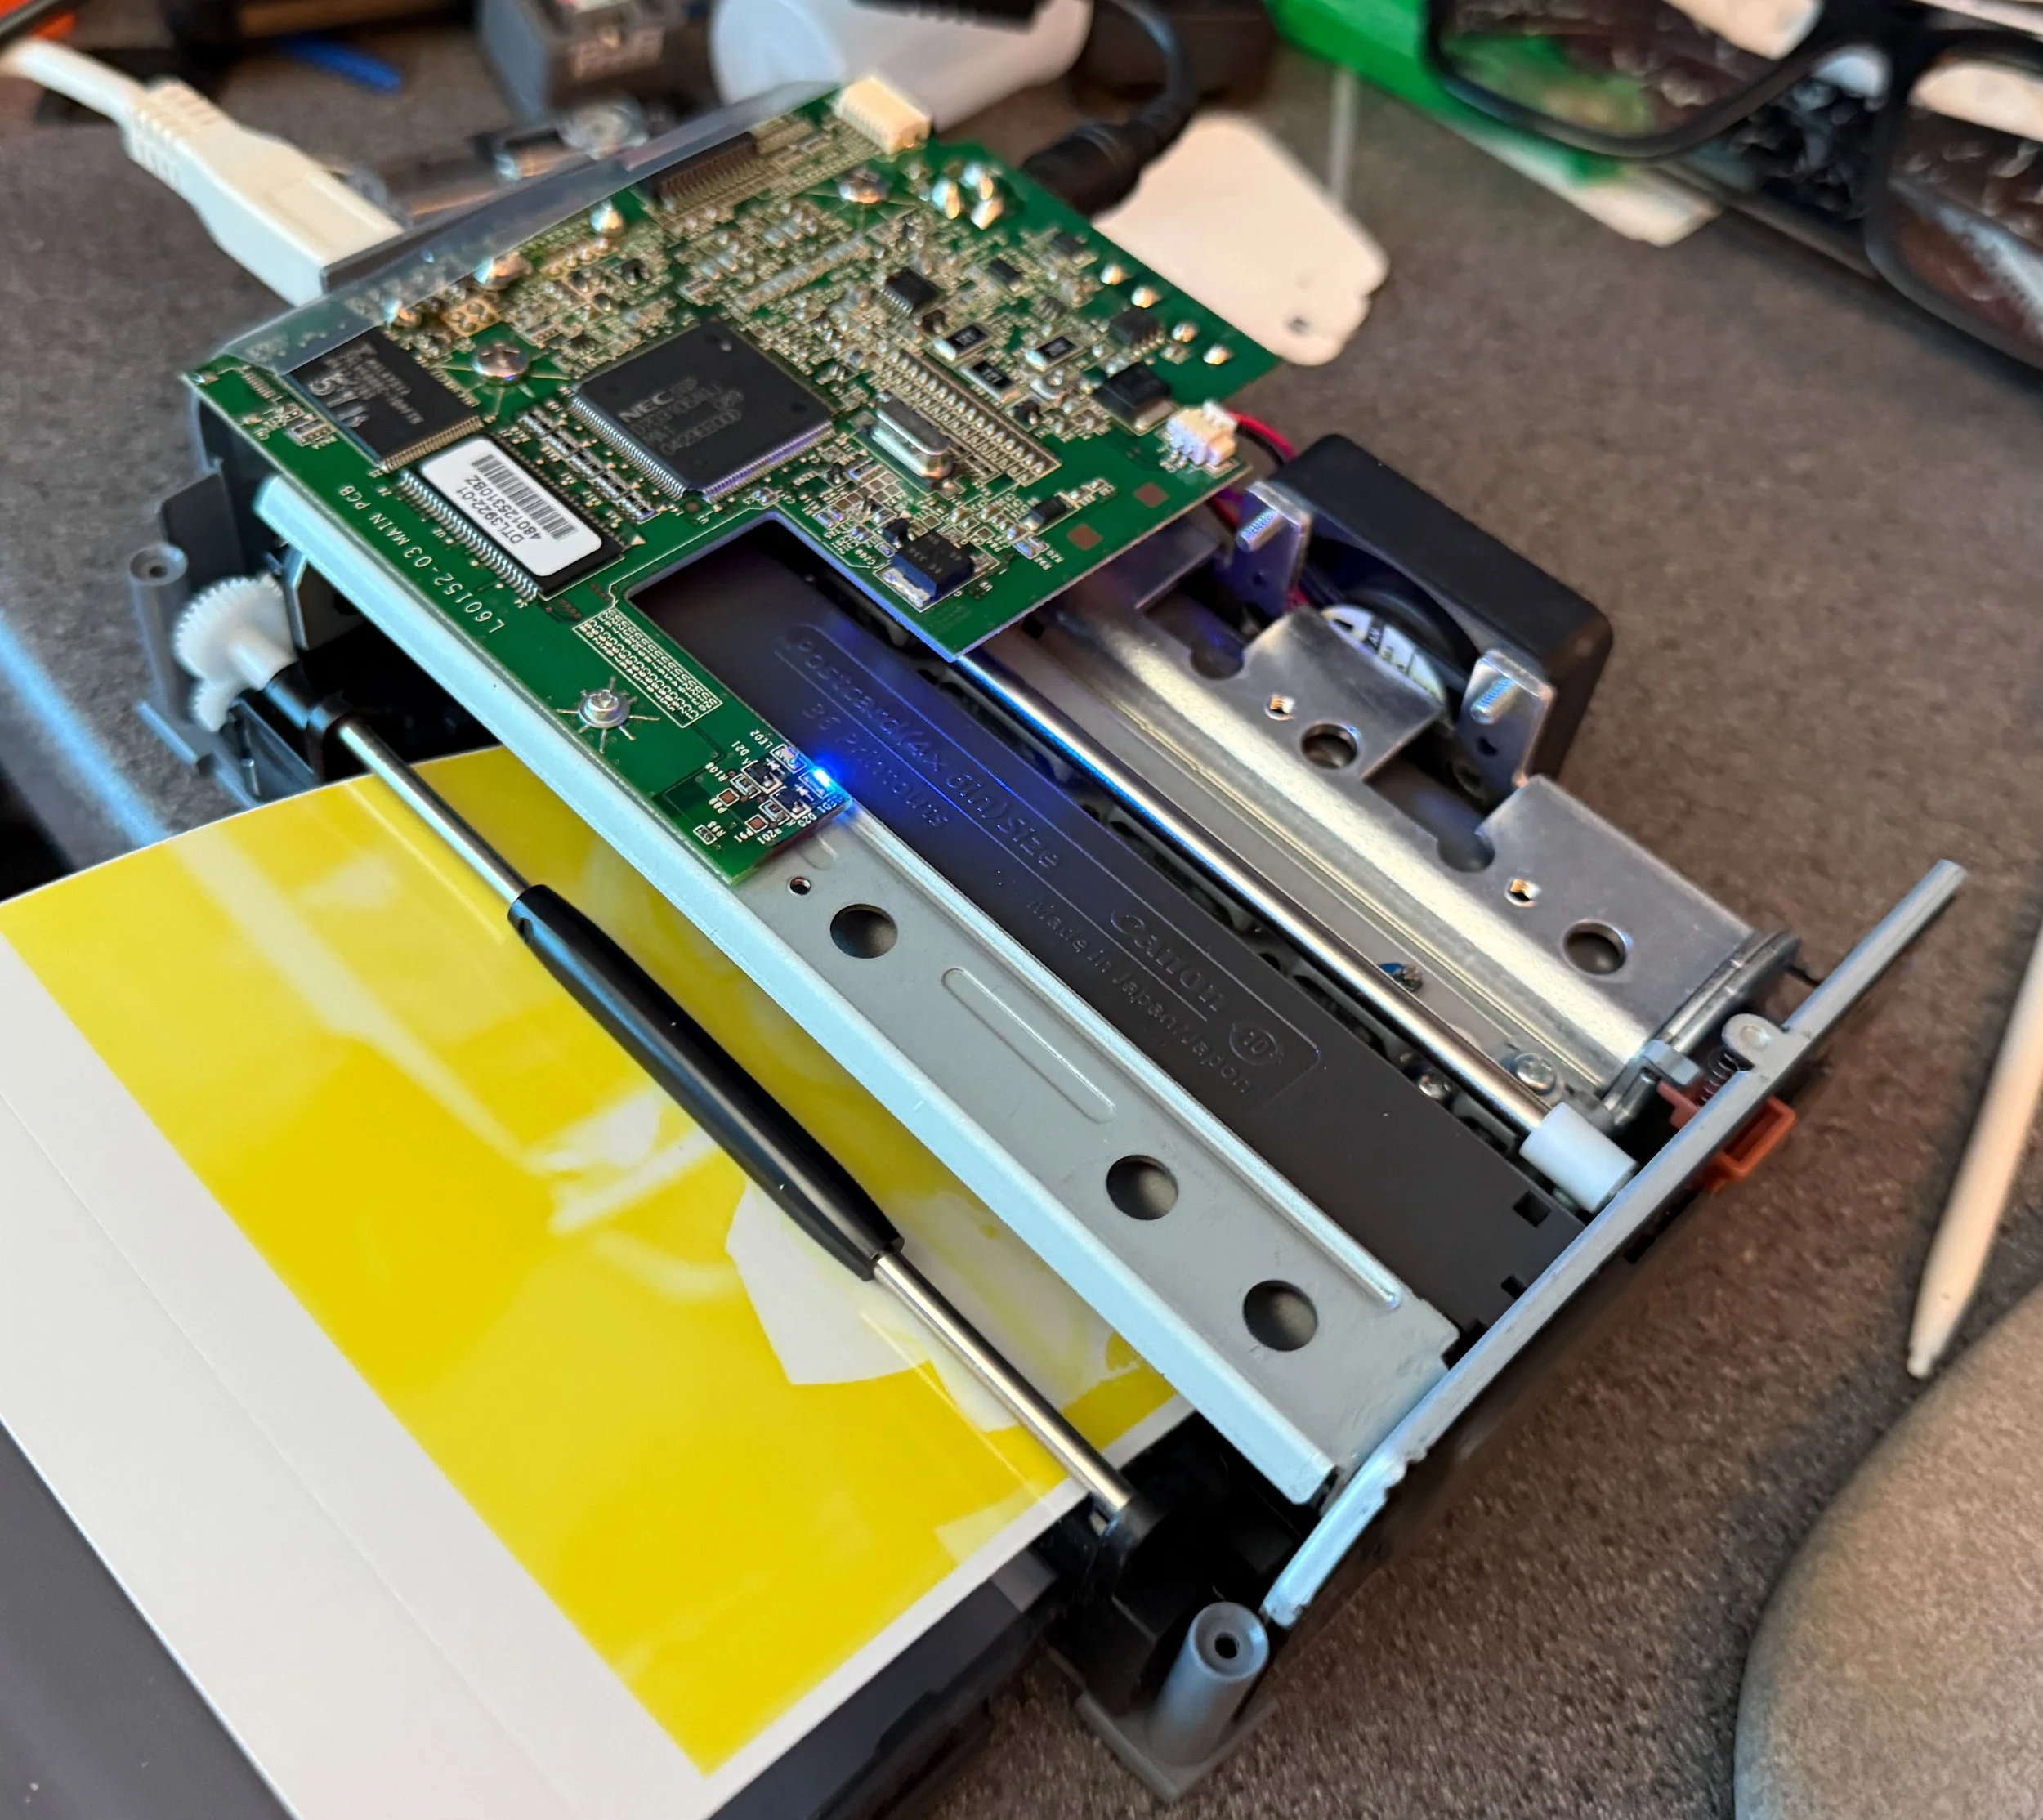
I’ve mentioned the Canon Selphy CP400 before. Although that time I got the name wrong. Its a really nice little dye sublimation printer which works a treat. And the paper and the ink are nice and cheap too. As part of my portable Pi Camera project I thought I’d get one to make a portable printer that works with the camera. I had a bit of fun getting the Selphy to work with the Pi but eventually I figured it out. You have to re-compile the Gutenberg suite to knock it back one version because the latest one breaks the paper size recognition. But I expect you already know that.
Anyhoo, I found a printer being sold for a fiver. In the original box. So I made the purchase, paid 6 pounds for postage (mutter mutter) and the printer arrived today. Turns out that “in original box” is not the same as “working”. Who knew? I got out my original one to make sure that all the drivers were in place and, sure enough, the five pound printer was getting stuck half way through a print.
I wandered downstairs for a disconsolate coffee and then, since I had not much to lose, I went back up to the office and took the lid off the printer to see if there were any wires dangling loose or bits of paper in the way. It looked OK so I tried to print again. And it worked. Yay! I popped the lid back on and it kept working.
So I went downstairs for a celebratory coffee and then returned to the office to tidy up. And I discovered that I’d taken the lid off the wrong printer, and I’d been testing the one that wasn’t broken. Can you see a pattern forming here from film fun on Monday? I’d be a bit concerned about incipient mental decay if I didn’t know that I’ve been doing this kind of stupid thing for the last sixty years.
Anyhoo, I took the lid off the broken printer and it worked fine. But only with the lid off. At this point I was too annoyed with the universe to do much more. So I put the new printer back in its box (it seems to like it there). The good news is that the plan is to move the printer into a custom case with a battery pack and whether it has a lid on it doesn’t make any difference to that application.
In all seriousness, these are cracking little printers and beautifully made (as you can see above). The only thing missing really is Wi-Fi. But you could add that by just attaching a Pi.






I’ve got this Raspberry Pi connected to an e-ink frame. I’ve written a little program that generates random text prompts from a set of keywords. The text gets fed into a copy of Stable Diffusion and every few hours a new picture appears. It’s quite fun. Today I added a little web server to the app so that I can view past pictures. None of them are very good, but I find them fascinating.
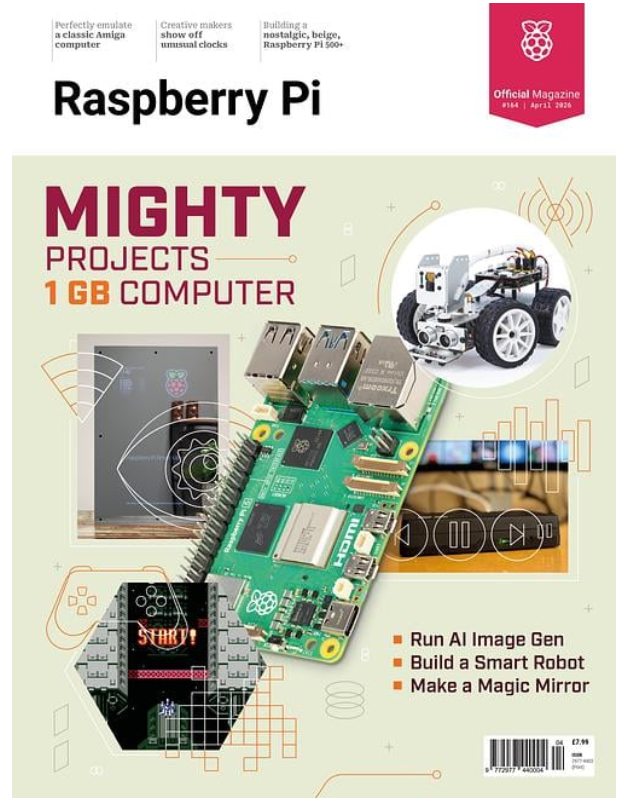
There’s a new issue of Raspberry Pi magazine out. It’s got some really nice articles. And a couple that I wrote. My favourite so far is the one that describes how to install and run Stable Diffusion on a Raspberry Pi 5 with 1G of memory (or even a Raspberry Pi Zero. The good news is that it works. The bad news is that it takes several hours to create the image.
I don’t see that as a problem though. At the moment I’m trying to get it working on a Raspberry Pi attached to an e-ink display. I think it might be rather cool to have randomly generated art popping up every now and then.
The latest Raspberry Pi magazine is now in the shops and available online. It’s a good read, as always, but whether this is because or in spite of my article in it about programming Python in FreeCAD I’ll leave you to decide.
Nicely packed
It was fate. On Wednesday I discovered that I’d earned some some more royalty payments. On Thursday I discovered that Raspberry Pi had released a new keyboard computer, Raspberry Pi 500+. So, one thing led to another (keyboard lighting joke there) and so yesterday it arrived. It’s very nice.
Size comparison
It is slightly larger and a lot heavier than the Raspberry Pi 500. It has proper clicky keys which are backlit If you don’t like the keycaps (and I do) you can swap them out for different ones. You are even given a key puller to remove the existing ones. You can get replacements (but make sure you buy low-profile keycaps or they might not work when you press them). You also get a tool to make it easier to take the computer apart, although bearing in mind it has 16G of RAM and a 256Gb built in solid-state disk I’m not sure why you’d want to get inside.
Use FN + F3 to step through other colours
The backlights work very well. Hold down Fn and press F4 and you can step through a set of different presets. Hold down Fn and press F3 and you can step through colour options for the presets.
There’s even an animated rainbow effect that looks awesome but might be a bit over the top.
Setting up the 500+ is a breeze because the internal hard disk has the Raspberry Pi operating system already loaded onto it. Just turn on the power and work through the very well organised setup. If you fancy something different you can always plug in a MicroSD card to boot from instead.
The machine has the same core components as a Raspberry Pi 5 with 16G of RAM and a 256G hard disk. There is no internal clock battery (boo) but you can buy one and plug it in. There’s no extra cooling, but it doesn’t seem to need it. There is a little internal extra in the form of a PICO which looks after the keyboard mapping and light display.
You can get direct access to the keyboard from Python. There’s a program which you can install and use to configure the keyboard from the command line. You can find instructions here. If you want to get your hands properly dirty you can write programs that interact directly with the keyboard lights. You can find all the source you need here. I’m looking forward to spending more time with the machine and making my own programs that use the coloured keys.
The Raspberry Pi 500+ is a lot more expensive than the Pi 500, at around twice the price. For that you get oodles of memory, an SSD, clicky keys and key lighting. I really like typing on the new keyboard. If you plan on spending a lot of your time typing you might find it is worth it for that alone. I wish the 500+ had a bit more personality though. It is just a minimal keyboard with sockets on the back. Of course you can add your own personality with keycaps and colours, but a strip along the bottom proclaiming its origins wouldn’t have come amiss. But I’m glad I got one and I’m looking forward to spending more time with it.
The August 2025 edition of Raspberry Pi magazine is now in the shops and available for download. I’ve written a couple of articles for this one. Inside you can find my deathless prose about using a Raspberry Pi as a desktop replacement (which works rather well) and storing settings in embedded Python apps.
It fits too!
I’m writing an article about using a Raspberry Pi as a desktop computer. Good thing I’m not wasting time playing with Lego instead…..
What do you do if you want to put a Raspberry Pi inside a device but don’t want to have to make room for the USB plugs that have to stick out of one end? You get some of these. I’ve ordered some. it will be interesting to find out if they do the job.
I’ve made a tiny video about “The Exchange”. It is a large language model that runs entirely on a Raspberry Pi. You can access it via “The Red Phone”. If you want to find out more, or even build your own, take a look here.
Need to tidy this desk…
If you take a look in the April edition of HackSpace magazine you’ll find an article by me about getting started with the Robot Operating System. And if you take a look in the April edition of The MagPi magazine you’ll find my Hull Pixelbot article and also an article about the Red Telephone.
Go me.
Rob Miles is technology author and educator who spent many years as a lecturer in Computer Science at the University of Hull. He is also a Microsoft Developer Technologies MVP. He is into technology, teaching and photography. He is the author of the World Famous C# Yellow Book and almost as handsome as he thinks he is.