Making Boxes for Gadgets with an Ultimaker Printer
/
Ultimaker and Gadgeteer would seem to be a match made in heaven. Gadgeteer gives you a bunch of hardware devices that you can connect together and program using .NET and Ultimaker gives you a way of making a box to put them in. I’ve spent today finding out just how easy it is to do this, and just how much fun. I spent some time last week printing my name, which was fair enough I suppose, but today I wanted to get started making some boxes for gadgets.
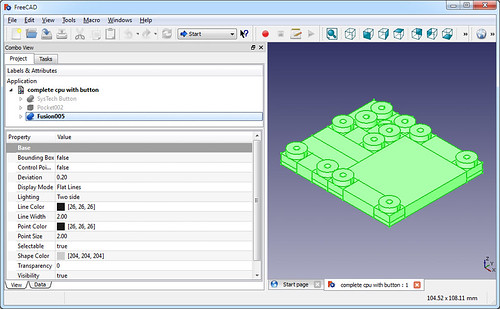
I started off using the AutoDesk 123D software but in the end I gave up on it. It is a great program for making ornaments and trinkets, but didn’t seem to make it easy to create engineering type drawings. I wanted everything to be just the right size and correctly positioned, and the program didn’t seem to make it easy to do this. So I switched to FreeCAD, following up on advice from Andy in a comment on the post last week. This has the feel of a proper CAD program (although I’ve never used a proper one, so I don’t have much to compare it with). Finally I figured out that the best way to make something complex was to use the Sketch view to draw something on a plane, and then extrude that into the model. That way I could cut quite complex shapes.
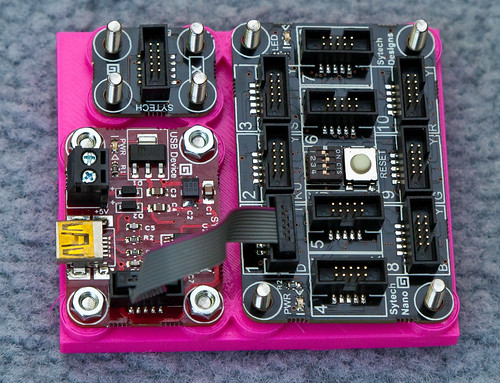
This is the view of my finished product, It has mounting blocks for a Sytech processor, power connector and button. The blocks are all individual components which I can assemble on a grid any size. The nice thing about the Gadgeteer devices is that they are all based on a grid mounting, with everything happening on 1cm boundaries. This makes it very easy for me to create some pins that I can use anywhere. The design above needs a little work, as the round mounting pillars are a bit too wide for the Gadgeteer standard, but for most of the devices I’ve found they work just fine.
Once I had made my design I had to convert it into an STL file (no problem, FreeCAD just does this) and then make the set of printer instructions. I used Cura for this. Finally I put my design on a memory card and turned the Ultimaker loose. I’m slowly getting the hang of 3D printing. Now that I’ve fixed all the leaks my problem is that sometimes the very first layer is not sticking to the printer bed. This means that the printer just extrudes plastic into the air and nothing gets made. I think I know how to do it now though, you have to adjust the print head so that when it is closest to the surface there you can just about pull a single piece of paper back and forth underneath it. And you have to make sure that this is the case across the entire printer surface.
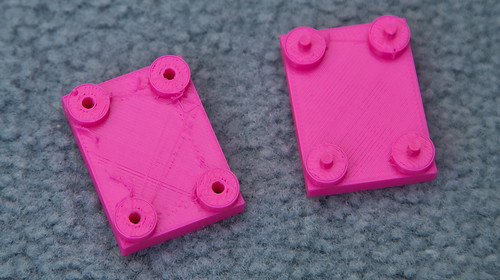
These are my early prototypes. For the first one, on the right, I tried to extrude pillars that I could just drop the board onto. I had a theory that I could just tighten a nut down onto the pillar and it would just self tap a thread into the pillar. Didn’t work. The pillars are not that strong and they snapped off. But for me the really amazing thing was that the Gadgeteer board just fitted onto these pillars. All the dimensions I had carefully put into FreeCAD were being reflected exactly in the finished article. Kudos to the Ultimaker crew, they have made a printer that prints things exactly the right size. If anything had been even slightly out of whack nothing would have fitted. As it was, once I’d cleaned off the excess plastic, I could just drop the board on.
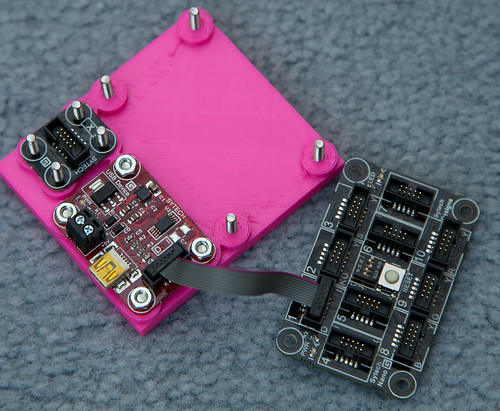
Version 2, which is where I am now, has bolt holes through the plastic pillars which I can then use to screw the boards down onto. I’ve made a three board carrier which you can see above and again, everything just lines up. Astonishing.
I’ve even managed to break one of the golden rules in 3D printing, and print overhangs that let me countersink the bolt heads in the surface underneath.
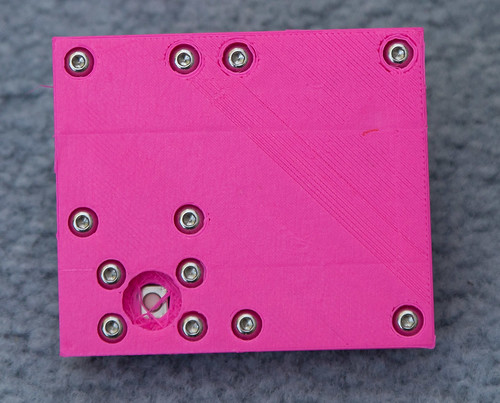
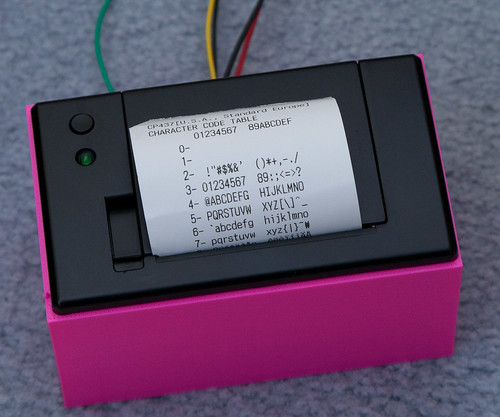
This is the view from the other side of the board. The heads are all countersunk. the big hole in the bottom is meant to be there, it is a push button. The idea was to make a round button to fit into the hole. Unfortunately, being an idiot, I’ve got the large and the small holes the wrong way round, so that my button will just drop onto the floor. Still, I’m very pleased with the results from just a day of playing with the software and the printer. Last night I also made a case for my thermal printer, which turned out rather nice too.
Once I get everything sorted I’ll put the designs on the interwebs somewhere for anyone who is interested. Just a great way to spend a day….


