Telling your VS Code windows apart with colour
/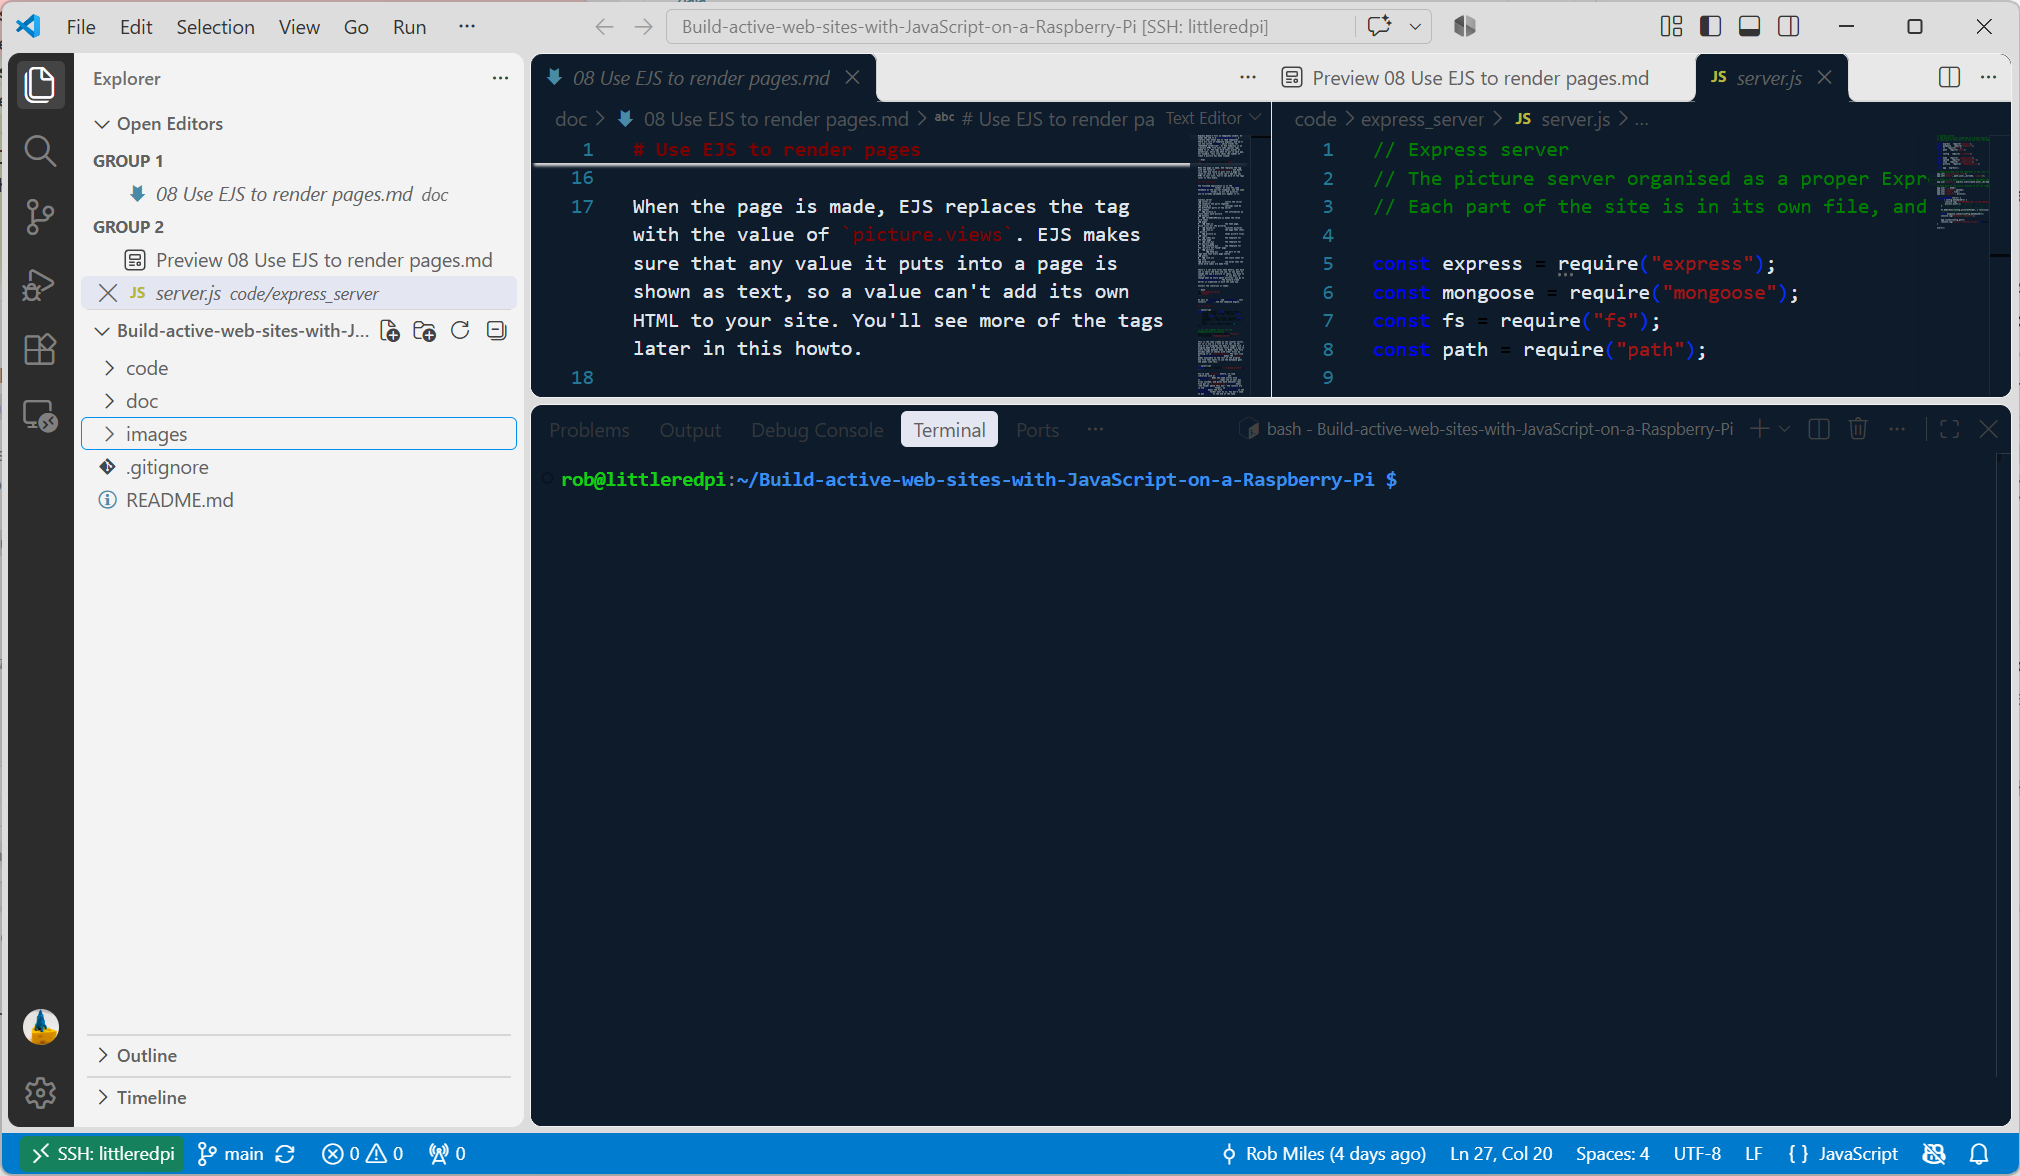
This makes things pretty obvious…
Telling your VS Code windows apart with colour
I often have two copies of Visual Studio Code open on the same project. One runs on my own machine. The other is connected to a different platform through a Remote connection. I do this a lot when I'm writing code for a Raspberry Pi and I often get confused. The two windows look exactly the same, and more than once I've typed into the wrong one, or built and run my code on the wrong machine.
What I wanted was to make the editor pages a different colour in each window, so I can see at a glance which one I'm in. My first thought was to write an extension. Before I did, I checked whether one already existed. It turns out you don't need an extension at all. VS Code can do this with its own settings.
The trick: User settings and Remote settings
VS Code keeps more than one level of settings, and later levels override earlier ones:
- Default: built into VS Code.
- User: your local installation. Applies to every local window.
- Remote: stored on the remote machine. Applies to every window connected to that machine, whatever project is open.
- Workspace: the project's own
.vscode/settings.json.
If you put one colour scheme in your User settings and a different one in the Remote settings, every window shows where it is running. You set it once per machine and it works for every project, with nothing added to the projects themselves.
Colouring the remote window
Open a remote window. The box in the bottom-left corner shows the connection, for example SSH: myserver. Press Ctrl+Shift+P and run Preferences: Open Remote Settings (JSON). This command only appears in a remote window.
Add a colour scheme like this:
{
    "workbench.colorCustomizations": {
        "editor.background": "#0d1b2a",
        "editor.foreground": "#e0e6ed"
    }
}
Save the file and the editor changes colour straight away. The settings are stored on the remote machine itself, so that machine shows the same colours whichever computer you connect from.
Colouring the local window (optional)
You only need this step if you want to change your local colours as well. Colouring the remote window is usually enough to tell them apart.
In a local window, run Preferences: Open User Settings (JSON) and add a workbench.colorCustomizations entry in the same way. If the file already has one, add your colours to it rather than creating a second entry, because only the last one counts.
Going further
editor.background only changes the editor page itself. The line-number gutter, the current-line highlight and the terminal keep their theme colours. These settings colour the rest of the window too:
"workbench.colorCustomizations": {
    "editor.background": "#0d1b2a",
    "editor.foreground": "#e0e6ed",
    "editorGutter.background": "#0d1b2a",
    "editor.lineHighlightBackground": "#1b2d42",
    "terminal.background": "#0d1b2a",
    "titleBar.activeBackground": "#1f4e79",
    "statusBar.background": "#1f4e79"
}
The title bar and status bar are the most useful, because you can see them even when no file is open.
Some other things worth knowing:
- Each remote machine has its own settings, so you can give each one its own colour. Each WSL distribution counts as a separate remote too.
- Dev containers lose their settings when rebuilt, because the settings are stored inside the container. To keep the colours, put them in the project's
devcontainer.jsonundercustomizations.vscode.settings. - Project settings win. If a project's
.vscode/settings.jsonsetsworkbench.colorCustomizations, it overrides your colours in both windows. Colour extensions write their settings there, so check that file if your colours don't appear.
What about extensions?
There are extensions that do something similar. Peacock is the best known. It has a peacock.remoteColor setting that gives remote windows a different colour, but it colours the title bar, activity bar and status bar rather than the editor page. Others, such as Color Stamp and Unique Window Colors, colour windows by project. That doesn't help here, because the same project would get the same colour on both sides.
For my purposes the built-in settings do the job, and there's nothing to install.