Raspberry Pi Wide Angle Zoom Lens

lens.png

Pimoroni now stock a new lens for the Raspberry Pi HD camera. This one is a zoom wide angle lens. I’ve been impressed with the quality of the longer focus lens that I got a while back, so I thought I’d invest in the new one too. The price is very reasonable at 15 pounds.

The quality is very good. Focussing is fun. It is not a “pure zoom” in that if you change the zoom settings to move closer or further away from the subject you will have to refocus. And sometimes (at least on mine) I can’t find focus positions for some zoom settings. But the bokeh (the effect you get when things are out of focus) is rather nice in a blurry kind of a way

The artistic view..

The artistic view..

I’m using mine to give an overhead view of my work area for videos. If you want to do this you’ll need to set the camera up so that it gives you a full desktop view. This is the command that I use:

raspistill -t 0 -p 0,0,1920,1080

This makes the viewfinder image from the camera fill my video output, you can change width and height values to match the display values you are using.

The lens will focus very close, which makes it ideal for viewing components and circuits. If you have the Raspberry Pi HD camera unit it is well worth a look.
Visual Studio Code on Raspberry Pi is awesome

Visual Studio Code Raspberry Pi.png

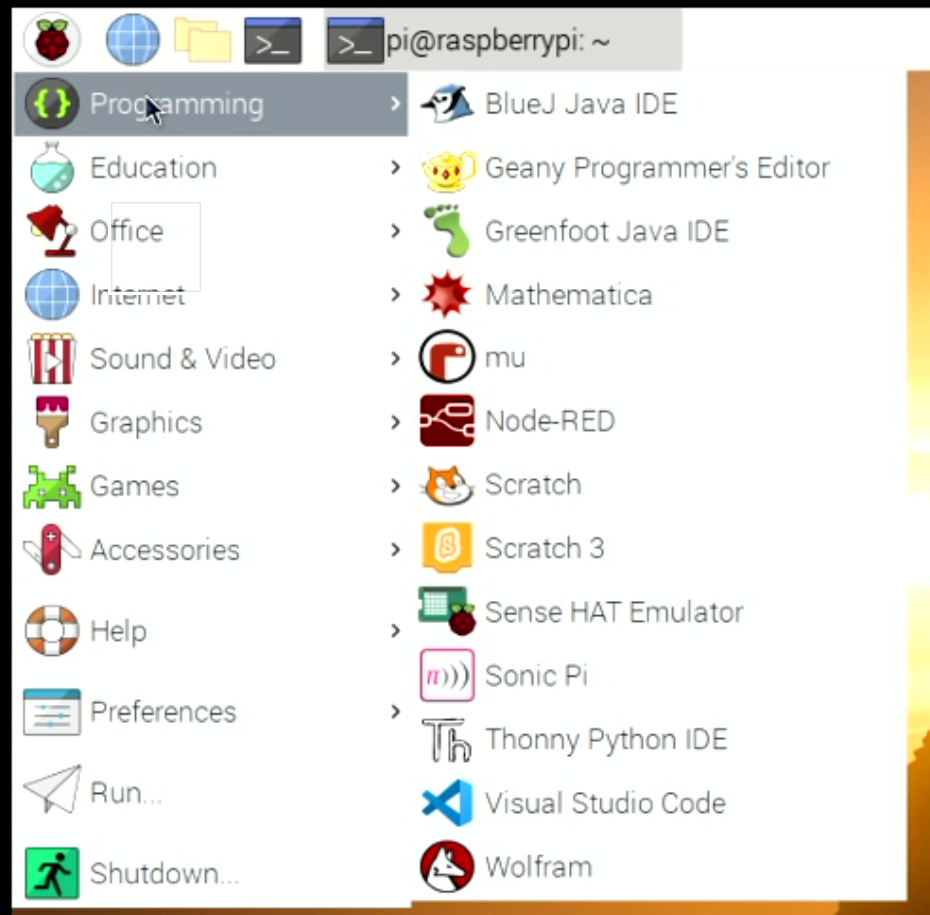
I’ve been using Visual Studio Code remote development on my Raspberry Pi devices for a while, but what I’d really like to do is just run Visual Studio Code on the Raspberry Pi itself. And now I can.

sudo apt update 
sudo apt install code -y

All I had to do was open up a command prompt and type the two commands above. And then I had an extra option for programming and using all the lovely Visual Studio Code plugins.

This is wonderful, wonderful, news. I’ve installed the Platform IO plugin and I now have a completely self-contained system for development on the Pi. I’m using the Pi 400 device which has a fair amount of processing power. It’s not as fast as my desktop - but then it cost a tiny fraction of the price. And it does get there in the end. Such good news.

Makertober Day 8: Thermal Camera

thermal camera.png

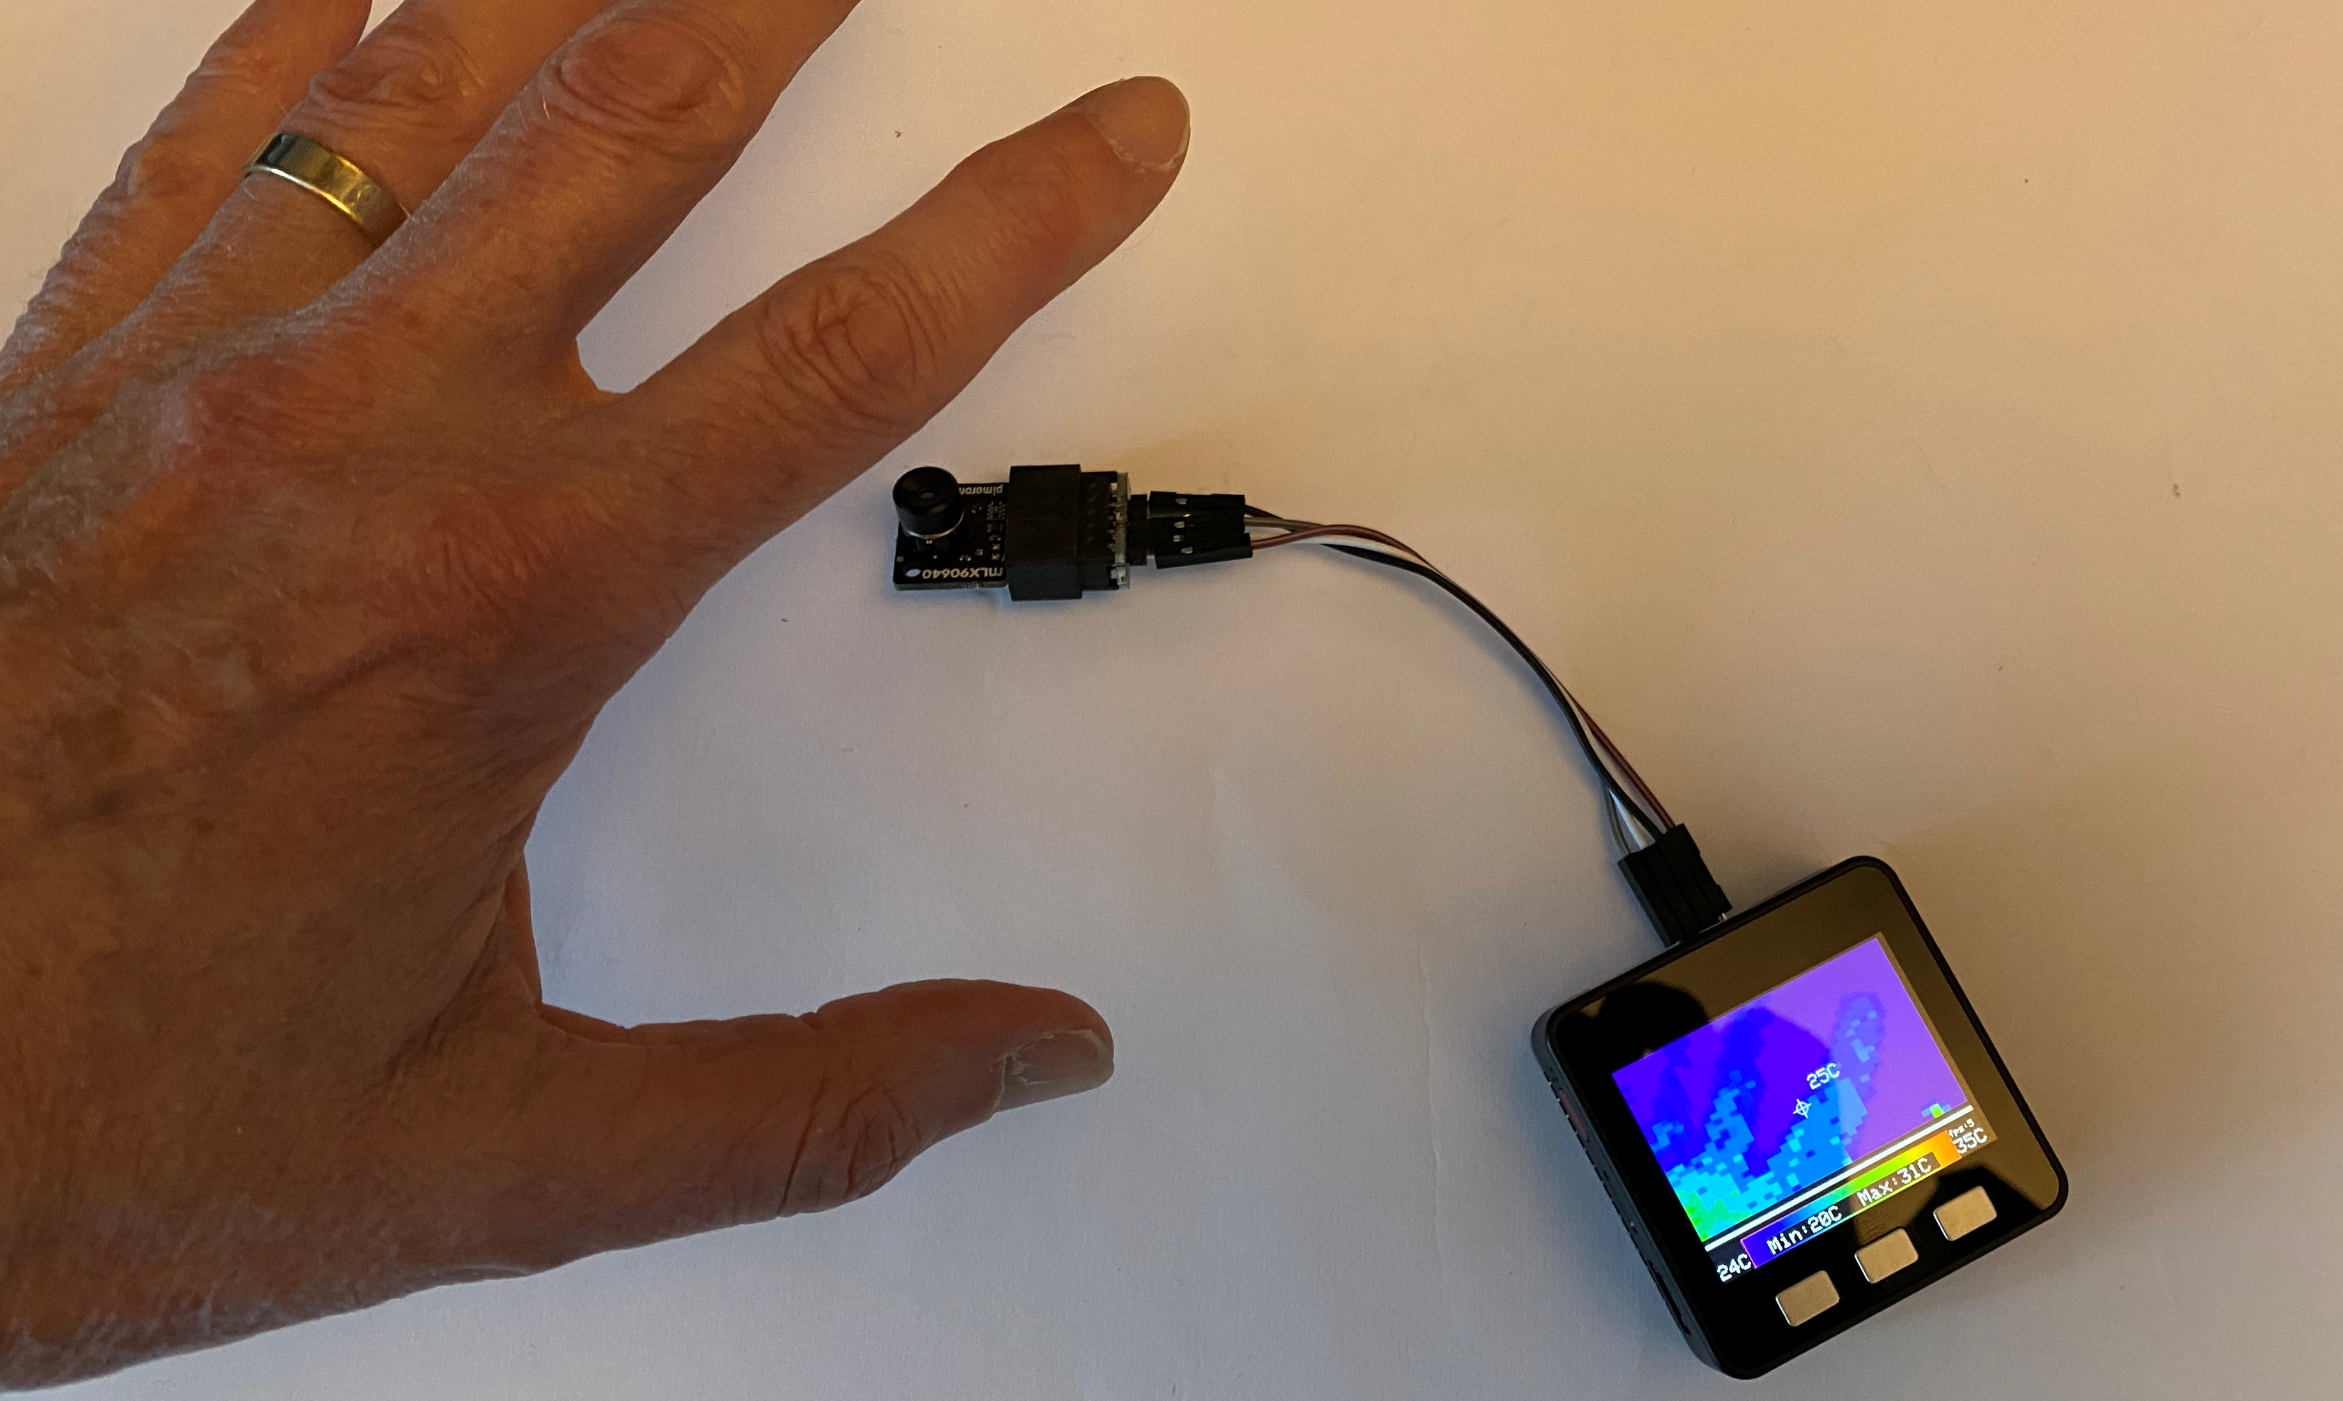
I suppose there should be more to making things than just plugging together devices and running their example programs….. However, until that time: here’s an M5Stack device connected to a thermal camera. M5Stack sell a camera unit but I used one sold by Pimoroni to be used with their breakout garden. Both devices are based on the same camera unit, the MLX90640 that gives 32x24 pixels of heat readings. I got the M5Stack sample program from GitHub which I found here. It works very well. At the moment these cameras are pretty much impossible to get hold of - I’ve had this one lying around for a while.

You can also use the camera with a Raspberry Pi although they are rather hard to get hold of at the moment.

A look at the Raspberry Pi High Quality Camera

I’m beginning to wonder why we need “proper” cameras. My smartphone can now produce pictures that I can use for just about anything. And now you can get a high quality camera for your Pi. You can even swap lenses like the professionals. We are looking for something we can use to track robots, and so I thought I’d get one and see how well it works. I bought the “telephoto” lens because it seemed to be higher quality, but you if you can track down “C-mount” lenses (they are used in CCTV and video cameras) you can have what ever kind of lens you like. There is also a “wide-angle” lens which I’d quite like to have a play with now.

The camera connects to the Pi in just the same ways as previous cameras, but there must be an awful lot more data going down that little ribbon cable. I attached my camera to a Pi 4 and had a play. First thing I did was point the camera out of the window and take a picture. I got a 6.5 Mbyte Jpeg image. The top right hand corner of it looked like this:

This is not the entire picture. This is a tiny crop of the top right hand corner. There’s a lot of chromatic aberration going on (that’s causing the purple fringes) but detail is pretty good. Watch what happens when I stop it down a bit though.

Suddenly the image is much, much better. “Stopping down” means reducing the size of the hole that lets in the light. This means that the lens has to do less work and so I’d expect the image to be a lot better. The downside is that a smaller hole means less light, so the sensor takes longer to capture an image. This can lead to blur unless you use a tripod or increase the gain in the camera and get more noise.

I don’t particularly want to show you the view from my window, but what I will say is that the camera is doing a good job here. Once I’d taken some pictures out of the window, I took some of my desk.

This is the entire image of a corner of my desk. The minimum focus distance is not great for the tele-photo lens, at about 15 inches.

This is a 100% crop of the above picture, which should give you an idea of how much of the frame the branches above took. It should also give you and idea of the great quality of this lens and sensor combination.

This is a crop of the same image taken with the lens aperture wide open. This shows that you can get some lovely “out of focus” effects with this camera.

Good things to know:

There’s a really good book about how to use the camera. It’s a free download from MagPi Magazine here.

if you want to use the camera preview with VNC remote desktop you have to enable direct capture in the Troubleshooting Menu of VNC Server.

if you want to use VNC remote desktop to a Raspberry Pi with no HDMI monitor connected you have to use raspi-config to set a specific desktop resolution using the Resolution Option in the Advanced settings.

You can adjust the lens distance using a tiny spanner, but I’ve not done this. So it might be possible to get even sharper pictures.

The picture quality of the high quality camera is very good. But then again you’ll be paying around 100 pounds for the sensor-lens combination and so you’d expect something pretty impressive. I’m not sure how much the sensors in mid-range compact cameras cost, but I’d expect them to be around the same quality.

The “telephoto” lens that I got has quite a narrow angle of view, so if you want to do general stuff I’d suggest getting the wide angle lens instead.

Things will get properly interesting when these devices get into the hands of all the smart people that like to play with Raspberry Pi. There is considerable scope for some very interesting devices and if you want programmatic access to a very high quality image you’ve got that now.

Rob in Hackspace Magazine

I’m a writer again! Hackspace Magazine this month have printed my article about using a Real Time Clock to control the power of a microcontroller. They’ve done a really good job laying out the pictures and words that I sent through, and the whole magazine is a very interesting read - as usual.

You can read the article (and the whole magazine) here

Seam Client Fun and Games

I think this should be fast enough…

Now that we are getting into networked game nights I’ve decided that I have a need to play games on the big telly in the living room. Thoughts turned to a Raspberry Pi 4 running Steam Client. This was suspiciously easy to set up: there are a couple of splendid guides online that you can find here and here

Then I did some testing. One thing I didn’t appreciate is that fundamentally Steam Client is a souped up remote desktop. I was installing it using VNC on my PC and things got somewhat surreal when my PC desktop appeared on a machine where it shouldn’t be. I could see my VPC desktop on a remote desktop on the Pi. It was a bit like that bit in SpaceBalls when they watch the video of the movie inside the movie.

I wanted to take a screenshot but I was afraid this might cause a rift in the space-time continuum.

Anyhoo it seems to work for most games. Now I need to figure out how to do the video chat part of the evening.

The Raspberry Pi serial port is almost useful...

If you’ve ever played with a Raspberry Pi you’ll be familiar with the annoying way you have to configure the device before you can use it.

You might have no intention of using your shiny new Pi Zero W with a keyboard, screen and mouse but to get it set up you have to connect them all.

I thought I’d found the answer to my problems in the form of these serial connectors. You can connect them to the serial port pins on your Pi, plug the other end into your PC, fire up a terminal program (I use PuTTY) and then use the command line interface to set everything up.

A while back this would have been an excellent idea. Unfortunately modern versions of the Pi operating system are a bit more security conscious than the older ones, and disable the serial port command line by default.

So if you want to use this cable you have to use a mouse, keyboard and screen to turn it on and enable the serial console…… Oh well. It will still be useful for “on the fly” modifications.

No need for PuTTY

I seem to be spending more and more time talking to command line interfaces (CLI) these days. I think this is because I’m messing around with the Raspberry Pi that controls my LED panel cube and I’ve left off the desktop interface because it slows things down.

For years my weapon of choice for getting a command prompt on a remote system has been the PyTTY program. But no more. Later versions of Windows PowerShell for Windows 10 have an ssh command that just works. I found this lovely blog post from Scott Hanselman that shows how to create keys that let you connect without needing to enter a password. I’m especially impressed with the cunning way that he pushes the key file from the PC to the remote device.

Last night at the Hardware Meetup I discovered that you can use the ssh command to connect to a remote system without needing to know the ip address of the target machine. This meant that I was able to use the mobile hotspot in my phone to give a network connection to my Surface Pro and my Raspberry Pi and then use:

ssh pi@raspberrypi

.. to get a command line on the Pi. Very useful.

18th Hull Raspberry Pi Jam

I went to the 18th Hull Raspberry Pi Jam today. It was great. They had loads of Raspberry Pi machines set up and a lovely exercise wiring up neopixels. Everyone who did the lab was knocked out by how easy it is to create and control coloured light displays from software. I was showing off the work in progress for my LED Cube, which is presently two of my older panels connected to a Raspberry Pi and displaying demo images. I’m using this software to drive the panels and it works a treat.

I was telling anyone who would listen (there were a few) that the panels I really wanted to use were stuck in UK customs. I’m really hoping that soon they will be released, I can pay whatever hefty duty they figure out that I owe and I can get on with building the device.

Then I got to talking to Jon about his recent project which involved making an awesome piece of artwork. For his next one he’s going to be using a coin mechanism. These are the devices that you find on fruit machines and the like. Apparently you can buy them from Ali-Express for not much money. So I’ve bought one.

You configure the mechanism by setting it in “learn” mode and then inserting loads of a particular kind of coin. It can remember three different types of coin and the output is a simple sequence of pulses that should be easy to pick up with an Arduino or Raspberry Pi.

I’ve absolutely no idea what I will use it for. I was thinking of taking it to a hardware meetup and offering people the chance to see if it recognises their coins:

“Lets see if it can recognise your two pound coin. Oh, bad luck. Sorry, no I can’t get your money back again.”

If nothing else, this could be a nice little earner. The device has cost me considerably less than a computer game and I think I’ll have at least as much fun with it.

The next Raspberry Pi Jam (which I think will be the 19th), is on the 14th of March. This upsets me, because I would really like to go but I won’t be able to make it. Kudos to Jon and Matt who organised the event, provided the coloured pixels and then helped everyone to make them light up.

Raspberry Pi Jam in Hull on Saturday 1st Feb

The next Raspberry Pi Jam is in Hull on Saturday 1st Feb. It looks like all of the coding slots have been booked up, but if you want to go along as a spectator, or to show off something you’ve made it looks like there are spots available. You can sign up here. I’m going to take along some LED panels and talk about building a LED cube. I’ve just discovered that my LED panels are actually in UK customs at the moment, which is rather exciting.

Hull Raspberry Jam with Two Buttons

Well, that was fun. I really should have taken some pictures of the jam, it was great fun. There were loads of machines set up and creativity going on all over the place. I took my “Two Button Box” along and developed the rest of the software. Thanks to Ben, Jon and Matt for advice and help on getting my Python program to run each time the box is powered on (this harks back to my Unix days of old - editing the rc.local file to run programs on boot up).

Players need to press the red button when there are more red lights lit, and the blue button when there are more blue lights lit. I’d taken a bit of care to make the gameplay progressive. The game starts simple, with just red and blue lights, but then other colours appear and then they all start to move around.

It’s always nice to see people playing a game that you made. I’m not sure it pushes back any frontiers or brings anything particularly new to gaming, but it is always nice to see someone enjoying playing with something you’ve made; particularly if you enjoyed making it.

You can see it in action here. Thanks to Jon for the video.

Making plans for Hull Raspberry Jam

There’s a Raspberry Jam in Hull tomorrow. There is a kind of development theme where attendees are invited to create a game that only uses two buttons to control it. I love a good constraint. Ask me to make a game and I’ll fall apart. Ask me to make a game that only uses two buttons and I get interested. I mean, as you can see above, I’ve got two buttons….

My plan is to put the buttons, a Raspberry Pi and a power supply in a box. It’s one of the boxes that is supposed to have an Air Quality sensor in it (sorry Robin).

There’s a kind of reason in this madness, in that I’ve often wondered how good the Raspberry Pi is for creating what I’d call “pure” embedded devices. The Pi Zero W is very close in price to things like ESP32 based devices and brings a lot of advantages, including much more power and a “full fat” operating system. I get to write in Python - which I love - and I can actually run the IDE on the device itself if I want to.

You can see my first step above. The first thing I do is make sure that all the components will fit inside the box. As you can see, I think it will probably be OK. The only snag I’ve hit so far is that the holes for the buttons need to be a little bit larger than the ones in the box itself. However, a few minutes with a drill have sorted that one out.

The box that I’m using, like pretty much everything in my life, came from Amazon. You can get it much more cheaply if you are prepared to order it from China via Aliexpress. It’s supposed to be used as a junction box for connecting cables. It has eight big holes all round the sides into which you can run cables and connect them together, or put devices into. It has these rubber inserts for all the holes that you don’t want to run cables into and I got to wondering how good they would be at defusing light from a neopixel. Perhaps I could put some lights in the box and use these as the basis of a game of some kind. Time to build a circuit…..

What we have here is the first circuit. The two micro-switches will be fitted onto the buttons. The coloured pixels are to be stuck inside the box against each of the rubber fittings. The chain of lights is connected to a single GPIO (General Purpose Input/Output) pin on the Pi Zero. The buttons are connected to two other GPIO pins. There’s a splendid library available from AdaFruit that allows a Python program running in a Raspberry Pi to set the colour of each of the leds and also read the state of the inputs. So in no time at all I had the lights on under program control. Some tests have indicated that they will work quite well. I’ll put them all in the box tomorrow.

The next thing I need is an idea for a game. What I’ve come up with is a very simple idea. Each light around the box will light up with a particular colour. If there are more red lights lit than blue lights, the player must press the red button. If there are more blue lights lit than red lights, the player must press the blue button.

This should be easy to code and might make for some compelling short term game play, particularly if I add a bit of complication as the game is played.

I’m looking forward to taking the box to the Raspberry Jam tomorrow and finishing off the code.

Raspberry Pi Model 4 a bit slow at 4K

So I’ve got my Raspberry Pi model four running and I thought I’d try it driving a 4K monitor. Promotions of the device have made much of the fact that this new version has not one, but two video outputs and they can run 4K video.

I don’t want two 4K displays, but a single one that works correctly would be nice. Unfortunately the performance is not great. It might be me, but it seems that although the desktop looks splendid it does seem to lag a bit. Moving the mouse around turns into a game of skill, where you have to stop moving the mouse before it arrives at the desired destination. This might be a great idea for a video game, but it isn’t much fun when you are trying to use the device.

I’m hoping that this is caused by early versions of the operating system not being optimised for the new hardware, but if you’re thinking of getting a model 4 I’d advise you to get your hands on a device and have a play before you splash any cash.

Raspberry Pi Model 4

I remember when the Raspberry Pi was first announced. A credit card sized proper computer which cost 25 quid? A likely story.

Twenty five million sales later, the story is looking more likely than ever. And now we have version 4.0. This version is interesting for a whole bunch of reasons. They reckon it has around twice the speed of the previous version, and you can now get it in memory sizes that go from 1 to 4 Gbytes. It now supports two monitors and 4K video output (although its a bit tricky if you try to use both at the same time). It also has two USB 3.0 sockets and the specs speak of much faster data transfer. The mounting holes look to be in the same place, and the pin-out for the “hat” connector is the same, although the pins can be re-purposed to get some extra I2C and serial ports which is very welcome.

The bad news is that there are a few “breaking” changes from the previous device. The video sockets are now micro-HDMI and there are two of them, which means that case designs will have to change and you’ll need to change your video cables. The power is now supplied via a USB-C socket and you need a bit more of it. The days of hanging a Raspberry Pi off a USB socket on a PC may be over. And if you want to get full speed all the time (or play with overclocking) you’ll need to add cooling to prevent the processor slowing down when it gets too warm.

But this does mean that you can consider using the Pi as a desktop replacement. I know they say that with every new release of the platform, but this time it might actually be true. The extra ram will make it possible to multi-task with ease, and the faster USB sockets mean you can connect fast hard drives too. However, having said that, I reckon that the extra power is interesting because it makes it easy to use a Pi as a proper “edge computing” device. It should be very possible to run some proper AI on this platform, allowing you to put a lot of computing power right next to your sensors, which makes things very interesting.

I can’t find any word from Microsoft as to whether the IoT version of Windows 10 will be ported to the Raspberry Pi 4. I really hope that it will be. Windows 10 on this platform would be awesome.

I’ve ordered myself a device, I’m looking forward to it coming and having a play.

Spotting a smile with Windows IoT

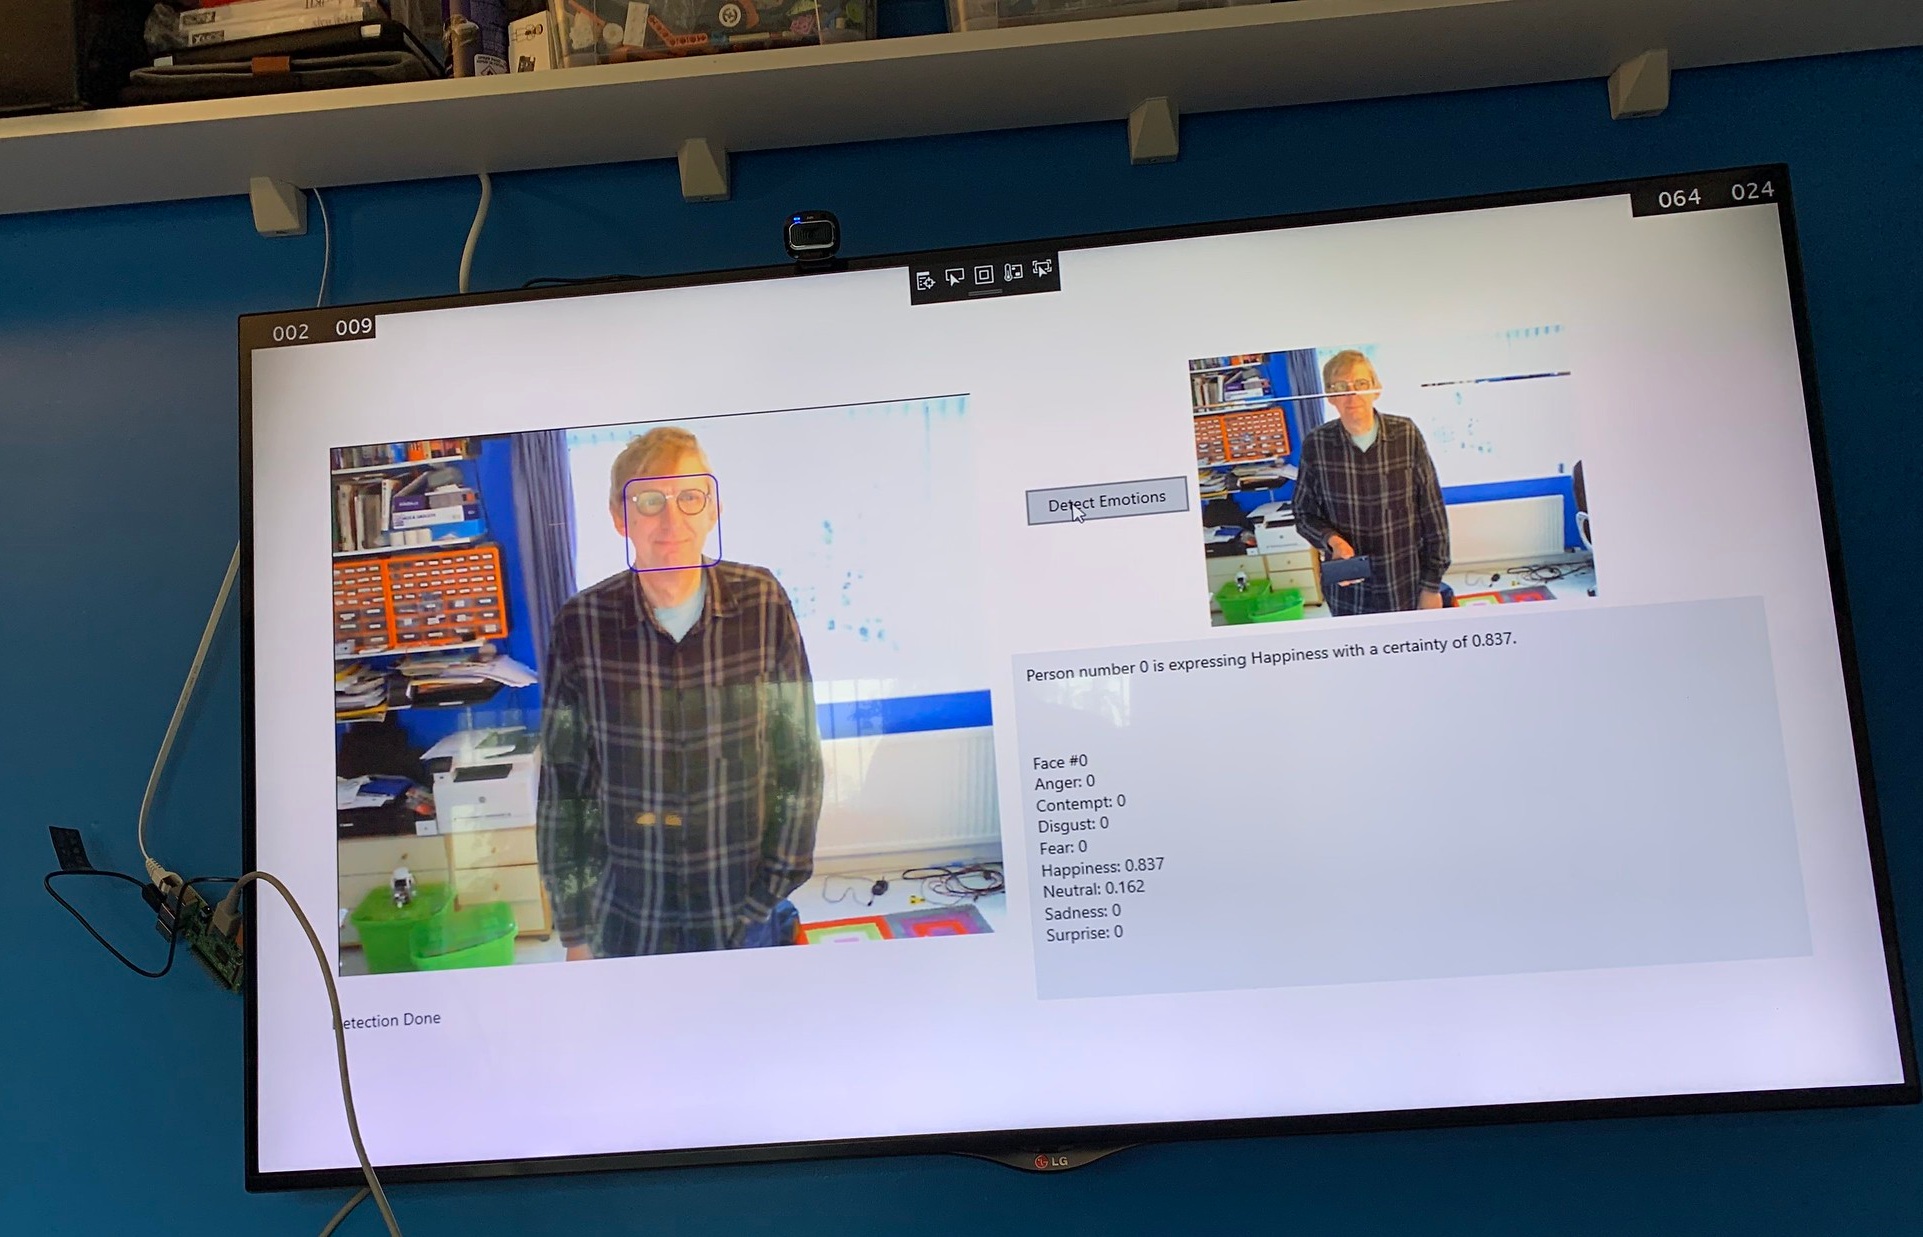
I’ve been working on my demos for the Insider Dev tour. One of the examples shows how to use Azure Cognitive Services to analyse a picture, find faces and see how happy they are. I’d like to use this in my demo, but I want to use the camera rather than a fixed image.

Anyhoo, I’ve got it working. The Raspberry Pi snaps a picture, sends it to the cloud and then gets back the location and happiness of anyone in it. I’m looking forward to showing it off next week.

I don’t intend to point the camera at the audience though……

Hull Raspberry Pi Jam with robots

Well, that was great fun. Spent the morning at the Hull Raspberry Pi Jam. It was something of a "RobotFest". I had my Hull Pixelbots and Coretec Robotics were there with their balloon Raspberry Pi powered balloon busting robots. I was trialling a new idea I've had, called the "Robot Rumble". The idea is that players code up their robot warriors to get as far into their opponents area as possible. You can find the draft rules here

As it turned out we didn't get that many rumbles going, but folks had great fun making their robots do things, including some things I'd never have thought of, which was rather nice. And from the sounds of bursting balloons and cries of victory coming from the other side of the library, fun was being had there too. 

The second part of this post was going to have the title "Three Thing Game Judging Fun". But instead I'd have to use the title "I probably shouldn't have eaten that chicken from the fridge". Number one wife did ask me to check the sell by date but I was confident it was fine. And besides, I'd thrown the package away.

By 2:30 it was turning out that the chicken might not have been that fine after all. And an attempt to "kill or cure" by drinking a can full of "Old English Ginger Beer" didn't have the desired effect. Which meant I had to beat a hasty retreat from the event and head home for a lie down amongst other things. 

Fortunately the effects don't seem to have been too long lasting, which is a good thing as I'm supposed to be driving to Birmingham tomorrow. 


Raspberry Pi at c4di Hardware Meetup this Thursday

If you were at the "Easy as Pi" HullDevs presentation from John Tasker last week (incidentally he has put his slides and sample code here) you might like to come along to our Hardware Meetup onThursday this week at the c4di, starting at 6:00. 

If you have any questions, or have a Pi that you want to get started with, or want to see what you can do with your Pi, then come along. Hardware welcome. I'll be bringing some of my Pi collection, including the world famous Logo Blaster. You can sign up here.