Special delivery

Bit of a commotion outside our house today. It started with the sound of helicopters hovering overhead, then motorcycle outriders hurtled down the road, followed by a couple of police squad cars, and finally an armoured truck. And then, with full sniper cover, a helmeted guard brought a package to our front door and rang the doorbell.

Turns out that it was just a printer cartridge delivery, but with the price of these things I’m not surprised by the precautions.

Getting Started with Azure Sphere

Pictures shows security aware graffiti

My free Azure Sphere development kit arrived last Friday, the day after I ordered it. Awesome. If you want one of your own you can get them here for free. It has serial ports, environmental sensors and buttons, plus a connection for an OLED display. You write programs for it using C via a Visual Studio extension. You can deploy and debug the code in the device from your PC and its very secure.

That’s all I really know at the moment, so lets get started. You can find the documents here. They tell you to go here and install the Visual Studio plugin. This also installs hardware drivers for the device. The bit that they don’t document very well is how to set up the device with Azure Sphere. You need to go here to do that. I worked through the sequence with no problems and now I’m waiting for my device to perform an OTA update to the latest firmware. Things that I noticed:

  • When you start using the azuresphere command in the Azure Sphere Developer Command prompt you’ll be asked to log in. This needs to be with an Active Directory enabled account. If you’ve not got one (because you are using an Office 365 subscription username for example) then that won’t work. However, if you’ve an Azure account (and having an Azure Sphere device without an Azure Account would be very stupid) you can use the free tier of the Active Directory provision (just click Azure Active Directory in the portal) to create Active Directory enabled accounts.

  • Once you’ve logged in with your shiny new Active Directory username you must create an Azure Sphere Tenant which acts as a container for your devices. Physical devices are then “claimed” by the tenant so that they are managed by that tenant. This is a one time action. Once a device has been claimed by one tenant it can’t be claimed by any other and a device can only be claimed by one tenant. I’ve made a Tenant called “Connected Humber CIC” for all our devices.

  • By default (i.e. unless you specify otherwise) any user in the Active Directory that authenticated your azuresphere command can control your devices, including pushing new firmware, claiming new devices and so on. If you want to restrict this you’ll have to set this up yourself. It’s not hard to do, but you have to do it. This is not a problem if, like me, you’re only got a few users on your Active Directory, but it would be an issue if you were adding the tenant to a large Active Directory setup (perhaps a corporate lan) with lots of users with different levels of access.

  • You have to use the azuresphere prep-debug command to allow you to deploy code into the device and debug it from Visual Studio. Once you’ve put the device into debug mode it stops receiving OTA updates. The azuresphere prep-field prepares the device for the field. These commands might install usb drivers for the debugging, so they need to run in Administrator mode - (start the Azure Sphere Developer Command prompt as Admin)

  • The Visual Studio Add-In for Azure Sphere works fine in Visual Studio 2019

Well, the firmware update has completed, I’ve done the command to prep the device for debug and now I’m running the GPIO version of “Hello world”; a flashing LED. I’ve even managed to put a breakpoint in the code and stop it. Next thing to do is connect a sensor and get my Air Quality code ported across so that I can get readings into the device, then I’m going to have to figure out how to get the readings over the network to store them and finally how to deploy the code for real.

Exciting stuff.

Long Cow

If it seems like I’ve been playing a few games lately I have. So there. Long Cow was an early birthday present, purchased because I liked the phrase “udderly ridiculous”, it looked like fun, and it had a “moo” voice box as one of the play pieces.

Players compete to create the longest cow and the biggest herd. Your cows can be of particular breeds, or you can use “frankencow” cards that allow you to mix them together and even add robot components. And there’s rustling and other cow related tom-foolery to be had too.

It’s actually rather fun. Nothing too taxing (although I think you can take it very seriously if you want) and some lovely artwork on the cards.

Lego Lunar Lander

I’d really like to be rich. If I was rich I could afford the new Lego Lunar Lander kit and a big house containing a “Lego wing” into which I could put it once I’d made it.

Actually, to be honest I’m not that bothered really. As someone who was around at the time of the landing (#oldagebrag) I remember getting and building the official Airfix Lunar Lander kit (complete with a piece of the moon). Mine even had gold tin foil from Caramac bar wrappers around the legs, just like the real thing.

Lamppost Sensors Live

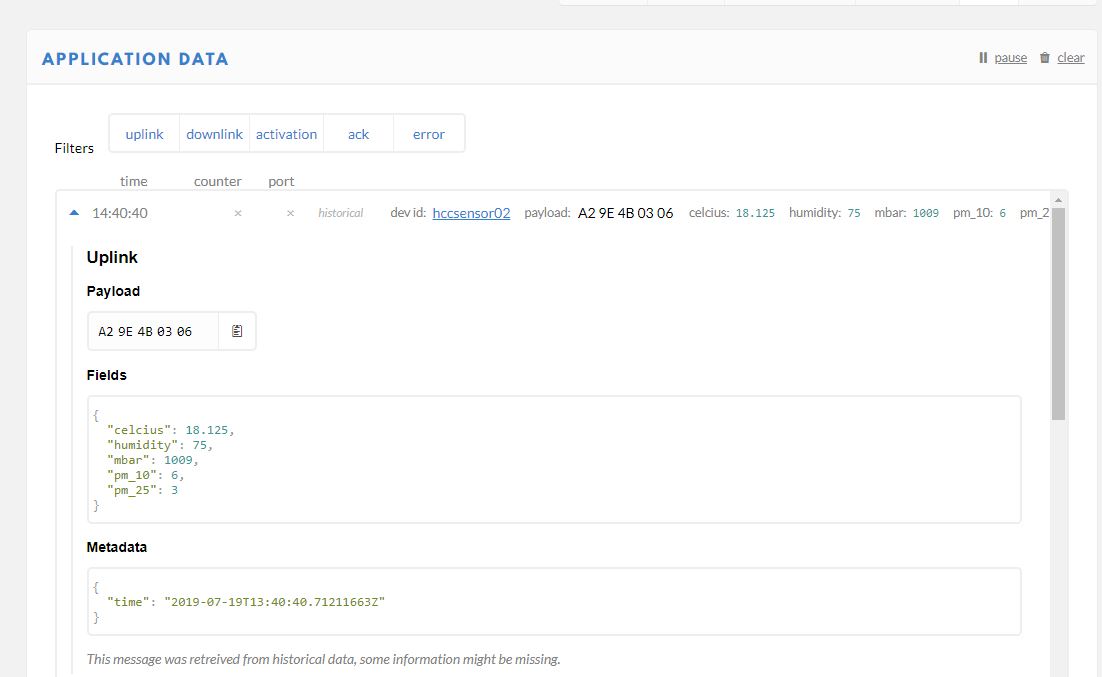
Well, this is rather exciting. The air quality sensors that we handed over to Hull City council to be attached to lamp posts and measure air quality are now attached to lamp posts and are measuring air quality.

We didn’t expect them to show up on the network just yet, but thanks to one plucky LoRa gateway in the middle of Hull, three of the four sensors are getting readings into the servers.

The next step is to get the data onto our interactive map so that everyone can see what it looks like.

Free Azure Sphere Development Kit

One of my big concerns about the Internet of Things is that people might not do it properly. By that I meant that they will rush to market with the ability to put connected control into all kinds of situations without worrying about security, deployability and maintainability. That’s one reason why I very much like a new competition where you get to play with an Azure Sphere embedded device which has those abilities at its heart.

Another reason why I like the competition is that you can get a free device to play with if you enter. You can find out more here.

Werewords rocks

This is a really good game. I’ve been a fan of werewolf for a while. That’s the game that pits werewolves against villagers. Werewords has a similar basis, but rather than trying to just spot the werewolves the villagers are in a race against time to deduce the “magic word” that only the seer, the werewolf and the mayor know. If the werewolf identifies the seer the wolf wins. If the villagers spot the werewolf, they win. Everyone can ask the mayor yes/know questions to try to work out what he word is.

The seer can try to steer the questions towards the answer, but not too much in case the werewolf spots them. The werewolf is doing the same thing, in the opposite direction. And sometimes the mayor is a werewolf.

Confused? You won’t be. Not after a few rounds. The whole game is run by an app that sets the scene and times each round. A complete game lasts around 6 minutes, and so over an hour or so of play everyone gets a go at the different roles. Well worth a look.

Shifty Eyed Spies

Shifty Eyed Spies is not a serious game. At least, not the way that we played it. Our attempts ended up mired in frequent hilarity and general shiftiness.

Players have to signal to each other via surreptitious nods and winks, while all the time looking our for others doing exactly the same thing.

It’s very unlikely you’d want to spend an entire evening playing it.But as a warm up for something a bit more meaty, or just a reason to be deeply silly for a while, it is rather fun.

Learning through games

I’ve got my two button game working now. It’s fun watching people play a game that you’ve made. They start doing things that you weren’t expecting. But sometimes you find out other things too.

The gameplay (press the red button if there are more red lights lit, blue if more blue) is simple, but I make the task more interesting by adding more colours and making the colours move around the lights. Then I thought I’d make the lights flash on for half a second and then off, so that the player has very little time to count them.

This actually makes the gameplay seem easier (at least for me). The brain seems to retain the information for a while so that you can work out the answer, even with a very brief look at them.

I think this is the basis of “flash cards” although I may be wrong. But it is a useful reminder of the way that you can start going down really interesting tracks when you start fiddling with games.

Getting Started with Micro Python on ESP32

I got my little game working on the Raspberry Pi yesterday, and today I got to thinking how I could make it work on something a bit, er, cheaper. It’s not so much that I begrudge paying the price for the Pi, more that I can think of more demanding things to do with the Pi than just run the game. My thoughts turned to the ultra-cheap ESP32 devices that I’ve been playing with. The only snag is that I’ve written the entire game in Python for the Raspberry Pi, and I don’t fancy re-writing it in the C++ that these devices normally run.

So, why not run Pyhon on an ESP 32 device?

This turns out to be really easy. If you’ve installed ESP32 devices as part of your Arduino development environment you will have a useful little program called esptool.py on your machine. To convert a device to Micro Python you just have to plug in one of those ultra-cheap devices, find out what serial port it is connected to (in my case com4) and then use the command below to program the chip with Micro Python.

esptool.py --chip esp32 --port com4 --baud 460800 write_flash -z 0x1000 micropython.bin

This loads the image in the file micropython.bin into the device. To get a Python image, go to the download site and look for ESP32 devices. I used the one in the file esp32-20190714-v1.11-146-g154062d9c.bin

Above you can see what happened when I ran the command.

When you restart your ESP32 you will be able to talk Python to it via a command prompt. That’s fine, but what you really want is an IDE that lets you write and deploy Python programs.

The best one I’ve found is called Thonny. It’s works with “normal” Python nicely enough, but it also has an option you can use to point it at an embedded device:

In the options menu above I’ve told Thonny to search for a device running MicroPython and connect to that. Now, when I run a program it is deployed into the device and executes from there.

The MicroPython installation provides a tiny filesystem that can hold python programs. When you run a program it is transferred into that filesystem and runs from there. There are two special program files on the device, boot.py and main.py. The program in the boot.py file is executed when the device powers up, followed by the one in main.py The Thonny program has an option (in the Device menu) to save the program you are editing one of these files. This makes it really easy to make your Python program run when the device is powered up. I made my game program the main.py one and now I have my original Python program running inside a device that only cost around a fiver.

It wasn’t quite as simple as just copying the files over. The api (application programmer interface) to use GPIO ports and Neopixels are different in the two devices and I discovered that MicroPython does not provide a random.shuffle method. This meant that I had to create my own shuffling function, which wasn’t too hard.

Anyhoo, I now have my program running in Python on a tiny embedded device. Which is rather nice. I’ll put the code up on GitHub later this week.

Hull Raspberry Jam with Two Buttons

Well, that was fun. I really should have taken some pictures of the jam, it was great fun. There were loads of machines set up and creativity going on all over the place. I took my “Two Button Box” along and developed the rest of the software. Thanks to Ben, Jon and Matt for advice and help on getting my Python program to run each time the box is powered on (this harks back to my Unix days of old - editing the rc.local file to run programs on boot up).

Players need to press the red button when there are more red lights lit, and the blue button when there are more blue lights lit. I’d taken a bit of care to make the gameplay progressive. The game starts simple, with just red and blue lights, but then other colours appear and then they all start to move around.

It’s always nice to see people playing a game that you made. I’m not sure it pushes back any frontiers or brings anything particularly new to gaming, but it is always nice to see someone enjoying playing with something you’ve made; particularly if you enjoyed making it.

You can see it in action here. Thanks to Jon for the video.

Making plans for Hull Raspberry Jam

There’s a Raspberry Jam in Hull tomorrow. There is a kind of development theme where attendees are invited to create a game that only uses two buttons to control it. I love a good constraint. Ask me to make a game and I’ll fall apart. Ask me to make a game that only uses two buttons and I get interested. I mean, as you can see above, I’ve got two buttons….

My plan is to put the buttons, a Raspberry Pi and a power supply in a box. It’s one of the boxes that is supposed to have an Air Quality sensor in it (sorry Robin).

There’s a kind of reason in this madness, in that I’ve often wondered how good the Raspberry Pi is for creating what I’d call “pure” embedded devices. The Pi Zero W is very close in price to things like ESP32 based devices and brings a lot of advantages, including much more power and a “full fat” operating system. I get to write in Python - which I love - and I can actually run the IDE on the device itself if I want to.

You can see my first step above. The first thing I do is make sure that all the components will fit inside the box. As you can see, I think it will probably be OK. The only snag I’ve hit so far is that the holes for the buttons need to be a little bit larger than the ones in the box itself. However, a few minutes with a drill have sorted that one out.

The box that I’m using, like pretty much everything in my life, came from Amazon. You can get it much more cheaply if you are prepared to order it from China via Aliexpress. It’s supposed to be used as a junction box for connecting cables. It has eight big holes all round the sides into which you can run cables and connect them together, or put devices into. It has these rubber inserts for all the holes that you don’t want to run cables into and I got to wondering how good they would be at defusing light from a neopixel. Perhaps I could put some lights in the box and use these as the basis of a game of some kind. Time to build a circuit…..

What we have here is the first circuit. The two micro-switches will be fitted onto the buttons. The coloured pixels are to be stuck inside the box against each of the rubber fittings. The chain of lights is connected to a single GPIO (General Purpose Input/Output) pin on the Pi Zero. The buttons are connected to two other GPIO pins. There’s a splendid library available from AdaFruit that allows a Python program running in a Raspberry Pi to set the colour of each of the leds and also read the state of the inputs. So in no time at all I had the lights on under program control. Some tests have indicated that they will work quite well. I’ll put them all in the box tomorrow.

The next thing I need is an idea for a game. What I’ve come up with is a very simple idea. Each light around the box will light up with a particular colour. If there are more red lights lit than blue lights, the player must press the red button. If there are more blue lights lit than red lights, the player must press the blue button.

This should be easy to code and might make for some compelling short term game play, particularly if I add a bit of complication as the game is played.

I’m looking forward to taking the box to the Raspberry Jam tomorrow and finishing off the code.

Mobile Phone Navigation is still rubbish

Wrong side of the tracks….

The satnavs that I’ve used in cars are mostly OK. The ones I’ve used in phones are mostly awful. Some observations:

  • The official Apple Maps application for iPhone actually consumes power faster than a normal car USB connector can charge it. So on a long journey your phone can go flat even if it is plugged in. On the plus side, it does make for quite a good hand warmer.

  • The Google Maps application (which you switch to because the Apple Maps one kills the battery) has a navigation display that is obscured by appointments that pop up on the screen and have no obvious way of cancelling. This is great if you are on the way to a scheduled meeting. Not.

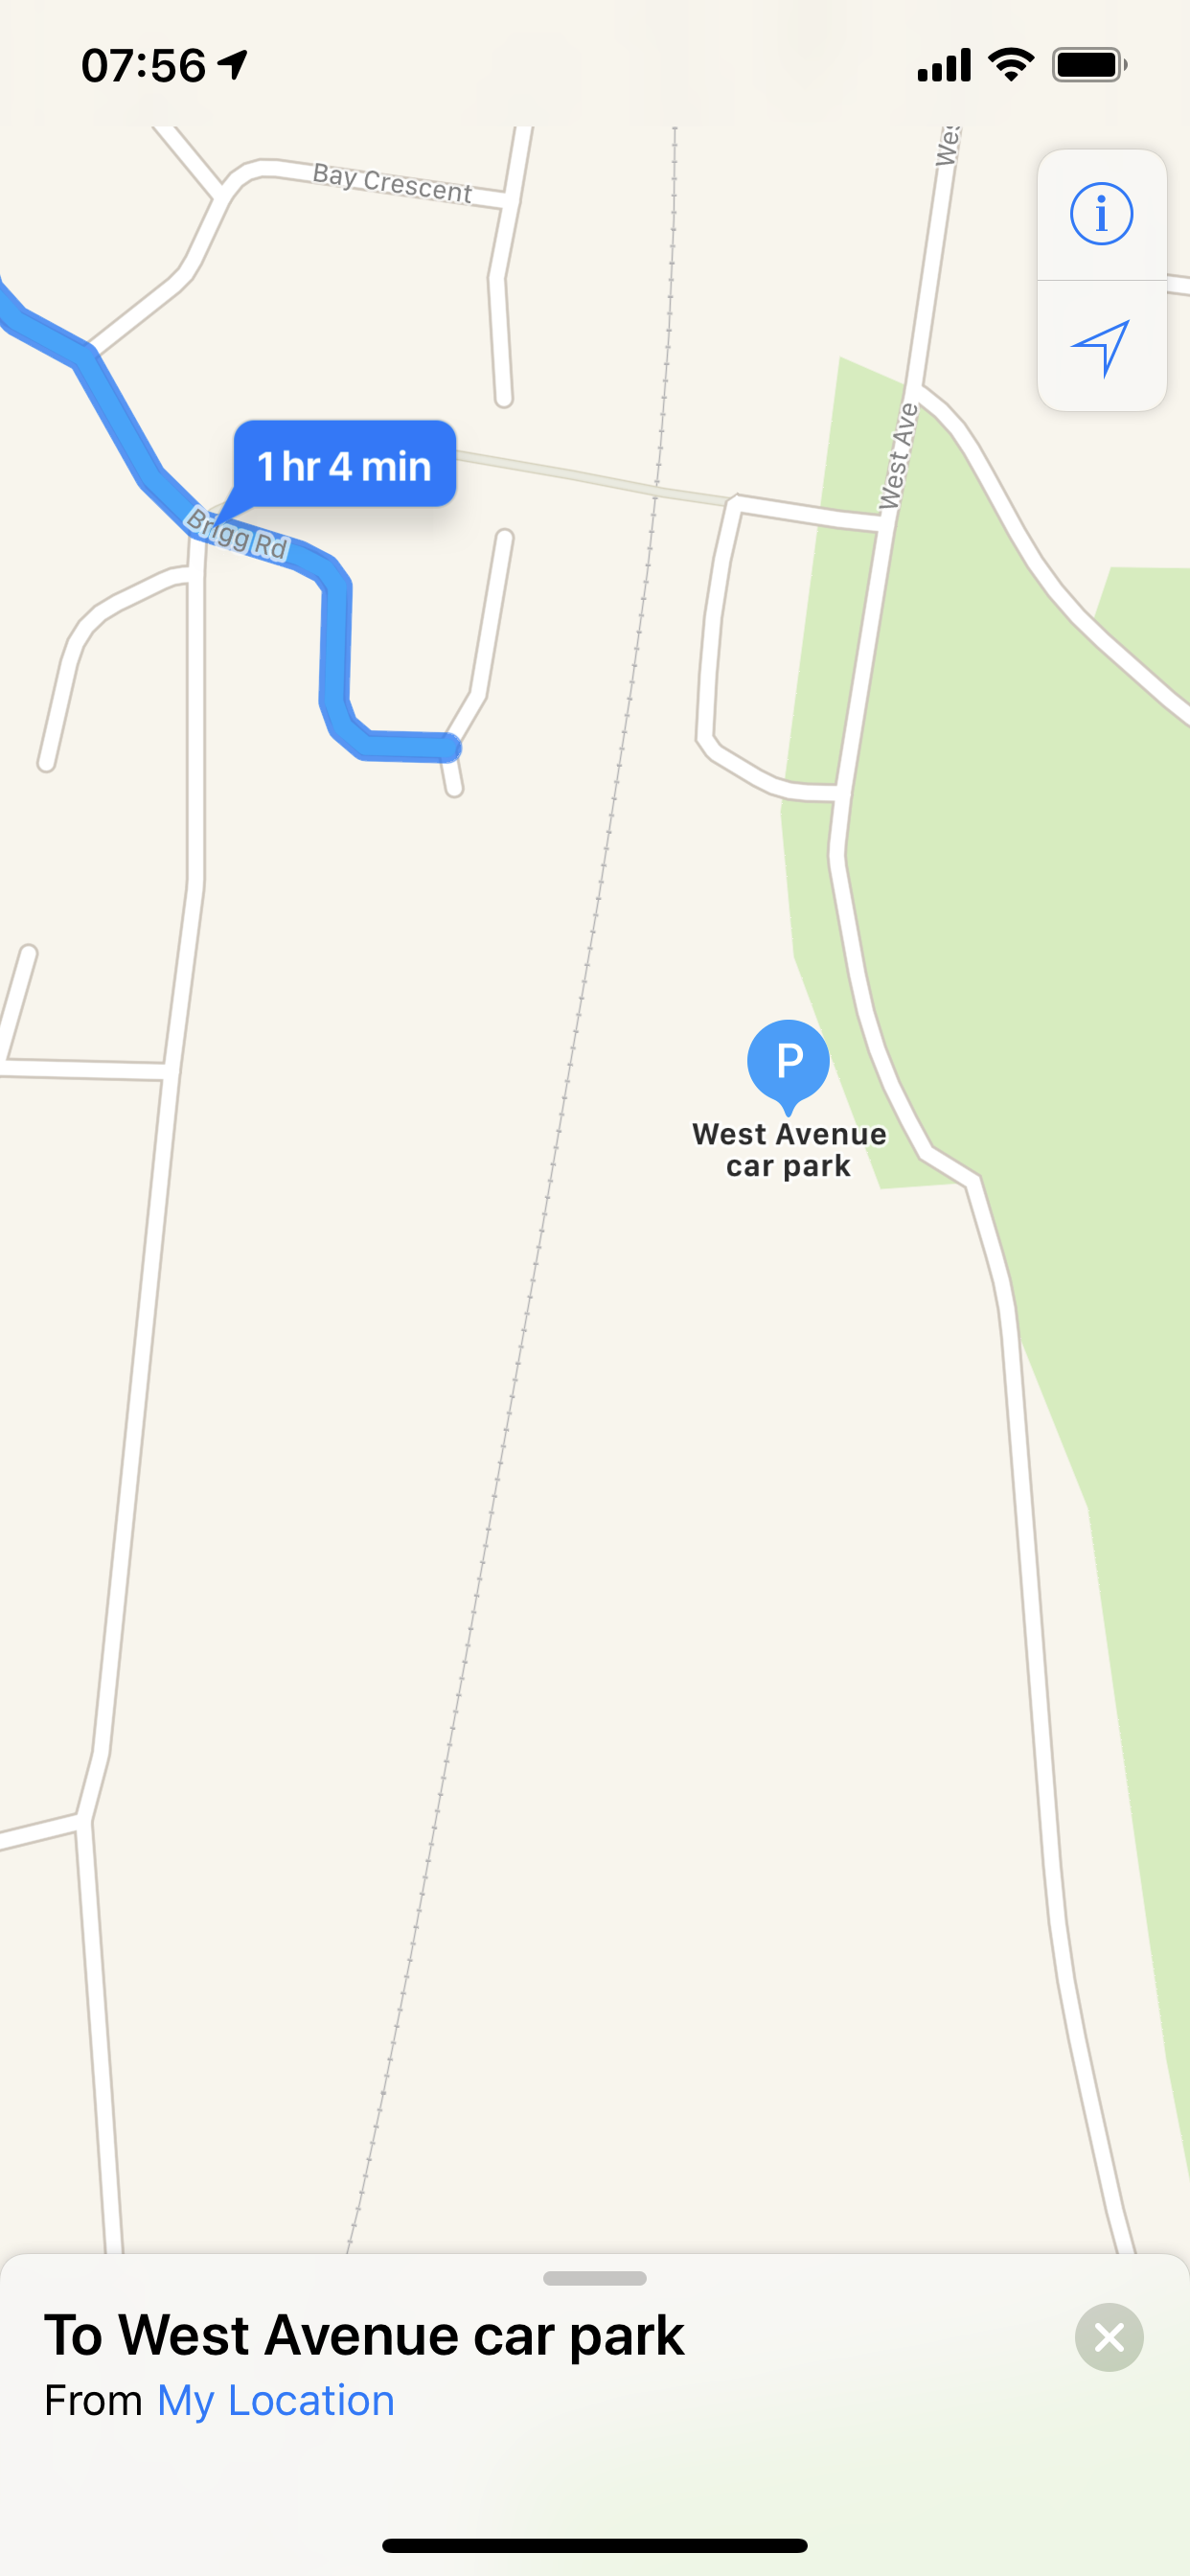
  • The Official Apple Maps app (which you decide to use for a short journey) just plain gets things wrong. Exhibit A above. Searched for the West Avenue car park in Filey, asked the phone to navigate me there. Got taken to a residential street across the railway from my destination. Rather than using the geographical location of the thing I’ve searched for (which it seems to know because it draws it in the right place) it instead navigates to the post code which covers an area including lots of wrong destinations)

O2 Apple Watch Data Fix

After all the fun and games getting the Apple Watch on O2 I was hoping for a happy ending. But this didn’t happen because although we could quite happily make phone calls with the device all the network and SMS features were broken. I was thinking for a while that I’d have to ring up and they’d try to sell me another watch. Wah.

But the good news is that the fix was quite simple. I opened the Apple Watch app on the connected iPhone and then went to the Mobile Data tab. This shows you the data used by the watch. Just as the phone was heading to the page it displayed a “Carrier settings update” message and offered me the chance to confirm. After doing this the watch seems to work fine with SMS and mobile data. So, if you’ve bought one (or even several) Apple watches from O2 and can’t get the data to work you might like to try this.

Raspberry Pi Model 4 a bit slow at 4K

So I’ve got my Raspberry Pi model four running and I thought I’d try it driving a 4K monitor. Promotions of the device have made much of the fact that this new version has not one, but two video outputs and they can run 4K video.

I don’t want two 4K displays, but a single one that works correctly would be nice. Unfortunately the performance is not great. It might be me, but it seems that although the desktop looks splendid it does seem to lag a bit. Moving the mouse around turns into a game of skill, where you have to stop moving the mouse before it arrives at the desired destination. This might be a great idea for a video game, but it isn’t much fun when you are trying to use the device.

I’m hoping that this is caused by early versions of the operating system not being optimised for the new hardware, but if you’re thinking of getting a model 4 I’d advise you to get your hands on a device and have a play before you splash any cash.

Awesome Overhang fun

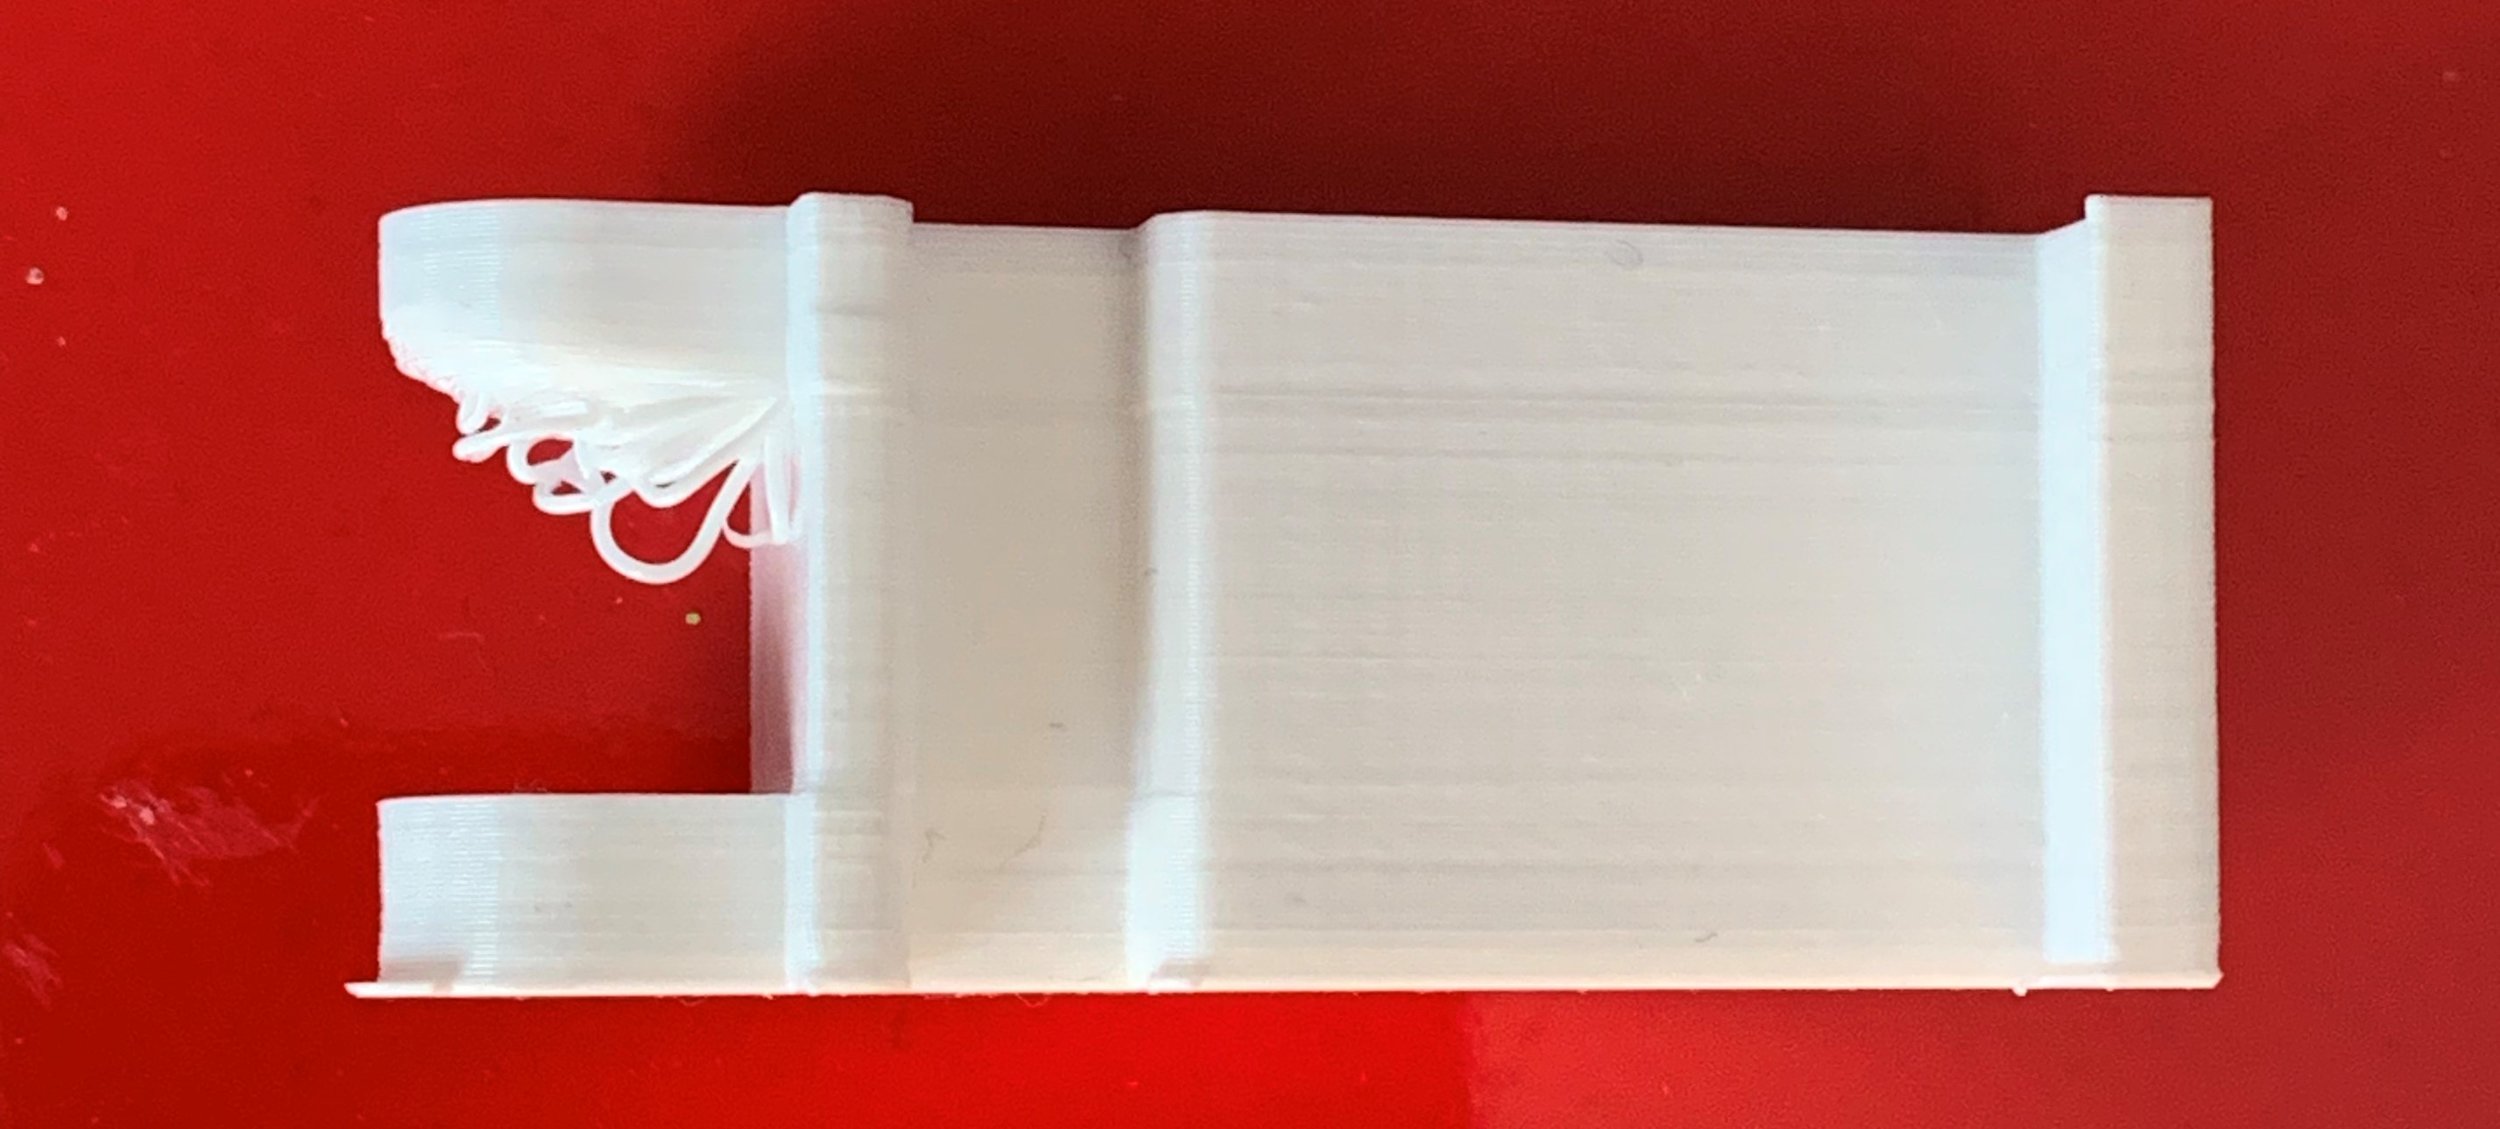
So I’m printing some camera clips on Una, my Ultimaker (seven years old this year). I forgot to ask for support for the print. I needed support because the top half of the clip just sticks out into the air. If I’d asked for support the gap on the left of the picture above would have been filled with removable printed bits that support the “ledge” that is being printed.

However, when the print finished I was impressed that even with the lack of support I’d got something that is probably usable. You can see the dangling loops of filament at the bottom of the ledge but after a few layers they had bunched together enough to get enough material to complete the print.

I’m not proud of my inability to specify support when a print needs it, but I’m very proud of the way that Una coped without it.

Uninspiring O2 Apple Watch

Drop everything - your order’s ready to pick up.

Turn off the TV. Put down your sandwich. Get off the bus. Whatever you’re doing, it’s time to hotfoot it to your O2 store. If you can’t come right now, that’s okay. We’ll hold it there for seven days. But don’t leave it any longer, otherwise we’ll assume you’ve changed your mind and we’ll have to cancel your order.

I had to work very hard to get the above message. The plan was simple. I thought it would be nice to replace number one wife’s ageing Version 0 Apple watch with a new and cellular version. And O2 were doing a discount offer that looked rather tempting. What could go wrong?

Lots.

I thought I’d perform the transaction online. Half way through - just after I paid my 20 pound deposit - the web page crashed. No order, no nothing, just a 20 pound transaction on my bank account. So I rang up and asked them to sort it out. Of course they can’t do that. There’s no transaction to find. But they can sell me the watch again. Cue 25 minutes of minutely detailed purchase discussion. The kind of thing I’d been trying to avoid by buying online. At the end of this fun and games I was promised an email containing a link that I could use to complete the transaction.

Guess what? That link crashed too. Another 20 pound transaction on the account. So I rang up again to try and sort if out and, bless my soul if they don’t try to sell me a watch for the third time. I suggested that it was time to get someone along who knew what was going on. Finally I got escalated to the point where someone asked “Are you using a pop-up blocker on your browser” .I’m not, but the merest mention of issues like these sends me scurrying off to try a different browser. And finally, after another 20 pound payment, I get an order completed. I’d carefully used Google Chrome to perform the purchase because I worry about browser issues breaking things but it turned out that this was broken. And the transaction that came through was made using Edge. Go figure.

Apparently the other payments will disappear after a while. They had better. Or I’ll probably have to go online and buy another watch to sort it out….

Anyhoo, a couple of days later I got the breathless email at the start of this page. So today we hurried along to the O2 store to get our hands on the treasured technology. It was a very uninspiring pickup. I wasn’t expecting fireworks, or a red carpet. This was just as well. I’ve had more engagement picking up parcels from the Post Office. In fact it was just like that - even down to the DHL wrapper the watch came in.

Pro tip for O2 shop staff: you can greatly enhance the pickup experience for customers by taking the item out of the postage bag before giving it to the customer, and then showing an interest in what was bought. I guess there’s no commission to be had in handing something over, but that’s not really the point as I see it.

I got the watch installed after three or four hours. Software updates over Bluetooth take an age. And it seems to work fine. But I can’t recommend the customer experience at all.