Hull Makerspace in Hackspace Magazine

This time last year Hull didn’t even have a Makerspace. Now we’ve got one that is featured in magazines. This month’s “Space of the month” in Hackspace magazine is Hull. Well done folks. I’ve used the Makerspace quite a bit, I’m especially fond of their laser cutter which is where I cut the chassis parts for the air quality sensor.

If you’ve not read Hackspace magazine you really should. I’ve got just about all the issues in printed form even though I could have read them here for free. What can I say? I like having printed stuff. And I really think this kind of publication should be properly supported. Take a look. I think you’ll agree.

Humber Street in Hull is Lovely

There is some rather nice artwork on the buildings

The weather in Hull was glorious today. We spent a goodly amount of time wandering down Humber Street looking for somewhere nice for lunch. Loads of choices, we went for Bert’s Pizza at the end which turned out to b a splendid choice. If you want to see what the future of life in Hull is really going to be like you should really go and take a look at the Fruit Market area. There’s just so much going on, and it is all nice.

Jelly belts

Number one son has discovered the joys of vinyl records. Today I thought I’d relive some of my youth and got my record deck down from the loft. Turns out that the drive belt has turned into a kind of jelly. Ugh.

Fortunately, through the magic of Amazon it turns out you can still get belts, and even the stylus, for my elderly Panasonic deck. The order went in today. Nostalgia beckons…

Linux on Windows 10 is Awesome

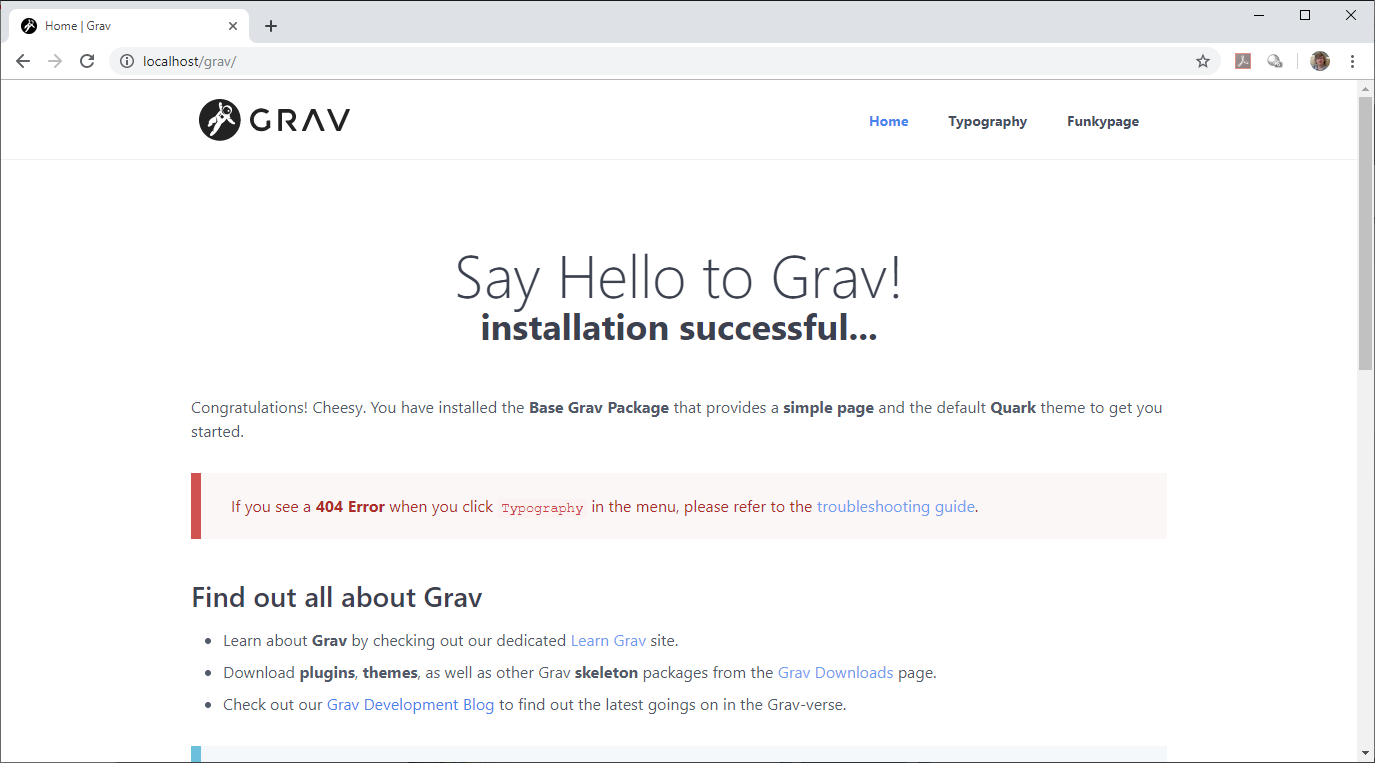
I’m doing some web site work at the moment for Connected Humber. In the process I found about about Grav, which is another nice way to make static web sites that are simple to host, even on sites like GitHub.

I thought it might be nice to have Grav on my machine so I could play with it. Only problem is that it really needs to run on a Linux box. A while ago I mentioned how easy it is to get a Linux box running in the cloud with Azure. It turns out it is even easier to get Linux on a Windows 10 device using the Windows Subsystem for Linux. This procedure here is a good start, but I used this one because it also covers the installation of lots of tools that you will want to use.

Now, to be clear, the Windows Subsystem for Linux (WSL) is not the same as running Linux on your computer. It is also not the same as a virtual machine running Linux. You start it running and you instantly get a shell command prompt that you use to talk to you “Linux” installation which is really just a process on your Windows PC. There is no graphical interface (unless you are prepared to do a lot of fiddling about) and you would never use this in production. But it is fantastic for development.

You can install all your favourite Linux tools and they will just work. All your Windows drives are mapped into the WSL environment. Network connections just work. You can host websites and services locally and then hit against them from Windows programs and browsers. There is even a plugin for Visual Studio Code that lets you write the code on your PC and then deploy and test it on your WSL.

It has always annoyed me that sometimes I have to scrabble around for a Windows version of a tool that is readily available for Linux. However, with WSL I can just install and use it. In no time at all I had Apache2, PHP and all the underpinnings needed to run Grav. And after a bit of fiddling around with the apache2.conf file I had it running. The lack of a Linux windowed environment is not a problem for me at the moment. Lots of tools, such as Grav and NodeRed (which also works great) are used from the browser, which works a treat.

I’ve been using the Unix command prompt for longer than I’ve been using Windows (what with Windows not having been invented when I started). It’s really nice to be able to use those commands again on my Windows box.

If you want to learn Linux, you should install this and start playing. It’s awesome.

Still time to enter the Humber Care Tech Challenge

I got an email from Kevin today if I was still planning to enter the Humber Care Tech Challenge.

Oh yes.

I’ve just filled in my form. Total cost for spending two days at the lovely Spa Hall in Bridlington, talking to subject matter experts, getting feedback on my ideas and picking up new skills? Zero. And the food you get while you’re there is free too. (I really hope they do the pie again. And the biscuits.)

Some companies spend piles of cash on “staff development” and “team building” events. Why? Just come along to the challenge with an open mind, a bunch of skills that you already have (and perhaps some you want to have a go with with). You never know, you might end up with a prototype application, a bunch of ideas and an implementation plan. After all, that’s what happened last time….

Sign up here.

A picture fit for the living room wall

We’ve had the same picture (Lego superheroes) over our fireplace for ages. Last night, thanks to a time limited 40% saving offer from Photobox, we set about changing this. We’re going for the picture above, which I took way back in 2013 from the Ferris wheel at Hull Fair. We’ve bought canvas prints from Photobox before and they do a good job.

I was feeling very smug about getting the order in before the offer expired and then I found out that they’ve extended the offer…..

Don't buy the wrong Heltec device

It turns out that I’m perfectly capable of making the same mistake twice. In fact, I seem to insist on doing this.

A couple of years I bought three Heltec devices that were configured for the American market. They worked fine, but only on the 433 MHz network that they use for Lora in the ‘states. For the UK and Europe you need 868 Mhz ones.

A while back Adam told me about a new Heltec Wireless Stick that looked interesting. I was intrigued, so I bought one. The product listing implied that it worked on all of the wavebands.

Mine doesn’t. It has 433 written on the box. It’s a nice enough device, but much less useful than I was planning.

Moral of story: check the transmit frequency of any LoRa device that you might think of buying.

Pride and Prejudice at Elsham Hall

There’s nothing like live drama in the open air. As long as it doesn’t rain. Today finds us at Elsham Hall sitting in their lovely grounds waiting for a production of Pride and Prejudice to start.

We were fortified by a large number of sandwiches and an optimistic weather forecast. The play was really good. It’s rather tricky to fit an entire book into a couple of hours but they managed it splendidly. There was some very clever casting at work, with some of the players playing multiple roles in great style.

I’m not a Jane Austen expert, but number one wife is. She reported that all the crucial lines in the book were faithfully transferred to the stage and we both thoroughly enjoyed it. And it didn’t rain. I’d like to see more open air theatre in the future. Even in England.

Using TTN Mapper to show LoRa coverage

I’ve been playing with TTN Mapper. It’s great. There’s an app you can get for your phone (Android or IoS). You configure it with the details of your Things Network application and then you can wander round with a portable LoRa device and help to build a map of coverage.

You don’t have to actually connect your LoRa device to your phone, you just have to enable the mapper program on your phone to connect to your application and then it will detect LoRa packets from the device in that application and use the gateway metadata to help build the coverage map.

I’ve configured one of my Pax counter devices so that I can use it for mapping. Note that you need to be careful to put the sensor name in exactly as it is configured in the application. My iphone keyboard “helpfully” converted one of the characters in the device name to upper case and broke the mapping.

Some of the strings you have to enter are quite long. I opened up the Things Network site on my phone and then copied them out of the browser into the setup page of the application.

You can use a wildcard for the device name but this might get confusing if the mapper starts thinking that messages from distant sensors are actually with you and your iphone. But this would be a good way to work if you make a network with a single LoRa device that you are going to use just for mapping.

I’m going to try and get into the habit of taking the phone and a LoRa device with me whenever I go for a walk.

Server Discussions at c4di

We had a quiet, but useful, hardware meetup today at c4di. Although most of the talk was of servers and software.

We’re in the process of migrating our services onto a shiny new Azure platform (if virtual machines can ever be regarded as shiny). As of today we’ve got the bulk of the work done. This means that you can go to our map and see something useful. We made some changes to the configuration live at the meeting which was great fun. I also insisted that we turn off the server and then turn it back on again, so that we could make sure that there are no manually started services that we need that would cause things to break if we ever had a reset. I’m pleased to be able to report that the server passed with flying colours.

Next we have to move our web sites and a couple of other services and then we’ll back in business. Huge thanks to everyone, particularly Starbeamrainbowlabs and Brian, for making the move.

Starbeamrainbowlabs has written some neat blog posts on the migration process that you can read here.

Any Solar Power experts out there?

I went to a meeting yesterday with some folks who are interested installing some of our air quality sensors. However, we have a major problem with this because at the moment our devices are all mains powered. This is mainly because the particle sensor is quite a power hungry beast. It needs to be fed with around 120 milliamps. This is not a huge amount, but it is enough to make long term battery powered deployment a bit of a no-no.

It looks like there are some devices out there, I’ve ordered some of the one above, based on the MCP73871 chip. If anyone has ever used this kind of device and got a happy ending I’d love to hear from you.

Icelandic Parking Tips

As part of the public service remit of this blog, I bring you my handy “How to buy parking tickets in Iceland” and “How to contest a parking fine in Iceland when you have failed to buy your ticket correctly”.

If you park up in Iceland you have to buy a ticket. Don’t work on the fact that nobody else has a ticket in their car window, it’s all done with car registration plates. Pay for your parking at one of the handy machines above. The most important button on this keyboard, at least at the start, is the one next to the Icelandic flag at the bottom right. You can use this to select the English language version of the machine.

Once you’ve got the language sorted, enter your car registration number, the number of hours you want and then your contactless credit card and it all works out.

Except that sometimes it doesn’t.

This is the funky little Kia Picanto that we hired from Lagoon Car Rental (they are awesome by the way). When I entered the registration I included the 21 in the middle of the plate.

This is a stupid thing to do. The registration is happily accepted by the machine, but it is not valid. The proper registration is just “JPL42”.

So of course we got a parking ticket. Wah. Fortunately there’s a website that you can use to lodge an appeal. Double fortunately I’d asked the parking machine for a printed receipt which we could use to give our appeal a bit of extra heft.

So the moral of this story is to not put the year digits into your registration when paying for parking. And to get the receipt to use if you are as daft as me….


Always take some toys to meetings

Today I had a meeting about Connected Humber CIC. We are trying to spread the word about what we are doing. I took some toys along, including the prototype Air Quality sensor and my Air Quality Top Hat.

This turned out to be a real win. Everyone was very impressed (or very polite). I reckon you should always have some toys to show off when you are trying to impress. This doesn’t mean you should push them into everyone’s face as soon as you start, but that if the conversation turns to “What have you made then?”, it is really nice to be able to pull something out of your bag.

Making classy web sites for free using Hugo

A while back I read a great post from David Parker about using the Hugo program to produce static web sites that you can host on GitHub. I’ve had a go with this, using the amazing meghna template. You can find the result here.

It’s been a great learning experience. Things I’ve learned:

  • The Hugo program will serve out a test version of your web site pages which you can view on your local machine. Each time you update a local file, the test web site updates automatically. This is a great way to preview your site, but beware of browser caching which can cause changes not to propagate. I lost a lot of time wondering why some changes hadn’t worked when they had.

  • if you want to map your Hugo site to a domain the source repository must be unique for a particular GitHub user or organisation and have the “.github.io” string on the end of its name. You can host web sites from other repositories in your GitHub account, but these will always have urls which are on the GitHub site.

  • David’s howto does a cunning GitHub worktree thing to allow both the web site source and the served pages to be on two different branches of the repository. He presents a batch file that will update the web site on the Master branch of the repository (the one containing the site) but if you want to push changes in the source files to the source repository you will have to do this by hand. I got myself into a bit of a tizzy using the GitHub desktop client to manipulate the site files. I’d advise you to do everything from the command line.

  • A GitHub repository that is mapped to a domain name must contain a CNAME file which gives the name of the domain being used. If you use David’s vanilla batch file to update your site you’ll find that the CNAME file is not replicated. You can fix this by adding the CNAME file to your static folder on your site repository or by changing the batch file to create a new CNAME file each time after it has wiped the old site prior to making the new one.

  • If you are mapping a domain name to your site and you want to use HTTPS (and you should) the address that you put in the config.tohtml file must be the domain name, not the GitHub address

  • If you add the

    RelativeURLs=true

    CanonifyURLs=true

    lines to your config.tohtml file these will break some of the megha features, notably the scrolling background images

  • You may have to modify some of the html files in meghna to remove references to a local php server used for mailing that is not available on a GitHub site

If you want to make a classy web site on the cheap (actually free) then I strongly recommend that you take a look at Hugo and the lovely templates that there are available for it.