Heltec Lora 32 on Fritzing

I spent a big chunk of yesterday trying to create a Heltec Lora 32 part for the Fritzing design program. In the process I learned quite a bit about SVG files, Inkscape and pcb design. So I don’t think it was a complete waste of time….

Tomorrow I’m going to try and figure out how to add my newly created part to the Fritzing parts library. Then I’m going to make Fritzing parts for the sensors that I’m using and then I can draw some lovely circuit diagrams.

LoRa Seminar Recording

Since I had the slide deck lying around I thought I’d record a screencast of the content for anyone who missed the seminar yesterday. I’ve not made any screencasts for a while. I learned a few things doing this one:

  • All the foam has dropped off the earpieces on my microphone headset and turned into a rather horrible powder….

  • The microphone on the headset seems to be past it’s prime too.

  • It’s very annoying when the phone rings and you’re in the middle of a recording (if you listen you’ll hear the smooth and professional way that I deal with this)

I’ve ordered a better headset with a proper microphone. At the emf camp earlier this year a chap was talking about podcasting and saying everyone should do it. Once the new headphones arrive I’ll have one less excuse for not having a go. So expect to hear more of my dulcet tones in the future.

Talking LoRa at Hull University

As you can see, there was a lot of publicity for the seminar….

Today I did my LoRa talk at the university. It was great fun, and the audience were lovely. I was in a lecture theatre I know very well from many hours of teaching there in the past. Good to see a few familiar faces and a few new ones. I hope you found the material useful/interesting.

Creating a WiFi Configuration Tool

One of the problems with any WiFi enabled device is the initial configuration. How do you tell your device the settings for your WiFi when you can’t talk to it via WiFi? It’s a “chicken and egg” situation, even though it doesn’t involve any chickens or eggs.

One answer is to make your device set up as a WiFi access point of its own, and then connect to this from a WiFi enabled phone or computer to configure all the settings. There are quite a few libraries of routines out there that will help you do this, but none of them did exactly what I wanted, so I’ve built my own.

You can see the configuration screen it generates in the screenshot above. You connect to it via your browser and then fill in the various options. It has support for five different access points and also lets you configure all the MQTT settings for a sensor as well.

I’ve got it working with my MQTT Mini Air Quality sensor. To configure the WiFi you simply turn the sensor upside down, plug it in and it starts up in “configure” mode. You then connect to the access point and perform the configuration. Then flip the sensor the right way up, restart it and away you go.

I’m very pleased with how well it works. I’ll have the code for the new, super configurable MQTT Mini device on GitHub before the end of the week. Then I’ll port the configuration mechanism over to larger, ESP32 based sensor.

Great fun.

Making a Do it Yourself Ground Pin

When I’m making embedded devices, I find that ground pins are a bit like liquorice allsorts. I just can’t get enough of them. The ground pin is the one that provides an electrical ground connection. You need a ground connection for the power for every device you want to add to your circuit, and also for every data signal. If you want to provide a push button for your user to press, yes, that needs a ground connection along with the connection to the input pin that is going to read it.

The Arduino has a few ground pins in amongst its selection of inputs and outputs. The Wemos D1 Mini that I like to use only has one ground pin. It’s really annoying when you’ve got lots of spare input and output pins on your device, but you’ve run out of ground pins. It’s a bit like “water water everywhere, but not a drop to drink…”

Anyhoo, there is a piece of programming magic that you can use to convert any digital output pin into a ground pin. Actually it’s not that magical. You just have to set one of your digital pins to be an output pin and set the level to 0. Hey presto. Instant ground pin.

You can’t really use such a pin for power connections, but you can use it for data connections. I’ve just used it on my MQTT Mini air quality device. It needs some form of input and I’m determined to avoid putting buttons on it. So I’ve added a tilt sensor. This the software to react when the user turns the sensor upside down.

The tilt sensor works like a switch. One way up a small metal ball rests on two pins, providing an electrical connection. Tip the sensor the other way up and the ball falls down away from the pins, breaking the connection. I wanted to add it to my Wemos device and, of course, I had no ground pins left. So I used a data pin instead. This is the code that makes the switch work:

#define GROUND_PIN 5
#define INPUT_PIN 4

pinMode(GROUND_PIN, OUTPUT);
digitalWrite(GROUND_PIN, 0);
pinMode(INPUT_PIN, INPUT_PULLUP);

I’m using data pins 4 and 5. Pin 5 is my “do it yourself ground”. Pin 4 is my input pin. The tilt switch is wired across these two pins. Pin 5 is configured as an output pin and set to the low (ground) level. Pin 4 is configured as an input pin with a “pull-up” resistor which means that when nothing is connected to the pin the data signal on the pin is pulled into the high state. When the switch closes, this pulls the voltage on pin 4 down to the level of pin 5 (ground) causing the input that the program sees to change from 1 to 0. My code to test the pin looks like this:

if (digitalRead(INPUT_PIN))
{
// device is upright
}
else
{
// device is upside down
}

It works a treat. So, if you need a ground line for data and you’ve no ground connections - but you have some spare signals - just make a ground of your own.

Top Down Steampunk

We went to MCM Comic Con today. It’s quite a long drive from Hull to Birmingham, but it’s worth if for the stuff on sale and particularly the people in costumes. Last time I went I resolved to try to attend this year in some form of Steampunk costume.

Of course I didn’t get around to it. But this year I thought I’d at least make a start. So, I’ve bought a Steampunk hat. It’s rather big - but I’m a big person. I’ve gone onto Ali Express and bought a flexible pcb covered in pixels. I’m starting at the top of the costume, the next step is to go through my collection of suits, coats and waistcoats. Then we start on the accessories.

This is going to be fun. And I’ve already got some goggles.

The Crimes of Grindelwald Film Review

Went to see “Fantastic Beasts the Crimes of Grindelwald”. I really enjoyed the first Fantastic Beasts film. That was a lovely film with lots of invention, whimsical creatures and engaging characters. So, when the sequel came a long we decided to go and see it without thinking.

That won’t happen again. I guess the first movie in a series is designed to hook you in. Then the second one has to set up a whole bunch of plot lines that you know are going to run until the very end of the movie sequence, and probably beyond that if the takings go well. What I liked about the first film was that there wasn’t too much of the turgid stuff that weighed down the last few Harry Potter films. This one had the lot though. Including:

  • A “chosen one”

  • An “avenge the death of my father” speech

  • A blood pact between sworn rivals

  • A marginal person who is introduced, bigged up with a dark secret and then killed off just to give everyone something to be depressed about

  • Brothers who fall out and then fall in again

  • A goody that everyone knows is a baddy right from the start

  • A baddy who nobody seems to be able to kill

  • A goody who has turned into a baddy so that they can turn back into a goody in film number four

  • A sneaking into a library/bank/whatever sequence to find out something crucially important that I can’t bring myself to care about

  • Folks waving wands at each other and sparks jumping about

I don’t really think that any of the above counts as spoilers. I suppose in our hearts we were hoping for something more. It was all stuff we’d seen before, in a slightly different order and by less familiar characters. And there was so much potential for whimsical invention and new directions in the first film. By the end I was just waiting for it to end, wondering what “crimes” I was seeing and coming to the unhappy conclusion that I might be the victim of one.

If you like Harry Potter, particularly the final depressing films, you’ll be fine. If you’ve been there and done that, you might like to ponder whether you want to do it again before going and seeing this film.

Surface Go Power Tip

I really love my Surface Go. I reckon that the best computer is the one that you don’t know you’re carrying, and on that basis it is great. You hardly notice when it’s in your bag.

But if I was using the machine all day and charging it every night I’d like it even more. This is because, like most Windows 10 machines, its sleep performance is not that great. Sometimes I leave the machine in my bag for a day or two and that usually means that when I open it up to use it the battery is pretty much flat.

However, you can fix this, at the expense of a tiny bit of convenience. The trick is to use the additional power settings to re-define the what the power button does. By default both closing the lid (or type cover in this case) and pressing the power button send the computer to sleep. That’s fine if you’re going to want to use the computer immediately in the next hour or so. When you open the lid or press power Windows 10 snaps right back into action. However, the problem is that in sleep mode the machine will only last a day or so before the battery goes flat (that’s been my experience with Surface Go and other Windows laptops - if yours is better, let me know)

I’ve changed the power button to make my Surface Go hibernate instead of sleep. When a machine hibernates it saves a copy of everything that’s running and then turns off completely. Waking from hibernation takes a few seconds more than waking from sleep, but you’ll have a lot more battery life left.

You can access the menu to set the behaviour of the power keys by doing the following:

  • Press the Start key

  • Type “power and sleep” and select the “Power and Sleep” option from the matches

  • Then select the “Additional Power Settings” from this menu, as shown below

  • Then click “Choose what the power buttons do” on the top left of the menu that appears.

  • Now select the options as you can see at the top of this post

When you know you won’t need the computer for a while, just press the power button rather than close the keyboard cover. You can then wake the machine with another press of the power button, and it will pick up exactly where you left off, but with a lot more charge in the battery. You can use this trick on any laptop.

Alexa Fun at Radio Humberside

James Piekos limbering up for some Alexa Fun

The press has been reporting stories of how Amazon’s voice controlled assistant, Alexa, may be ordering Christmas presents automatically for unwitting owners. Apparently, if someone says “You know, we could ask Alexa to order a train set for little Timmy”, in the same room as an Amazon Echo it is possible that the device may interpret this as “Alexa, order a train set”. It might even put “For Little Timmy” on the label.

Who’d have thought?

I was reviewing the papers for James Piekos at Radio Humberside today and we were talking about this. We even did some “remote control” of Amazon Echo systems, trying to get them to tell jokes, which was fun, but the subject does merit serious consideration.

I think that Amazon are being a bit naughty here, in that the Amazon Echo is set to order things using voice commands when you first get it. If you want to stop this behaviour, you have to go into the options and turn it off. I think it would be preferable for this setting to be initially off, but Amazon are in business to sell you things (something worth remembering here) and the Amazon Echo is just another device that they are going to use to do this.

I’ve come across quite a few stories about voice controlled devices and how they record everything you say. I’m pretty sure that they don’t; the amount of storage required to do this would be huge, beyond even the capacity of Amazon’s servers. However, they will record the sounds around the “Alexa” command when it is recognised, if only so that when you claim that you didn’t order that “Made in Chelsea” box set they can play back the awful proof.

These recordings might be of interest to all kinds of people and they do raise questions of privacy. But I see this as just another trade we are making between privacy and convenience. If we want the convenience of being able to order box sets we have to live with the possibility that the machine might also record the music we are listening to when we place the order.

I’m actually OK with companies like Amazon, Apple and Microsoft doing this kind of thing. I know that their relationship with me exists so that they can sell me stuff. I’m much more nervous about companies such as Facebook and Google,who have a business based on selling bits of me to other people so that their customers can influence me in ways that might go well beyond getting me to buy TV show box sets.

I think that, as with most things, this is really a education issue. People need to know the way these things work and, most importantly, how you can set limits on their behaviour. I’ve turned off voice purchasing on my Alexa devices, if only to stop a megaphone owning chum with a liking for practical jokes buying me stuff from outside my kitchen window……

Software Engineering Philosopy

This picture is one of mine. You can find it on Flickr

Had an email from a Peter who’s reading the C# Yellow Book at the moment. He asked about how to learn more about software engineering. I quite like my reply, so I’m putting it in my blog….

I worry a bit about too much emphasis on "software patterns". I just tend to write code that solves the problem, and then discover afterwards that I've used a particular pattern. Things like "dependency injection" just seem like programming common sense to me, but then again I have been programming for a very long time.

By all means read up on the different patterns, but do it from a perspective of refining your technique, not finding a quick solution to a problem. If you use a pattern without understanding how it really works that can end badly.

My strong advice is just to keep writing code. Build your knowledge and develop a habit of looking at existing systems and trying to figure out how you would make them work and what design decisions were made when they were created. If you do it right you’ll be learning new stuff and having new ideas all the time. I still am.

A lot of programming and software design is down to practice and experience, just like any other field. And you also need to remember that any working system is built up of compromises and that it is very rarely that you will find the best solution. You might find the fastest, or the smallest, or the quickest to build, but not the best.  So decide what kind of “best” that you want, and go for that.

The case of the missing shift key

Can you spot what’s missing here?

Sundeep got in touch today. She’s looking at getting a very cheap, simple, laptop to develop Arduino software. She asked me what I thought of the GEO Book 1, which is presently on sale at the very attractive price of 99 pounds. It’s got a Celeron processor, a mere 2G of memory and uses rather slow eMMC memory for the rather paltry 32G of storage that it provides.

But it only costs 99 pounds.

I had a look around and the reviews of it were not great, but these reviews were for a device priced at 160 pounds, not 99.

As it happened, I was in PC World buying another hard disk (I’ve run out of space for my photos) and they had the GEO on show. So I took a look.

First impressions were good. The display is fine, the construction smart enough and there seemed to be a reasonable turn of speed. I sneaked behind the rolling demo and fired up Word to get an idea of the performance. Everything fired up reasonably well. Quick enough to be useful. Then I tried to type something and it came out kind of wrong. So I tried again. My text was being mangled. Then I took a proper look at the computer.

There is no SHIFT key on the right hand side of the keyboard. As a touch typist I find this key rather useful. When I type W I use the shift key with my right hand and press w with my left. This did not work. I thought I was going mad at first, and that I’d failed to spot something fundamental. But no. There really is no SHIFT key on the right hand side.

I can’t believe they’ve made a computer like this. I was thinking of getting one of the devices just to see what you can do with a really cheap machine. I had high hopes. But not if I can’t type on it. If you fancy getting your hands on a Windows 10 machine that is so cheap that you could regard it as disposable then I can just about recommend it. But if you want to type properly on the keyboard you’ll need to be careful.

There might be some cunning keyboard mapping code that you could add to steal one of the other keys on that row to work as a shift, and you can of course plug an external keyboard the USB port, but for me I’m afraid that the GEO is a no-go. Even at such an amazing price point.

IMPORTANT NOTICE ABOUT C4DI HARDWARE GROUP

If you’re wondering where the Meetup site for the c4di hardware meetup group has gone, we’ve moved our operations to GetTogether. Alternatively you can just turn up at a Meetup at c4di on the first and third Thursday of each month, starting at 6:00 pm.

Note that the above picture is not one of mine, I’m using an image from unsplash.

Using the Second Serial Port on the Azure IoT Devkit

For some time I’ve been trying to create an Air Quality Sensor using the Azure IoT Developer Kit. It’s a nice little device that has a bunch of environmental sensors, a nice OLED screen and a couple of buttons. It is also properly secure, in that it contains secure storage and you can validate access using X500 certificates.

I like it a lot, but I’ve not been able to use it for air quality work as I couldn’t get the second serial port to work on it. This is important because the air quality sensors that we are using deliver their readings over a serial connection. I’ve tried doing what the documentation says to do but it just didn’t work.

I posted a question about this on the GitHub repository for the kit and got a response indicating that what I was doing should just work.

But it didn’t.

So I had a proper look in the code in the device SDK. After a bit of digging I discovered that two of the source files are missing statements that make the second serial port available to Arduino programs. The file Variant.cpp needs the statement:

UARTClass Serial1(UART_1);

..and the file Variant.h needs the statement:

extern UARTClass Serial1;

Then it does work. I’ve tested it and everything. The picture above shows my cunning test rig, using a USB to serial adaptor that I wired to the devkit. If you’re connecting the device using a MicroBit connector you will find that pin 1 is TXD and pin 2 is RXD.

I’ve put the changes into a fork of the devkit sdk that you can find here. I’ve also told the developer team about my fix, so that it should appear in the “proper” version soon. I’m very pleased to be able to contribute a tiny bit to the development of the device. I feel like a grown up programmer…..

The only problem I have left to solve is that my Air Quality sensor needs a 5 volt power supply. While the USB connector on the Developer Kit board receives this from the host device the power connection is not surfaced anywhere on the board. I can see why this is: you wouldn’t want people inadvertently sending 5 volt signals into the input pins, but it means that my wiring is going to have to be a bit more complicated than it might be.

Anyhoo, I can now start porting my Air Quality Sensor code into the Devkit, which is nice. I’m also going to make a little box for it too.

Air Quality Designs and Software now on GitHub

If you woke up with an urge to create an Air Quality sensor out of either a Heltec or a Wemo device then I’ve got good news for you. You can download all my software and hardware designs from here. You can make sensors that use LoRa in OTAA or APB (these will make sense if you know LoRa or go to my talk later this month). You can also use MQTT to talk to Azure IOT Hub or another MQTT broker including Mosquitto.

All configuration is performed using JSON messages that can be sent via the serial port or over the air. It is very easy to configure a device, no need to re-burn the software each time you want to deploy another sensor with a different name and network configuration.

I call this a “shirk in progress” release, in that I’ve been too lazy to release any new versions for a while. However, I'm now using this as my main development repository and so you can expect updates, including more detailed documentation, over time.

Using an Azure Function to receive MQTT Messages

The video shows me pressing a button on my Air Quality sensor to trigger the sensor to send a new reading via MQTT. The action then switches to the output of an Azure Function running on my PC which is responding to this. I’m very pleased with this.

MQTT (Message Queuing Telemetry Transport) is a neat way to connect embedded devices together. I’ve used it to talk to the Hull Pixelbot devices over the internet using Azure IOT Hub. Using MQTT in this way has meant that my server applications can send commands to the robots to tell them what to do, and also receive messages back.

Creating a server application is all very well, but it is a bit too much like hard work for me when I’m writing code for the Air Quality sensors. In that situation I don’t really want to have a server application sitting in the cloud twiddling its digital thumbs while it is waiting for incoming messages.

What I really want is a way of connecting a lump of code (ideally a C# method) to the event “Hey out there. I’ve got a new Air Quality Reading”. It turns out that Azure Functions just do this. You deploy the function into the cloud and bind it to the Azure IOT Hub and the endpoint that you want it to listen to. And then, whenever your remote node (which could be anywhere in the world) wants to send a message it posts an MQTT update and your function runs.

This is my function at the moment:

[FunctionName("SensorMQTTReceiver")]
public static void Run([IoTHubTrigger("devices/#",
Connection = "IoTHubConnectionString")]EventData message, ILogger log)
{
    log.LogInformation(
$"C# IoT Hub message: {Encoding.UTF8.GetString(message.Body.Array)}"
}

I stole most of how to do this from a very useful howto here. The next thing to do is add some code to the function that puts the data values from the post into a data store and perhaps add handling of alerts if we see air quality values which are out of range.

The next thing to do is build a similar mechanism to process LoRa updates sent via the things network.

PCB Design at the Connected Humber Hardware Group Meetup

Thanks to Robin for the picture

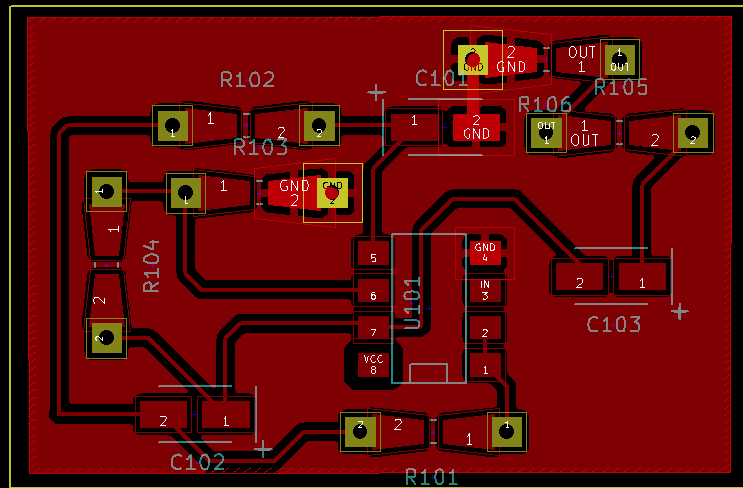
We had another great session at the Connected Humber Hardware Group tonight. Paul was telling us how to design our own printed circuit boards and get them made up. This is now so cheap that every electronics hobbyist should be getting their own custom boards made up. It turns out that it is all a matter of workflow, in that the sequence in which you put the design together is the important part. Unfortunately I was helping out with a recalcitrant LCD panel during this bit, so I’ll have to ask the other members to help me along when I start making my own circuits.

I want to make at least four, one for the fully featured Air Quality sensor, one for the “Mini MQTT” sensor, another for the Hull Pixelbot dual brain version and a final one as a badge which I think will look cool.

We’ll be continuing our exploration of PCB design at later meetups. They are free to attend, great fun, and take place on the first and third Thursday of each month at c4di in Hull. You can just turn up on the day (as a bunch of people did tonight) but you can also sign up for notification of upcoming events here.

Talking LoRa and Air Quality Sensors at Hull University on 28th November

Air Quality sensors inside and outside the box

I’m presenting a session at Hull University about low powered radio networks and air quality sensors in a couple of weeks. I’ve just written the description:

"LoRa is a low powered, long range radio networking technology with the potential to open up new embedded applications. It makes it easy and cheap to create connected devices. Rob Miles will explain how LoRa works, what makes it particularly interesting and why you should start working with it. He will show how the Connected Humber group are using LoRa to move Air Quality data from sensor to server, and how you can create your own LoRa devices very easily."

It sounds rather interesting. I’m definitely going to go along.

Learn PCB Design at Connected Humber on Thursday

This could be your design….

This week we are having a rather special Hardware Group meetup at c4di. We will be looking at the creation of printed circuit boards (PCBs). We will be using a freely available tool which can be used on lots of different computers.

If you have any interest in making stuff you really should come along. It is now very cheap to get PCBs made and they make construction much, much easier. And of course they look really professional.

We start at 6:00 at c4di in Hull on Thursday 15th November. You can join our group on GetTogether here.

Get Your Eyes Tested

For the last few days I’ve been telling everyone I meet how sharp the world now appears to me. I’ve got some new glasses. They’ve made a huge difference to the quality of my life. I’m now able to read text by looking at the letters, rather than inferring the meaning from the approximate shape of the words. This is probably going to massively improve the quality of my writing.

Then agane probuably not.

Anyhoo, the serious message here is that you need to get your eyes tested regularly. I left mine for a bit longer than I really should have, and this resulted in me spending a lot more time squinting at things than should have been the case.

I think regular eye tests are especially important if you spend long periods of a working day staring at a video screen. I’ve gone the whole hog and actually replaced my “computer” glasses too and I’m really pleased that I have. Because everything is just so sharp now…