Raspberry Pi 2 and Windows 10

News of the Raspberry Pi 2 took me completely by surprise. And then, to add to this shock I find that it is not only an awesome device, but available to buy right away. Amazing. Who do these people think they are? Apple?

If the news of a new Pi with quad core processor and twice as much RAM wasn't enough though, I then find that the new Pi will be able to run Windows 10. For free. The only word I can think of to sum up this turn of events is blimey. 

The Windows 10 support will be limited to "universal" applications, which means an end to  any dreams of running Visual Studio on a device you paid 25 quid for. But that does mean that you can use Visual Studio to write and deploy programs onto the device, which will be great. You can find out more about Windows 10 on Pi here.

The development puts a mild question mark over devices such as Galileo and Edison, which are of the same ilk, but are more expensive and have no display capability. I guess everything will settle down and find its place eventually. The two Intel devices probably have a bit more straight line speed, although the 900 MHz four core processor in the new PI is not to be sneezed at. 

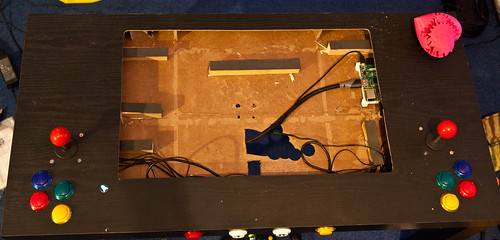
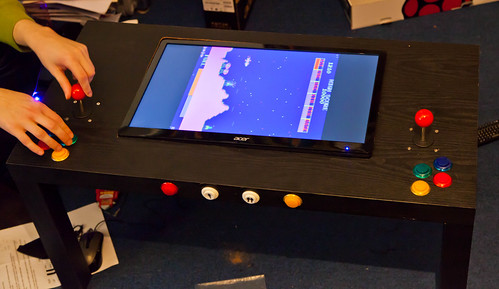
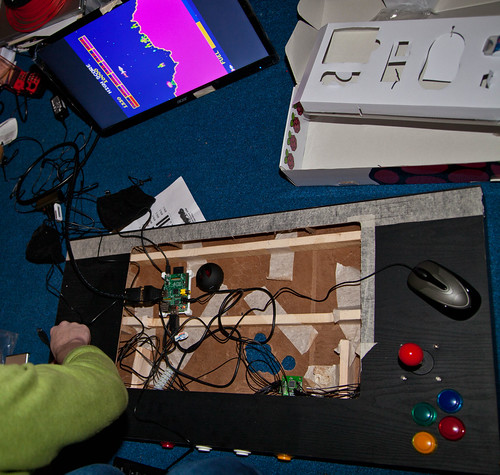
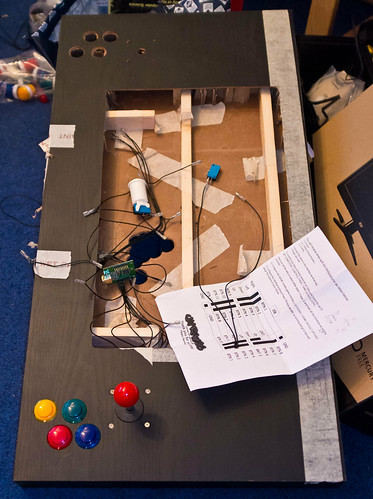
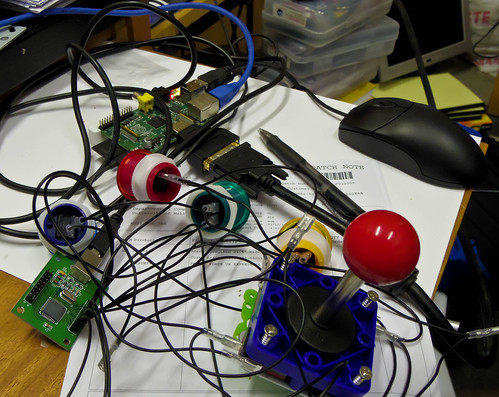
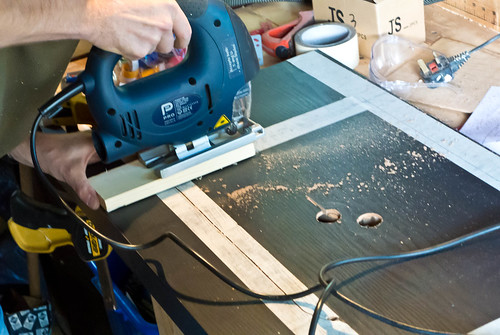
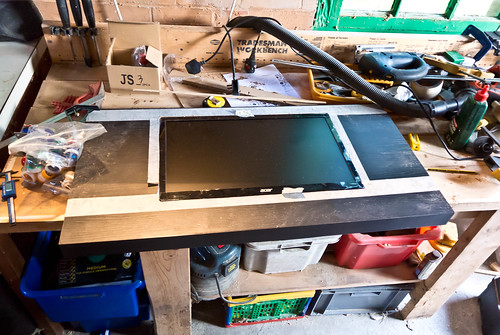
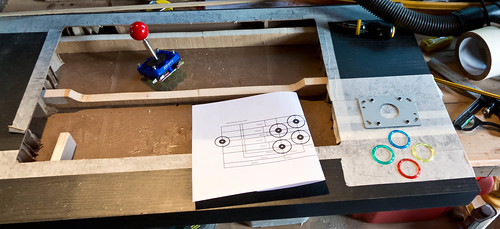
Anyhoo, my Raspberry Pi 2 is presently sitting in Cottingham Post Office waiting for me to drop round and pick it up. I actually bought 2. One to give the Video Arcade Table a shot in the arm, and the other for playing with.  We really do live in interesting times. 

Update: I've had a chance to do a very quick benchmark and compare the performance of the original and the new Rapberry Pi. You can find out more here

Raspberry Pi B+ Tabletop Upgrade

Still a work in progress...

Still a work in progress...

It's been nearly two years since I started on my Raspberry Pi powered arcade tabletop. I got it to the point where it was just about working and promptly lost interest. For a considerable while the poor thing has been languishing in my office. I even took the drastic step of removing the monitor in the hope that the sight of the empty hole might motivate me to actually finish it off. 

Anyhoo, this week I've decided to actually get the project finished. I've made an arrangement with Robert that if I've not got the table finished by the time he comes back from his travels I'll give him fifty quid. I figured that this would force the issue nicely. So far it is working....

Another reason for finishing it off is that I needed a solid reason to play with the new Raspberry Pi B+ device. This has lots of advantages for this project. It has four USB ports so I don't need a USB hub or separate power supply. I now just need two power cables to the device. One for the monitor and the other for the Pi. 

My B+ arrived today and I spent a little while getting it going. There is actually an operating system image specially for emulating games machines now, it is called PiPlay and it is rather nice. You just download the image and it has emulators for lots of devices. It hooks into Mame4All, which is the latest incarnation of Mame for the Raspberry Pi. 

However, I found that Mame4All is not quite what I want for all the games I want to play. It is based on a slightly older version of Mame which is good because it performs better, but bad because it is missing one or two crucial features. The biggest omission is the lack of the "cocktail table" button.

One of the things I want to be able to do is have a player at each end of the table so that they can get proper Player 1 vs Player 2 action. This means that I need to be able to invert the screen when each player takes their turn. Mame4All doesn't do this, but AdvMame does.  But then Mame4All works with some games that AdvMame doesn't like...

So it looks like I'm going to have to have several different Mame installations installed and then write a script that fires up the appropriate version depending on which game we want to play. Which shouldn't be too much of a stretch.

As for the Pi B+, it works very well. The only problem that I've found is that if you connect a USB device that wants a fair amount of current, for example a USB hub or speaker, it causes the Pi to reset. I think there are some settings that you can adjust to allow more current from these ports. I'll have find out more about this. 

I've also ordered some glass from Jack's Glass for the top. I just hope that Robert will be impressed when he gets back....

Raspberry Pi Arcade Table Nearly Finished

IMG_5569.jpg

This is how it looks now, not too shabby eh?

I spent a chunk of today finishing off my Raspberry Pi powered tabletop game machine. Because I swapped monitors I had to rework the monitor support but fortunately the size and shape of the hole in the surface was the same.

I did have all kinds of plans to rework the joysticks, but I’ve changed my mind (mainly because I’m lazy) and so I’ll keep it like this for a while.

IMG_5557.jpg

This is the work in progress. I covered the wooden parts with foam plastic to make a better support. I’ve found that my favourite fool suppliers (www.toolstation.com) also sell 0.5M HDMI cables which made it much easier to fit the monitor. You can just see the Raspberry Pi on the top right hand side, the USB hub and the joystick interface are under the front panel. Since I took this picture I dismantled a pair of USB powered speakers and put the drive units and amplifier under the screen as well. Here is a parts list of sorts:

The only thing left to buy now is the glass which I’ll have to get cut to cover the monitor. I also need to tidy up the wiring. One of the nice things about this design is that all the voltages actually in the table are low ones. These are the things that I’ve learned from the exercise:

  • Test the monitor angle of view before you buy it. Don’t assume that it will work.
  • Think about how the joystick and buttons are to be arranged, and how you see the device being used.
  • Cutting the surface is easy, but watch out for metal staples that connect the surface to the wooden bracing inside. You can actually do the cutting of the top and bottom panels with a craft knife if you are careful.
  • You have to cut a hole in the bottom of the table and push the joysticks up through it. Removing the shaft and trying to slide the joysticks in between the top and bottom is pretty much impossible. I took off the metal mounting bracket and screwed the joysticks directly to the surface, otherwise there was not quite enough clearance for them inside the table
  • Making physical things is quite a bit harder than writing software (at least for me) but very satisfying

IPS Monitors and the Pi Arcade Tables

IMG_5504.jpg

Yesterday I ordered up an LG IPS224V 22 inch LED Backlit IPS Monitor from Amazon. Today, thanks to another free trial of Amazon Prime that I’ve signed up for (and set a reminder to cancel before I have to pay anything), it arrived. I joked to James (who is also building a PiArcade table and has ordered an IPS monitor) that I was worried that it might be a really good picture, and I’d have the problem that my arcade table monitor was better than my computer one.

Well, I’ve got that problem. This monitor is simply stunning, and has instantly replaced my trusty HP computer monitor of several years standing. The contrast is amazing, the angle of view very impressive (see the picture above) and the extra pixels really serve to make things easier on the eye. Since I spend a lot of my time staring at a screen I figure that this is a good investment and I’d advise anyone thinking about changing their screens to take a good long look at this one.

So now I have two monitors to get rid of, and another order out there on Amazon Prime……

Pi Arcade Table Complete but Flawed

IMG_5470.jpg

This isn’t a great picture, in more ways than one.

Today we put the finishing touches to the Pi Arcade table that I’ve been building. It was just a matter of fitting the wiring for the switches, fitting the Pi and then dropping the monitor into the slot. And finding out that it doesn’t work quite as well as I would like. The problem is not with the Pi, or the software, or the controls, or even the cardboard table top. The problem is with the monitor. Although the picture is good and the device runs cool thanks to its LED backlight, it doesn’t have the angle of view that you need to have if you want to sit and use the table as it is supposed to be used. You can see it in the photograph above. The bands at the top and bottom of the screen are supposed to be black and yet, from the angle of view that we have they look grey. The fact that most of the games that I want to play are on black backgrounds doesn’t help either so, while this is not a glorious failure, it is not quite the glorious success that I was after.

But it is of course not the end. Since I bought my monitor the price of IPS monitors (which use a better pixel switching technology) has dropped quite a bit. I’m going to put my LED monitor out there for sale (any takers?) and see what difference I get with one of those.

IMG_5458.jpg

I guess you’d call this “integration testing”…

PiArcade Table Progress and Compromise

DSCF8849.jpg

Did some more work on the PiArcade table today. I’ve got the right hand joystick all fitted and working, along with the buttons. I’ve also made the holes that will allow the monitor cable to be fitted in the back and I’ve made my first major compromise. You can see it in the form of the four shiny screws that hold the joystick in place above.

I was going to implement a strict “no screws on the top” policy because I reckoned it would look a lot cleaner. But it would have meant a fair bit of extra fiddling, and might have resulted in a joystick that was not as firmly anchored as the one above. So I compromised. I can always paint the screws black, or put a bezel over the top, or just decide not to worry about it.

The only snag that I’ve hit today is that the wires to the second joystick aren’t quite long enough to reach across the table, but a few minutes with a terminal block or two should sort this out.

Pi Arcade Joystick Interfacing

IMGP0091.jpg

I’m trying to get the entire department working on my Raspberry Pi powered gaming table. After sterling work by Peter on the cabinet, today it was the turn of James to lend a hand with the button and joystick interfacing. The kit that I’ve bought comes with a USB to button interface (you can see it at the bottom left of the above picture). all we had to do was wire the right buttons and switches to the pins on the interface, connect it to the Raspberry Pi and then remap the controls in the software to use the right switches. And the amazing thing is that we did just that.

By the end of the day we had an arcade game running and the only problem left to solve is getting the sound output to work. At the moment the Pi is putting the sound down the HDMI cable. We need to change this over to the 3.5mm jack socket and then I can get some amplified speakers connected.  At this rate it should be finished well before Christmas….

Raspberry Pi Tabletop Development

Spent a most excellent afternoon round at Peter’s working on the Raspberry Pi arcade table. I’ve found a cheap coffee table from Argos that should be able to house the monitor and the electronics. Today we were making a hole for the monitor and the joystick buttons.

DSC_0062.jpg

Peter makes the first cut. Note use of a spacer piece of wood to make sure it isn't the deepest...

DSC_0064.jpg

Fitting the monitor in place. Note the little tape tags at the top and bottom. We added those after we discovered that once we'd put the monitor in place we couldn't get it out again without a lot of faffing about.

DSC_0073.jpg

This is the first plan of the joystick and button arrangement. Current idea is to be able to use it from either the side or the ends of the table.  If it doesn’t work, well, I’ve got a spare table….

DSC_0078.jpg

Buttons in place. Note strange ritualistic markings above the buttons that are either where the joystick is going, or something much more sinister….

DSC_0081.jpg

The unfinished finished product.