Successful 3D Printing

Untitled

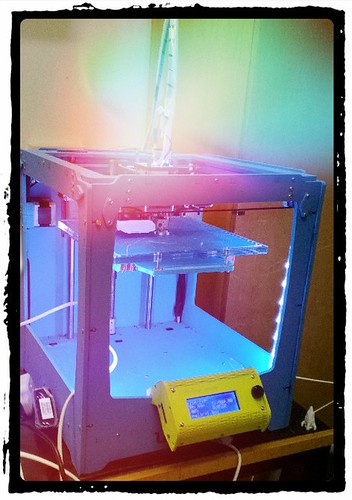
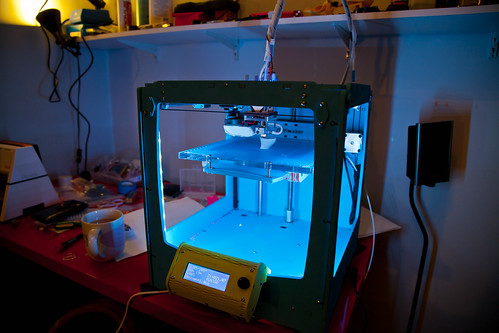
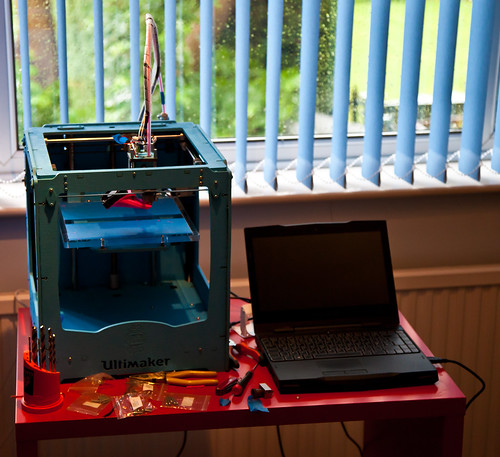
I’ve been playing with my Ultimaker 3D printer for a while now and I’ve reached the point where it is almost, but not quite, an appliance. By that I mean that I can walk up to the printer with a desire to print something and produce what I want. Most of the time. Here are Rob’s top tips for printing.

Raw Materials

Get the latest software:  The best software for Ultimaker is Cura. It was specially written for the device and it works a treat. It is updated regularly and gets even better each time. The latest version, which starts a print off by “dive bombing” the print surface, works really, really well.

Use the right plastic: I only use stuff from the Ultimaker shop or Faberdashery. These places do a range of colours and I’ve found the consistency and quality of what they produce to be very high. The Ultimaker forums are full of people who have had problems with systems when they started to use some cheap stuff they got from an auction site or wherever. Once you get dodgy bits into your print head it is very hard to clean it out. There are two kinds of plastic you can use in your printer, PLA or ABS. I must admit I’m a confirmed PLA chap. This stuff melts at a lower temperature and I’ve found it much easier to work with. It sticks to the print bed really well and doesn’t shrink as much during printing, which reduces the amount of warping that you get.

The Ultimaker people recommend that you print something using the higher temperature ABS to “seal” the print head and block any holes with high melting point plastic so that if you perform later prints with PLA there will be no seepage. I tried this and what happened to me is that I managed to completely block the print head with some high melting point plastic which meant I had to use the “fit a new one” cleaning technique. The new print head design, which you must have, is not prone to leaks in my experience, as long as you make sure that you tighten the head up when it is hot.

Setting Up

Spend a while getting the height of the print bed just right: It is only important to get the print bed alignment right if you actually want to print anything. If you get the height wrong you will either see nothing printed (because the print head is pressed hard against the print bed and no plastic is coming out) or print balls of wool (because the print head is too far away and the stream of fibre just goes out into the air). One trick that worked for me was replacing the bolts and springs that support the print bed. I put in some much longer bolts and some springs that I stole from ball point pens. These give a much longer range of travel for the print bed and make the bed less likely to move. Then I used “Rob’s Patent Bed Levelling Technique”, which goes like this:

  1. Adjust the screws to make the print bed as low as possible.
  2. Move the print head into the middle of the printing area.
  3. Manually turn the Z axis screw until the print bed is a few millimetres away from the print head.
  4. Adjust the Z limit switch so that it triggers at this point. Test this by turning the Z screw by hand to make sure that it trigers. Do this before you use the software to send the print head home.
  5. If you have got this right you should have a situation where when you send the print head home it ends up a few mm above the print surface. Now you can level the bed off using the adjustment screws.
  6. The four screw positions for the adjustment bolts form a square. It is very important that you adjust the height of the print head on the lines of this square and nowhere else. Otherwise, when you adjust the height at one screw you will affect the height at another, which will drive you nuts. The idea is that if you get the height right on these lines it will be right for the entire surface, because your print surface is flat. 
  7. Adjust the bolts so that you can slide a single piece of paper between the print head and the print surface. Do the final adjustments when the print head is hot. I always do a sanity check before every print where I send the print head home and then slide my magic paper to make sure that the clearance is still OK. This ensures that if the bed has got pushed down while I was removing the previous piece from the surface I discover this and pop the bed back into place. Once you get the height right you will never have to adjust the bolts again.

Make sure that the plastic is flowing before a print: At the start of a print you can turn the print feed drive to push fibre out of the head. Do this. Make sure that you are getting a nice stream of plastic out of the head just before you print. As soon as the head is hot you should hand feed some plastic and then set the print going. Any hiccups in the plastic feed at the start of the print process will probably stop the first layer from sticking to the print bed, which will end badly. Some people use “retraction”, where the software pulls the fibre back during printing to remove spurious bits from the print and make it tidier. I’ve never used this, the idea of sucking hot plastic into a cold part of the print head just scares me. And I’ve been perfectly happy with the results of ordinary printing.

Printing

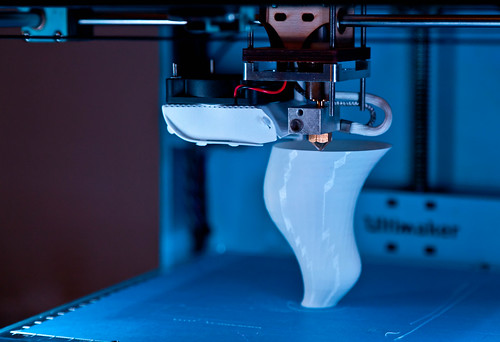
Keep an eye on the print process: My experience has been that if I leave the machine for too long, bad things happen. And anyway, it’s fun to watch.

Make sure the fibre is feeding well: I’ve had a few situations where the roll of material on the back of the printer has “gummed up”, stopping the feed of plastic into the printer. Make sure there is plenty of slack. Actually, I now don’t use the roll on the back at all. Lots of fibre is supplied loose, and so I just lay it on the floor underneath the desk where the printer is standing and then just turn the roll round as the fibre is used. I did experiment with a turntable that would feed fibre from a roll laid on top of it, but that didn’t work very well so now I manually rotate the roll every quarter of an hour or so. This means that I have a reason to keep an eye on the printer, which is nice.

Après Print

Never leave the print head hot: If the head is hot, it should be printing. When I started using the printer I thought that giving the printer a few minutes to properly warm up would make printing better. It really, really does not. What happens instead is that the heat travels up the print fibre which melts and then solidifies when you start printing, forming a plug which takes ages to fix.

Release the Fibre Feed when you leave the printer: I’ve no idea whether this solves a problem or not, but it works for me. Whenever I know I’m leaving the printer for a while (more than a day or so) I release the fibre drive at the back of the printer. My theory is that taking the tension off the drive bolt and associated parts will make them last longer. I’ve no idea if this works or not, but I’ve not had any problems feeding fibre into the machine, and I want to to stay that way.

Keep the print head clean: This is particularly important if you change the colour of your prints a lot. I have a “sacrificial rag” that I use to wipe down the print nozzle just after a print, when it is still hot. This stops a print from picking up stray bits of plastic of a different colour. Do this carefully, so you don’t burn your hands.

Enjoy your Printer

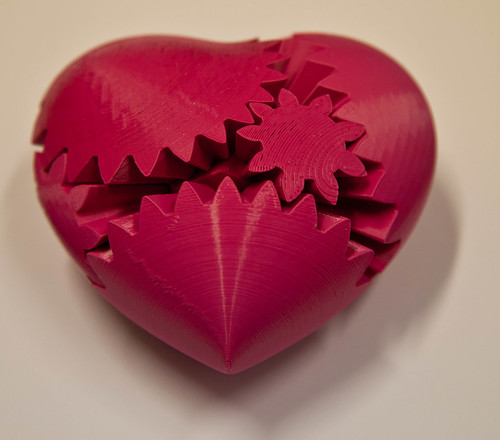
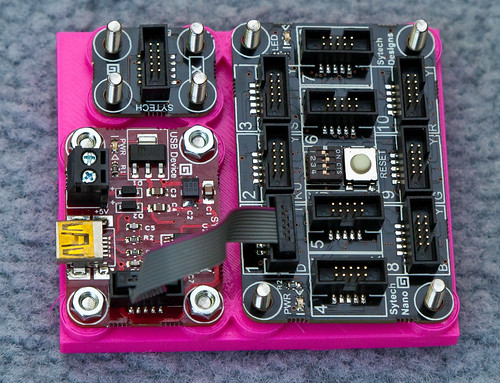
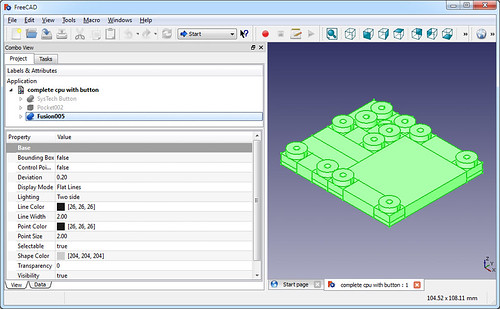
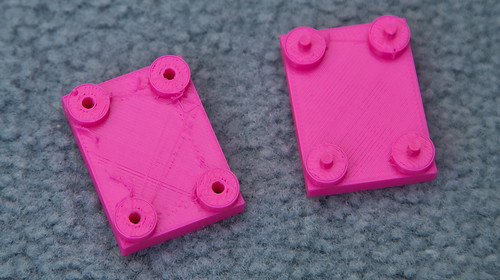
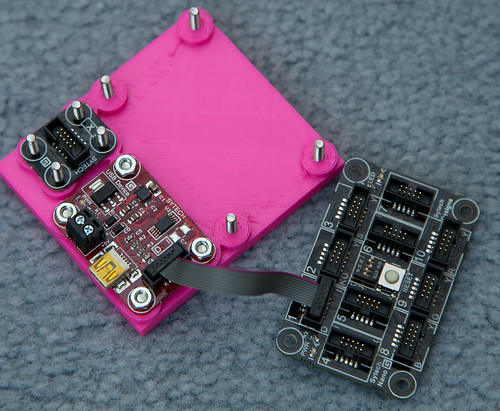
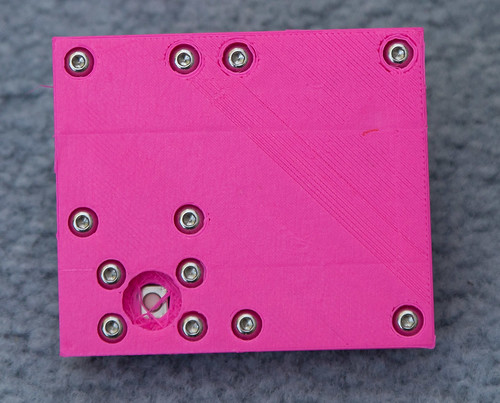
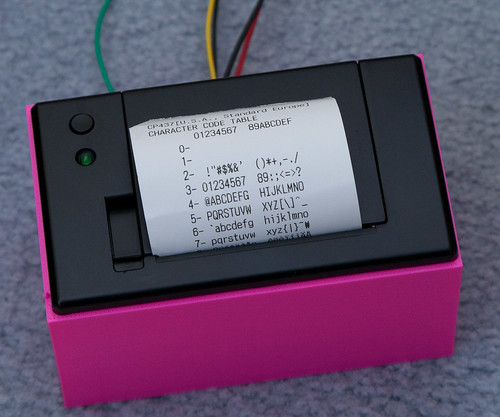
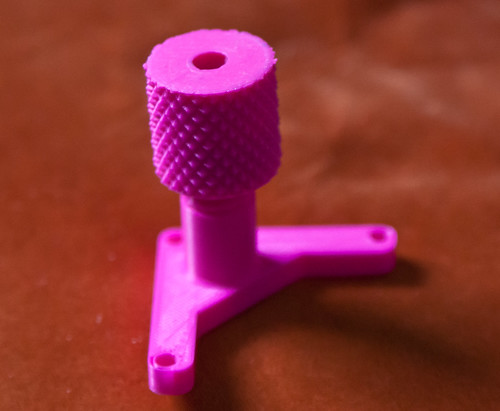
Look for things to print: I bought the printer as a way of making cases for gadgets. I’ve done that, but I’ve also had a lot of fun finding things on thingiverse and just printing them. Especially the rocket.

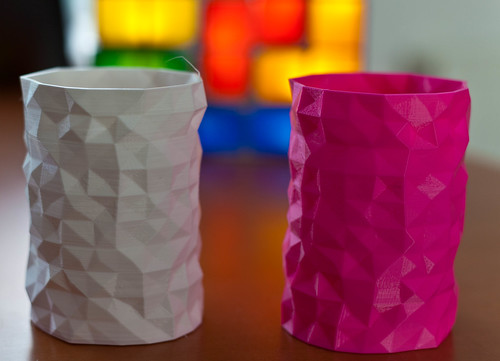
Try different colours: Faberdashery do lots of colours, and even luminous fibre. They also do a “variety pack” of different colours which is great fun.

Show it off: The printer is quite portable, I use a big blue Ikea bag to carry it around. I’ve not found that it loses calibration when it is moved, which is nice.

Luminous Rockets and the Lumia 920

Untitled

Now, this one impressed me lots. What you can see above is a picture of a rocket that I printed using “glow in the dark” fibre from Faberdashery. I took the picture using my Lumia 920 in pretty much pitch darkness. You can just see the edge of another, non-luminous, rocket on the left of the glowing one.

The picture was taken hand held and I’ve done nothing more to it than a slight crop. Amazing.

Sunday Printing

IMG_5129.jpg

I’m getting the hang of 3D printing now. I started off thinking that I would be using it to print cases for gadgets. I am doing that, but now I’m just printing out things that I find pleasing. Like the “Heart Gears” above from Thingiverse. I’ve been busy today writing quiz questions and auction stuff for Three Thing Game and in the background Una the Ultimaker has been turning out the parts above. It is a design that we saw at the exhibition yesterday and I really like it.

I’m not completely happy with the results (that will never happen) but on the whole I think it works well. The gears turn and the object turns into and out of a heart shape. I need to adjust the flow and layers slightly to get rid the gaps in the surfaces above.

3D Print Show

DSCF8932.jpg

The wristband of power. And a Lego watch

Another reason to go to London, apart from the Augmented Reality event yesterday, was to drop in on the 3D Printshow that was taking place in London this weekend. Ultimaker, the company that made my 3D printer, were there and I wanted to drop by and see how they were doing. I also wanted to see what was going on in this area. The answer is rather a lot. We arrived before the show opened, but there was already quite a queue snaking around the courtyard waiting to get in. Fortunately we weren’t waiting long and soon we were inside marvelling at the way this technology is moving forward. And boy, is it moving. I counted five 3D printers I’d never seen before, all printing away merrily in front of throngs of fascinated folks. Autodesk were there too, along with lots of other companies, some I’d heard of, some not.

DSCF8857.jpg

The folks at Sculpteo will take your designs and make them. You can even design your artefacts on their web page.

DSCF8858.jpg

They can even print in colour, and the quality is lovely.

DSCF8867.jpg

There were some lovely examples of printing

DSCF8878.jpg

This is a great piece of art. The heights of the keys show the popularity of the web sites behind them.

DSCF8881.jpg

This was a very clever piece of 3D art. The cylindrical mirror in the middle shows a perfect image of a hand, reflecting the seriously distorted sculpture.

DSCF8920.jpg

They had a band, and of course all their instruments had been printed…DSCF8894.jpg

At the Ultimaker stand they had a seriously impressive dual extruder printer which had turned out some incredible prints.DSCF8888.jpg  

One major bonus was these folks being at the show. Formlabs might just have the future of 3D printing in their hands. They’ve built a 3D printer that uses an optical technology and special syrup that solidifies under UV light. The resolution is streets ahead of anything comparable at the price. Only snag I can see is that the raw material is a bit pricey, at 130 dollars a litre, but with a bit of luck this will drop over time. Some of the things they had printed were astonishingly good and because there is no messing around with hot and sticky plastic, their printer has a good chance of making it as an appliance.

There were lots of people selling ready made printers and claiming that they have a device for the mass market. I’m not convinced of this. I’d love to be proved wrong, but for now I still see it as a tinkerer’s toy. Ultimaker sell their machines as kits and I think that this is actually quite an honest thing to do. Once you have built the machine you end up with a pretty solid understanding of how it works and how to fix it when it goes wrong. And I reckon all the current crop of printers will go wrong I’m afraid. In a few years time, when the technology has settled down, maybe we will see it in the home, From the interest that I saw at the show, this is just a matter of time.

3D Printing at the Rather Useful Seminar

IMG_5118.jpg

Una getting star billing

Some time back I rather rashly promised to bring my 3D printer in for a Rather Useful Seminar. Well, today was that day. The weather was horrible. Just the kind of torrential downpour in which you want to carry your high precision printing device. Partly made of wood.

Anyhoo, thanks to help from Adam, a blue Ikea carrier bag (just about a perfect fit) and a big bin liner I managed to get Una the Ultimaker into the lecture theatre and so I started the seminar. As usual I’d prepared a slide deck and so I stated working through the background to 3D printing, talking about the different technologies and how they worked. Then I glanced at the audience. Nobody was looking at me. They were all staring transfixed at Una, who was sitting on the bench doing nothing.

So, that was that. It was straight over to the PC, draw something in Sketchup (a really great, free program), export it to an STL file, slice it with Cura and then get Una printing.

People love watching 3D printers do their stuff. In a world where pretty much everything has been made “Ho Hum” by technology there is something rather magical about a device that makes something appear from nothing. Una behaved herself very well. Once she’d printed the silly design I’d made in Sketchup we went on to print a tiny rocket, and she handled that with aplomb. Then it was back into the bag for the trip home. I’ve just unpacked her and she seems none the worse for the trip out.

I really like this device. It is well thought out and works a treat. And everyone seemed to really enjoy seeing her in action. I’ve put my slides on the Rather Useful Seminars site, but you would probably learn more by just searching YouTube for videos of Ultimakers…

Una makes some Rockets

IMG_4950-Edit.jpg

Una the Ultimaker is now really coming into her own. Especially now I’ve put the little blue locking device in the right way round on her print head so she doesn’t push our her Bowden tube half way through every print. I’ve found this super Rocket Retro on ThingUniverse and I’m working my way through the coloured fibres that I got from Faberdashery in their multi-coloured pack. They rather cunningly sent me some Jade Green translucent fibre along with my order, which looks amazing. It is a bit wasted on a rocket but I’ve printed a thin sided vase with it which looks really nice. So now of course I’m going to have to order some more.

Una the Ultimaker Lives

IMG_4793.jpg

I’ve decided to give my 3D printer a name. I’ve come up with “Una the Ultimaker”, because it is about the only name I know that begins with ‘U’. Ursula didn’t seem right and, like most people of my generation, I’ve always had a bit of a thing for Una Stubbs. Anyone who can make Cliff Richard movies worth seeing has got to be OK in my book. You’ll find her now doing sterling work in Sherlock.

But I digress. Last Friday Una got herself into a bit of a pickle. Her Bowden Tube (the tube that delivers the plastic fibre to her extrusion head) popped off the fitting when she was printing. This caused cable to her temperature sensor to come off and she got dangerously close to over heating. The problem was caused by a plug of plastic that had formed in the printing head. This is only the second time I’ve had a problem like this but it is a well known issue with 3D printers. Fortunately the folks at Ultimaker have been working on this and have just released a new “hot end kit” that has been specifically designed to address this problem. Anita at Ultimaker posted a kit out to me in double quick time and I spent this evening fitting it.

I had to strip down the entire print head and rebuild it, which was great fun. I first built the original print head just long enough ago that I’d forgotten all the little things you can do wrong, like forgetting to fit the fan cable before you assemble the whole thing and then finding that you have to take everything to bits again…

But the good news is that having put the new print head on it does seem to work a lot better. It has been designed with flanges that should reduce leaks as well. I celebrated by printing another twisty vase and it has come out better than just about anything I’ve ever printed. With a bit of luck I can now get on and make some new cases for bits and bobs.

IMG_4782.jpg

This is Una in her natural habitat, along with a well earned cup of tea for me..

Capturing Objects with Autodesk 123D Catch

image

Autodesk 123D is slowly replacing FreeCad as my favourite place to create 3D models for printing. This is because I’m spending ages trying to get my head around how to use it. Turns out that designing things in 3D is much harder than 2D. Who’d have thought?

Of course the perfect way to make a 3D model of something would be to wave a camera at it and then have something crunch all the images and then drop out a design. That’s what Autodesk claim to have done with their 123D Catch application for iPhone and iPad. I’ve not had a chance to try this yet (the lack of an iPhone is slowing me down a bit here), but if you’ve got one you might like to give it a whirl. You should be able to convert the resulting scans into stl files and then get them printed.

This, of course, brings along lots of new and scary issues. If I go to an art gallery or shop and scan all the things I find interesting I can then go home and make my own versions. Basically, copyright problems are now moving into the third dimension…

Now available in white

IMG_3968.jpg

I found this Roundom Vase design on Thinginverse. It is a fairly good workout of the Ultimaker printer. Up until now I’ve been printing in pink, as it is the only colour plastic I had in stock. However, today when we got back from our trip away there was a parcel from Faberdashery with some different colours in it, including a reel of “Artic White”.

Changing printing colours is quite easy. You heat up the print head, pull the old coloured plastic out of the printer and then push in the new one that you want to use.  Then just extrude plastic until all the old colour has gone. push the old plastic out until the colour changes, and then print something in the new colour. Actually, the base of the white vase above has some pink streaks in it where a last blob of the old colour made its way out of the system, but for now I’m printing white, which is nice.

I’m pleased with the results, but the surface is not quite perfect, as you can see if you examine the above pictures carefully. For me the interesting thing is that the imperfections, which you would think would be down to things like random noise and vibration, are pretty much always in the same place on both vases. Very strange.

I’ve almost, but not quite, reached the point where I can fire up the machine with the expectation of getting a useable print out of it each time I use it. The most important thing is to make sure that the first layer sticks to the printing surface. To do this I use the “Rob Miles Patent Pending A4 paper trick”. This goes like this:

  • Turn the printer on and heat up the print head. This is so that you don’t get bits of solidified plastic upsetting the position.
  • Put a piece of A4 printer paper on the print surface.
  • Send the printer to its home position where the Z value (up and down) is set to zero.
  • Turn the printer off so that it doesn’t spend too much time with the print head heated up.
  • The print head should now be really close to the print surface. Adjust the surface height until the paper will just slide between the head and the print surface. Move the print head to the four corners of the print surface and adjust the height at each of those.
  • Remove the paper, turn the printer on, heat up the head again and start printing.

If you have the urge to tinker then a printer like this is a great outlet. I wouldn’t say it is totally reliable, but it is fun.

Embedded Text Printing using Autodesk 123D and Ultimaker

IMG_0351.jpg

I’ve already had one go at printing text using the Ultimaker, when I used Autodesk 123D to print out my name. Next I thought I’d try making text that “stuck into” the surface. My theory was that it might look better than stuff that stuck out. And it sort of does, see above.

The biggest problem was persuading Autodesk 123D to let me put the text into a surface. I’ve figured out a way to do it now (and the program itself is growing on me as I’ve also found out how to dimension things after I’ve created them). Anyhoo, if you ever want to embed text into a surface (and so I don’t forget for next time), here is the sequence:

  1. Make a new surface that is going to hold the text.
  2. Create a sketch on the surface that contains the text you want to embed.
  3. Extrude the surface. For some reason the text part doesn’t extrude and so you get an embedded effect.

I’ve no idea if this is a bug or not meant to happen. It actually looks really good in the designer…

image

You can just export and print as usual. As you can see at the top, it doesn’t look too bad. Each character in the picture is about 1cm high. I’m going to experiment with larger text and different fonts.

Making Boxes for Gadgets with an Ultimaker Printer

IMG_0302.jpg

Ultimaker and Gadgeteer would seem to be a match made in heaven. Gadgeteer gives you a bunch of hardware devices that you can connect together and program using .NET and Ultimaker gives you a way of making a box to put them in. I’ve spent today finding out just how easy it is to do this, and just how much fun. I spent some time last week printing my name, which was fair enough I suppose, but today I wanted to get started making some boxes for gadgets.

I started off using the AutoDesk 123D software but in the end I gave up on it. It is a great program for making ornaments and trinkets, but didn’t seem to make it easy to create engineering type drawings. I wanted everything to be just the right size and correctly positioned, and the program didn’t seem to make it easy to do this. So I switched to FreeCAD, following up on advice from Andy in a comment on the post last week. This has the feel of a proper CAD program (although I’ve never used a proper one, so I don’t have much to compare it with). Finally I figured out that the best way to make something complex was to use the Sketch view to draw something on a plane, and then extrude that into the model. That way I could cut quite complex shapes.

FreeCad.jpg

This is the view of my finished product, It has mounting blocks for a Sytech processor, power connector and button. The blocks are all individual components which I can assemble on a grid any size. The nice thing about the Gadgeteer devices is that they are all based on a grid mounting, with everything happening on 1cm boundaries. This makes it very easy for me to create some pins that I can use anywhere. The design above needs a little work, as the round mounting pillars are a bit too wide for the Gadgeteer standard, but for most of the devices I’ve found they work just fine.

Once I had made my design I had to convert it into an STL file (no problem, FreeCAD just does this) and then make the set of printer instructions. I used Cura for this. Finally I put my design on a memory card and turned the Ultimaker loose. I’m slowly getting the hang of 3D printing. Now that I’ve fixed all the leaks my problem is that sometimes the very first layer is not sticking to the printer bed. This means that the printer just extrudes plastic into the air and nothing gets made. I think I know how to do it now though, you have to adjust the print head so that when it is closest to the surface there you can just about pull a single piece of paper back and forth underneath it. And you have to make sure that this is the case across the entire printer surface.

IMG_0307.jpg

These are my early prototypes. For the first one, on the right, I tried to extrude pillars that I could just drop the board onto. I had a theory that I could just tighten a nut down onto the pillar and it would just self tap a thread into the pillar. Didn’t work. The pillars are not that strong and they snapped off. But for me the really amazing thing was that the Gadgeteer board just fitted onto these pillars. All the dimensions I had carefully put into FreeCAD were being reflected exactly in the finished article. Kudos to the Ultimaker crew, they have made a printer that prints things exactly the right size. If anything had been even slightly out of whack nothing would have fitted. As it was, once I’d cleaned off the excess plastic, I could just drop the board on.

IMG_0306.jpg

Version 2, which is where I am now, has bolt holes through the plastic pillars which I can then use to screw the boards down onto. I’ve made a three board carrier which you can see above and again, everything just lines up. Astonishing.

I’ve even managed to break one of the golden rules in 3D printing, and print overhangs that let me countersink the bolt heads in the surface underneath.

IMG_0309.jpg

This is the view from the other side of the board. The heads are all countersunk. the big hole in the bottom is meant to be there, it is a push button. The idea was to make a round button to fit into the hole. Unfortunately, being an idiot, I’ve got the large and the small holes the wrong way round, so that my button will just drop onto the floor. Still, I’m very pleased with the results from just a day of playing with the software and the printer. Last night I also made a case for my thermal printer, which turned out rather nice too.

IMG_0298.jpg

Once I get everything sorted I’ll put the designs on the interwebs somewhere for anyone who is interested. Just a great way to spend a day….

Making a Name for Myself with Ultimaker

DSCF8302.jpg

I’ve been spending more quality time with my Ultimaker 3D printer. Making designs from other people is kind of fun, but I really wanted to design and build my own components. So tonight I fired up Autodesk 213D beta and had a go. Turns out to be quite easy and fun. The Autodesk program is quite easy to drive, although it definitely has the feel of beta software, with the odd crash and lockup here and there. You also have to sign into the Autodesk site and the default is to publish your designs for everybody to see, which worried me a bit, particularly as the first design I did was the one above….

It proved quite easy to draw some text, extrude it into 3D and then connect it to a block. The 123D program can export to STL files and I used the Cura program to create the file of printer commands.

Tonight I actually got around to building up the UltiController part of the system which allows me to print objects without needing a computer. I just put the design files onto an SD card, pop the card in the controller and set it off. The printer is behaving itself at the moment, with no leaks (reaches out and touches convenient piece of wood) and did a pretty good job. My first attempt got the size a bit wrong and tried to print one that was a bit large, but I re-rendered the design in Cura with a scale factor of 0.25 and got the result above, which is around half an inch on the long axis.

The next step is to design and make some plastic components to mend the piano, at which point the printer will probably have paid for itself…..

Making Things

A gadget that makes gadgets is probably the ultimate gadget. So a few weeks ago I sold a whole bunch more cameras (I seem to do all my saving by means of the “camera bank”.) and ordered an Ultimaker. Peter reckoned that this was the best of the 3D printers and I was attracted to it by the level of detail that you could print with, and the fact that it came in a kit, which I could spend the upcoming bank holiday working on with Number One Son.

WP_000020 (1).jpg

Several weeks later a heavy box arrived which contained motors, circuits and some lovely laser cut birch plywood which would be fitted together to make the finished printer. So, armed with the very detailed instructions and beautifully packaged and labelled pieces we set to work.

It was great fun. Like Lego, but bigger and with bits that light up, bits that get hot and bits that move. And you learn lots of new terms like “Bowden Tube”, “Peek insulator” and “STL file”. And at the end of it you have a thing that makes things. The principle is very simple. At one end you push a plastic fibre which goes down a tube to the “extruder head” which contains a heater and a very fine nozzle.

IMG_0091.jpg

This is the finished product, I painted it blue. The machine “prints” in 3D by moving the head over a build surface, adding successive layers of extruded plastic to create the design you fed into it. It is fascinating to watch the head buzzing around. Number one son made a video of it printing out a Companion Cube here.

One of the great things about the printer is that it can print extra bits for itself. If you look at the picture above you can see a bright pink fan ducting on the print head which I printed and then fitted to replace the one that the printer ships with. The new duct does a better job of focusing the cool air onto the print so that it hardens more quickly. If I have an idea for a better design I’ll simply print that out and then fit it.

Tonight I decided to print out a new locking assembly for the “Bowden Tube”. This is the tube that guides the raw plastic fibre into the extruder head. I was especially interested in this because it contains a screw thread, and I wanted to see how this would turn out. The print did not go well, mainly because I left the printer heated for too long, and some fibre in the tube melted and formed a plug that stopped the flow. I had to strip down the print head, clean out the blockage and then rebuild everything. Two hours of messing around with bits and bobs. And I loved it. At the moment it is extruding very well, but I’ve got a little leak of plastic around the nozzle which I’ll have to seal up. I’m looking forward to adding some sealant and then trying again.

IMG_0095.jpg

This is the assembly I printed tonight, with a knurled nut on top of the fitting and a thread that works really well. Perhaps I should get some different coloured plastic to work with…

The main reason I got my Ultimaker was not to print parts for it (which would be kind of recursive) but to make cases for other gadgets. The Gadgeteer platform provides a lovely way of making devices, but they will still need a box. As long as the box is smaller than 8 inches in any direction (the build volume of the Ulitimaker) I can design and print it. We already managed to print out a box for number one son’s Raspberry Pie device.

This is not a technology ready for prime time. But it is a tinkerers delight. You don’t just get to play with the bits, you get to make more bits to play with too. There might be people out there who will say that in the future everyone will have an Ultimaker, and that one day the machines will make themselves. This might happen at some point, but great as it is I can’t see my little blue box printing out a Stepper Motor or a Microcontroller any time soon. To me it is very similar to the very first TVs that were made by John Logie Baird. They worked by spinning disks and flashing lights and were thoroughly impractical for proper viewing. But they got people engaged with the idea of being able to view things over long distances. The Ultimaker is just like this. It is slow (although really fast for a 3D printer), noisy and not 100% reliable, but that doesn’t matter. What it does seems as magical as watching someone 100 miles away must have seemed in 1925. When people really figure out how to do this, how to make different colours and build more quickly, then I can see that there really will be one in every household. And another piece of Star Trek technology will have arrived in our lives.

We will be launching a spin off from Three Thing Game (Three Thing Thing) later this year when we will get people building gadgets using Gadgeteer (keep your diaries clear for the 27th – 28th of October folks) and I’ll bring along the printer so that we can make some boxes for whatever gets made.

Oh, and if you want to find out more about Gadgeteer, Peter has produced some superb posts about the platform.